Transcription of garage door OEM REPLACEMENT PART
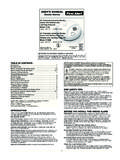
1 "Installation instructions on backU-D ASTRAGALEASY TO INSTALL9' Weather Seal for Steel DoorsCreates a tight seal between garage door and concrete floor (Works with U shaped applications up to 9' wide) garage door OEMREPLACEMENT PART9' Weather Seal for Steel DoorsTools Needed: locking PLIERS OR C-CLAMP SCISSORS OR KNIFEIf your door is connected to an automatic opener, be sure to disengage the opener before beginning no time should you remove bottom roller carrier because it is under spring tension. If complications do occur contact a qualified door dealer for service.
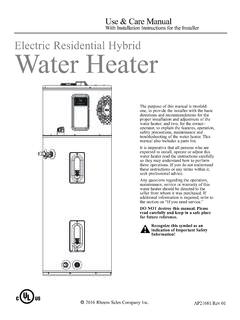
2 Never use a board or ladder to prop the door 1: Unplug garage door opener and manually disconnect opener from the door, if applicable. Open garage door to full open position. Secure door in this position by placing a vice grip or C-clamp above top roller (Figure 1). Place another vice grip or C-clamp below bottom roller (Figure 2) to keep door from 2: Slide old astragal out one end. Slide full length of new astragal in flush with one end. Crimp retainer down on astragal in this end as shown (Figure 3).
3 Go to other end, push about one inch extra into retainer and crimp retainer (Figure 3). This procedure is to hold astragal in place due to shrinking. Trim end flush with door 3: Remove clamps, close door and readjust lock if necessary. garage DOOR OPENER OWNER, PLEASE READ!STEP 4: Reconnect opener to the garage door and plug it in. SAFETY REVERSE AND TRAVEL OF THE garage DOOR OPENER MUST BE TESTED. Refer to door opener manual for proper procedures or contact a qualified door agency for 1 Fig.
4 2 CLAMPCLAMPFig. 3 TRACKCLAMPU-D ASTRAGALRETAINERCRIMPA fter sliding Astragal into place, crimp these edges at least 1/2 from ends. This will stop astragal from slipping INSTRUCTIONS019213402639 P/N