Transcription of Getting Started with Eclipse for Java
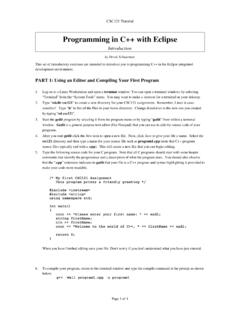
1 Getting Started with Eclipse for java Maria Litvin Phillips Academy, Andover, Massachusetts Gary Litvin Skylight Publishing 1. Introduction 2. Downloading and Installing Eclipse 3. Importing and Exporting the Preferences 4. Configuring Eclipse 5. Running Hello World 6. Bringing Existing java Files into Eclipse 7. Command-Line Arguments and User Input 8. Running GUI Applications 9. Using Jar Files 10. Creating Jar Files 11. Content Assist and the Debugger Copyright 2010-2018 by Maria Litvin, Gary Litvin, and Skylight Publishing All rights reserved. Teachers are authorized to make copies for face-to-face teaching. 2 Getting Started with Eclipse FOR java 1. Introduction Eclipse is a vast extendable set of tools for software development. Here we are interested in Eclipse s Integrated Development Environment (IDE) component for writing java programs. Eclipse is an open source project of Eclipse Foundation; you can find information about Eclipse Project at Eclipse is available free of charge under the Eclipse Public License.
2 Eclipse was developed by software professionals for software professionals; it may seem overwhelming to a novice. This document describes the very basics of Eclipse , enough to get Started with java in an educational setting. Eclipse runs on multiple platforms including Windows, Linux, and Mac OS. There may be minor differences between Eclipse versions for different platforms and operating systems, but the core features work the same way. Here we will use examples and screen shots from Windows. 2. Downloading and Installing Eclipse First make sure the java Development Kit (JDK) is already installed on your computer. See for directions. Go to The default download, as of June 2018, is 64-bit Photon; you need Eclipse IDE for java Developers. Earlier releases of Eclipse (Oxygen, Neon, Mars, etc.) are listed in a frame on the right. Choose your platform (Windows 32-bit or 64-bit, Linux, or Mac OS X) on the right and click Download.
3 Under Windows, you will download a zip file, for example, The zipped file contains the folder Eclipse . Copy it to the destination of your choice to unzip or right click on the zip file and choose Extract . We prefer to use C:\Program Files as the destination for the Eclipse folder. You might want to rename Eclipse into Eclipse ( with a capital E ) for consistency with the names of other application folders. But if you prefer, you can install the Eclipse folder in C:\. You will find in the Eclipse folder. This is the Eclipse executable. Create a shortcut to it on the desktop (by dragging to the desktop while holding down Ctrl+Shift or Alt). Double click on the shortcut or on Eclipse may ask you to choose a workspace. A workspace in Eclipse is just a folder on your computer that will hold your programming projects. It is a good idea to create a folder that is initially empty; do not use any of the Eclipse installation folders or any folders that hold original files from your textbook.
4 Eclipse comes up with a Welcome screen: Getting Started with Eclipse FOR java 3 Go over the overview and/or tutorials or click on Workbench (the arrow icon) or simply close the Welcome tab to start coding. 3. Importing and Exporting Preferences Configuring Eclipse is a daunting and time-consuming task for a novice. Eclipse has thousands of configurable options, basic and advanced, all mixed together. For example, Insert spaces for tabs and Show affordance in hover on how to make it sticky appear in the same dialog (General/Editors/Text Editors). Factory defaults are chosen for experienced software developers and are not always appropriate for educational use. Luckily, Eclipse provides a way to export the preferences from the current workspace into a file (an .epf file) and import the preferences from a file into a workspace. Our preferences are available in the file. You can download , which contains , from Our Eclipse preferences are described in Section 4.
5 You might want to just import these preferences into your workspace and leave Section 4, Configuring Eclipse , until later, when you are ready to experiment with your own settings. 4 Getting Started with Eclipse FOR java To import into your workspace, follow these steps: 1. Download and extract from it into a folder of your choice. 2. Choose the command on the File menu. 3. Expand General , select Preferences and click Next: 4. Browse to , select it, and click Finish. If you want to configure your own preferences and save them, perhaps for backup or for using them in another workspace, export them into a file. Follow these steps: 1. Choose the command on the File menu. 2. Expand General , select Preferences , and click Next. 3. Type the pathname of the file (or browse to the folder where you want to store the .epf file and add the file name). No need to include the .epf extension it will be added automatically.
6 Click Finish. Preferences created with an earlier release of Eclipse might not work properly with a newer version. Getting Started with Eclipse FOR java 5 Eclipse configuration settings apply only to the current workspace and revert to defaults when you switch to a new workspace. You need to configure or import preferences into every workspace that you create. * It is possible to always use the same workspace, but as the number of projects in it grows, it may become hard to manage. You might prefer to use a separate workspace for each chapter in the textbook. The preferences settings includes an entry for Installed JREs , that is, the java Run-Time Environments installed on your computer. Eclipse might not work properly if the JRE selected in the preferences does not match the JRE installed on your computer. To examine and change the Installed JREs setting, choose Preferences on the Window menu, and go to java Installed JREs: Remove the JRE listed there if it doesn t match the JRE on your computer, and add the one you have.
7 Check the box for the desired JRE. If in doubt, click on Execution Environments (on the left panel, under Installed JREs ) to see how your selected JRE matches the version of java installed on your computer. * offers a way to install preferences for all workspaces at once using Oomph installation editor. 6 Getting Started with Eclipse FOR java While at this screen, you might want to attach java docs to the selected JRE. Click on your JRE, click Edit, click on it again, and click Javadoc Location. If you had installed the docs locally, browse to the doc/api folder on your computer (for example, file:/C:/Program Files/ ); otherwise enter the URL for the java documentation page online (for example, ). Now, when you position the cursor over a library class name in the editor and press Shift+F2 for contest-sensitive help, Eclipse will open a window with the javadoc description of the library class.
8 You may want to change some of the Eclipse settings frequently. For example, to change the editor font size, go to Window/Preferences, navigate to General Appearance Colors and Fonts, expand the java line, choose java Editor Text Font , click Edit, and choose the font size. To set the console font, go to General Appearance Colors and Fonts Debug line. 4. Configuring Eclipse In this section we give a few suggestions for setting preferences and show where different types of options are located. The options we recommend below simply well, our preferences. In Eclipse , the Preferences command is located under the Window menu. Click on it. Under General Editors Text Editors check Insert spaces for tabs and Show line numbers if you want them, and uncheck Highlight current line and Enable drag and drop : Getting Started with Eclipse FOR java 7 Under General Startup and Shutdown uncheck Confirm exit when closing last window and all of the Plug-ins activated on startup.
9 Also increase the number of recent workspaces under General Startup and Shutdown Workspaces. Under General Workspace check Save automatically before build and Show workspace path in window title . 8 Getting Started with Eclipse FOR java The next step is setting java -specific options: Under java Code Style uncheck the Add @Override box. Under java Code Style Formatter click New and enter a name of your choice for a new profile: Getting Started with Eclipse FOR java 9 Click OK. Under the Indentation tab choose the Spaces only tabs policy and set both the indentation size and the tab size to 2. Under the Braces tab change all brace positions except the last one, Array initializer, to Next line. Under the White Space tab Arrays Array initializers uncheck after opening brace and before closing brace boxes. Under the Control Statements tab check all Insert new line boxes. Define another profile under java Code Style Clean Up.
10 Under the Code Organizing tab check Remove trailing whitespace ; under the Missing Code tab uncheck Add missing annotations. Under the Unnecessary Code tab uncheck Remove unused imports. Under java Editor Content Assist uncheck all the boxes in the Insertion section and uncheck Enable auto activation : Under java Editor Folding uncheck all the Initially fold boxes or disable folding altogether by unchecking the Enable folding box. Under java Editor Mark Occurrences uncheck the Mark occurrences box. If you do not like italics in your code editor, go to java Editor Syntax Coloring, choose the java Static fields element, and uncheck the Italic box. The same for java Static final fields. 10 Getting Started with Eclipse FOR java Under java Compiler Errors/Warnings expand Potential programming problems and change Serializable class without serialVersionUID from Warning to Ignore. When you are finished setting the preferences, click OK.