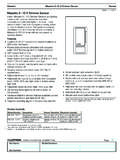
Transcription of GRX-CI-PRG Programming Control Interface
1 S P E C I F I C AT I O N S U B M I T TA LPageJob Name:Job Number:Model Numbers:GRX-CI-PRGC ontrol Interfaces369363 Rev. B 1 Programming Control InterfaceDescription Integrates a GRAFIK Eye lighting Control system with a PC or other digital equipment that supports RS232 and TCP/IP communication. Provides a basic serial string command set that allows a PC to monitor and Control lighting. Built-in astronomic timeclock provides ability to schedule lighting events. Example: Lobby lights turn on to scene 1 at 7:30 or 10 minutes after sunrise. Enables use of a PC to set up GRX-3500 and GRX-4500 Control units. Comes with easy-to-use, point-and-click Windows -compatible LIAISONTM software for scheduling the astronomic timeclock and using the programmer Interface .
2 Functionality is selected using DIP switches. Operates with or without a PC connected. May be programmed to Control any combination of one to eight GRAFIK Eye 3000 or 4000 series Control units. GRX-3100, GRX-4100, and GXI-3100 Control units may utilize the astronomic timeclock function of the GRX-CI-PRG . GRX-3500, GRX-4500, and GXI-3500 Control units may utilize all functions of the GRX-CI-PRG . S P E C I F I C AT I O N S U B M I T TA LPageJob Name:Job Number:Model Numbers:GRX-CI-PRGC ontrol Interfaces369363 Rev. B 2 California Energy Commission (CEC) ListedPower IEC PELV/NEC Class 2 Operating Voltage: 12 V 125 mA24 V 65 mAEnvironment 32 to 104 F (0 to 40 C).
3 Relative humidity less than 90% non-condensing. Basic Command Set Monitoring: Scene selection and scene status updates. Control : Scene selection, scene lockout, sequencing, zone lockout, zone raise/lower. Astronomic Timeclock Allows lighting changes to occur automatically based on time of day and/or day of week/month, as well as relative to sunrise and sunset. Supports four schedules with 60 lighting events per schedule and one Super Sequence. Allows user to start, pause, and stop schedules from a PC or a Wallstation. Provides commands to set and monitor the timeclock s time, date, and day of week, and report sunrise and sunset. If a loss of power occurs, the programmed schedules and the time of day will be retained for a minimum of 10 InterfacePermits complete set up of the following on GRX-3500, GRX-4500, or GXI-3500 Control units via an IBM -compatible PC: Scenes, including light levels in 1% increments and fade times.
4 Load type settings. Tamper-proof protection of scenes. Assignment of communication between Control units and wallstations. Dimmer panel zone and load assignmentAllows a Windows -compatible PC to query GRX-3500, GRX-4500, and GXI-3500 Control units for their setup, including type of Control unit and number of Software Control over TCP/IP requires LIAISONTM version or later. Allows use of a PC to create timeclock schedules for all GRX-3000, GRX-4000, and GXI-3000 series Control units. Allows use of a PC to create setups for GRX-3500, GRX-4500, and GXI-3500 Control units. Provides downloading of schedules and setups to GRX-CI-PRG Interface and Control units.
5 Works on any PC operating with Windows 95 Windows NT , XP, or later (excluding Windows Vista and Windows 7). Supplied by Lutron. Updates are available online at Communications and Capacity IEC PELV/NEC Class 2 wiring connects GRX-CI-PRG Interface to Control units and other components. One GRX-CI-PRG Interface per GRAFIK Eye 3000 or 4000 or GXI-3000 system. Automatically occupies wallstation address 16. 50 ft (15 m) maximum from GRX-CI-PRG Interface to PC or other RS232 source. 328 ft (100 m) maximum from GRX-CI-PRG Interface to PC or other Ethernet source. S P E C I F I C AT I O N S U B M I T TA LPageJob Name:Job Number:Model Numbers:GRX-CI-PRGC ontrol Interfaces369363 Rev.
6 B 3 SwitchFunction When set to ON When set to OFF1 Zone Lock RetainIf power goes out, locked zones stay locked when power cycling unlocks locked Lock RetainIf power goes out, locked scenes stay locked when power cycling unlocks locked RetainIf power goes out, sequencing resumes when power cycling stops Scene RangeSequencing loops through scenes 5 to loops through scenes 1 to UsedDo not set to preset; do not FeedbackInterface reports Control unit and wallstation button reporting on button StatusInterface reports scene reporting on scene Timeclock SchedulesEnables internal internal 2 3 4 5 6 7 8 S P E C I F I C AT I O N S U B M I T TA LPageJob Name:Job Number:Model Numbers:GRX-CI-PRGC ontrol Interfaces369363 Rev.
7 B 4 in ( mm) in ( mm) in ( mm) in ( mm) in ( mm)Mounting holesMounting1. Mount the Control Interface directly on a wall, as shown in the Mounting Diagram, using screws (not included). When mounting, provide sufficient space for connecting cables. The unit can also be placed in the LUT-19AV-1U AV rack using the screws provided with the unit. The LUT-19AV-1U will hold up to four units. If conduit is desired for wiring, the LUT-5x10-ENC can be used to mount one Strip 4 in (10 mm) of insulation from wires. Each data link terminal will accept up to two 18 AWG ( mm2) Connect wiring as shown in the Wiring Diagram (next page). LED 1 lights continuously (Power) and LED 7 blinks rapidly (Data Link RX) when the IEC PELV/NEC Class 2 Data Link is installed Strip Length4 in (10 mm) InterfaceWallMounting ( ) ( ) ( ) ( ) dia.
8 #6 or #8 (M3 or M4) screw recommended (not included)Mounting Hole DetailDimensions: in (mm) S P E C I F I C AT I O N S U B M I T TA LPageJob Name:Job Number:Model Numbers:GRX-CI-PRGC ontrol Interfaces369363 Rev. B 5 Link Wiring1 2 3 4 5 6 71 2 3 4 5 6 7 8RJ45 jack: Ethernet link (to PC or A/V equipment)Ethernet link/ activityEthernet speedData Link (to Control units, processors, and wallstations) DIP switchesCAT5 Cable: maximum 328 ft (100 m)To PC or AV equipment. For Ethernet link, use a CAT5 cable to connect to auxiliary equipment. The Ethernet link LED will light continuously when link is present and will flash when there is link activity. Additional Ethernet network equipment and cables provided by or 24 V to outlet (with optional transformer).
9 Do not wire terminal 2 on Data Link when using optional transformer. To power separately from the Data Link, order the following Lutron transformer model numbers: 120 V: T120-15DC-9-BL 240 V: TE240-15DC-9-BL 240 V (UK): TU240-15DC-9-BLRS232 Cable: maximum 50 ft (15 m)COMTxDRxDTo PC or AV equipment: Use a standard DB9 male to DB9 female cable, or follow the chart Pin Connect Wiring Typical PC or Pin onRS232 Interface A/V equipment 9-pin cableCommon Com 5 Transmit TxD 3 Receive RxD 2 LED 1: PowerLED 2: Ethernet linkLED 3: UnusedLED 4: RS232 link TXLED 5: RS232 link RXLED 6: Data link TXLED 7: Data link RX S P E C I F I C AT I O N S U B M I T TA LPageJob Name:Job Number:Model Numbers:GRX-CI-PRGC ontrol Interfaces369363 Rev.
10 B 6 PELV/NEC Class 2 Terminal Connections Install in accordance with all applicable regulations. Do not connect line voltage/mains power to device. This Control can use IEC PELV/NEC Class 2 wiring methods. Check with your local electrical inspector for compliance with national and local codes and wiring practices. Make daisy-chain connections to the IEC PELV/NEC Class 2 data link terminals on the end of the Control Interface . Do not use T-taps. Run all wires in and out of the terminal block. Each terminal accepts up to two 18 AWG ( mm2) 6 ZONE 4 HOT/LIVESSACU WIRE ONLYZONE 2 ZONE 3 ZONE 5 NEUTRALZONE 1 CLASS 21 2 3 4 USAC lass 2 IECPELV 4 3 2 1To additional wallstations/ Control interfaces (16 maximum; 3 powered from one GRAFIK Eye Control unit without external 12 V power supply.)