Transcription of Hella auxiliary headlights: Vehicle installation
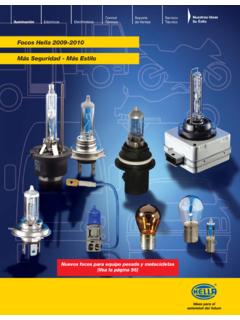
1 Ideas today forthe cars of tomorrowHella auxiliary headlights : Vehicle installation Lighting Electrics Electronics ThermalManagement SalesSupport Our Ideas,Your Success. TechnicalService222 installation of auxiliary headlightsAuxiliary headlights for driving and fog applications are a meaningful supplement to the existing lighting equipment. The styled frontal areas and bumpers of modern SUVs and off-road vehicles make the attachment of auxiliary headlights a real challenge. In some cases, professional installation without additional brackets is almost impossible, which often puts potential customers off.
2 A few important points must be heeded during the electrical connection of headlight systems too, to guarantee their perfect function for years to come. This brochure provides a host of information, via step-by-step texts and photos, about installing auxiliary headlights with the aid of Vehicle -specific and universal attachment systems. Valuable practical tips and advice will help you with the installation of auxiliary headlights . KIA SorentoPage 6 13 Land Rover Defender Page 14 23 Nissan QashqaiPage 24 31VW TiguanPage 32 41 The illustrations and step-by-step details are a demonstration of mounting possibilities.
3 Please observe national legislation when mounting and using the brackets and today s vehicles, the visible frontal area is usually made of lightweight plastic composite parts. Their main tasks range from optical design through pedestrian protection to aerodynamics. The installation of auxiliary headlights is certainly not one of them. The days when wide, chrome-plated bumpers decorated Vehicle front-ends are long gone. And with them the straightforward possibility of installing auxiliary headlights . This is a problem that concerns interested off-road drivers in particular. For this reason, garages often face the challenge of how best to attach the auxiliary headlights to the Vehicle .
4 The answer is: using professional light brackets. These are available in different shapes, surface finishes and made of various materials. They are available both as universal and Vehicle -specific types. Customers interested in purchasing such light brackets should always make sure they have been approved by the legislator, however, since requirements have been significantly tightened, particularly in terms of pedestrian bracket setsHow can the headlights be attached to the Vehicle ?For the attachment examples shown in this brochure we used the Q-light light bracket series made by the Swedish company QPAX.
5 The brackets are made of aluminium and have an anodised finish. In addition, this bracket series complies with European guidelines and is supplied in two different versions:Universal light bracketThis attachment set is made up of one light bracket, two spacer sleeves and various mounting parts such as screws, washers A general installation manual is also supplied as part of the set. Vehicle -specific light bracketsThese bracket sets have been adapted in form and attachment position to suit specific vehicles. This includes the spacer sleeves and the other mounting parts, plus the installation manual.
6 This is particularly advantageous when determining the attachment position and position of the drill holes. All the necessary dimensions and drill hole diameters are available. Various working steps are also explained. However, the installation instructions do not claim to be complete!4 Practical tipCareful preparation is required before commencing the installation of additional headlights or lights. The following details must be checked first:Can the headlight be attached without additional installation material (light bracket etc.)?! If not, what else do I need?! What is behind the front apron?
7 ! Are there any solid metal parts the headlights could be mounted to?! Are there any hoses, pipes, radiators or other components installed that could make installation more difficult or even impossible?! What is attachment and installation situation for Xenon headlights like? Is there a suitable space available for the ballast units?! What is required for electrical connection (relays etc.) of the headlights ?! Do any special points have to be remembered when connecting up to the Vehicle electronics?If a garage has had no experience with any particular Vehicle , it makes good sense to have a closer look at the Vehicle and remove the front apron if necessary.
8 This allows possible problems to be anticipated in advance. It also allows the work required to be estimated much more accurately, so that realistic quotes can be made to customers. Because if experience has shown us one thing it s that a day can pass in no time! General noteWith some vehicles, installing the ballasts near the headlight may present a problem excessive exposure to water/splashing. With 4th generation ballasts (see photo), the supply cable from the ballast to the headlight is a metre long and thus covers the majority of attachment situations. If this should not be sufficient, however, there is also a three metre supply cable available, this can be ordered under the part number 8KB 990 299-251.
9 This should be long enough to install the ballast units in the interior or in a splashwater-proof area if required. 5In the case of light bracket mounting, it must be assumed that further material in the form of cable ties, washers etc. is required. Below is a short list of some of the materials that were used during installation :Ring groove nutDue to the shapes of some Vehicle profiles it is not possible to set up a screw-type connection, since the nut cannot be screwed onto the screw thread in the profile. The screw thread is quite simply out of reach. Ring rivet nuts are a very good alternative solution in such cases (see photo).
10 First, a hole of the required size is drilled in the profile. Then the ring groove nut is inserted and pressed in place. These nuts are available in different sizes and in a set with the appropriate installation tool. They are easy to use and quickly installed. Additional installation materialThreaded rodsIf a screw connection has to be set up over a longer distance, these threaded rods can be used. They simply have to be cut to the correct length, are already being supplied as a set and are easy to sealDue to the shape of some cross members behind the front aprons, the spacer sleeves face outwards after tightening, rather than being parallel to the Vehicle axis.