Transcription of HOW TO CRAFT YOUR OWN PEACE POLE
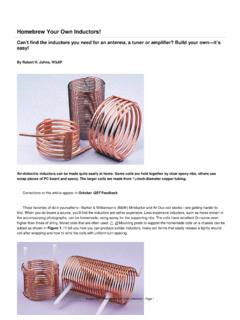
1 HOW TO CRAFT your OWN PEACE POLEM aterials Needed: Cedar 4 x 4 pole Language Plates from ShopPeace Quart of Spar Urethane Foam brush for each coat 1 piece 80 grit sand paper 1 piece 220 grit sand paper Sanding block Tack cloth Use of a compound miter saw Mask - NIOSH approved respiratory protectionCHOOSING your POLEEven before you receive the plates you ordered from us on ShopPeace, you can get started on the pole itself. Call your yard to make sure they have what you want before you go recommend using cedar, as it has great rot resistant properties and is readily available at better lumberyards.
2 Pick through the pile of cedar to find the lightest, straightest and nicest looking pole . CREATING your POLEOnce home, cut a point on the top at 45% angles so it looks like a little pyramid using a compound miter saw and wear eye with the 80 grit and sand the entire 4 x4 until the whole piece is clean and smooth. (Note: a 4 x4 is actually ) Finish the sanding by doing the same with the 220 grit paper. Once sanded, use the tack cloth to remove all dust. Start applying the urethane from the top down and watch for drips. Follow all safety instructions on the urethane can and protect yourself from dust during the sanding process by wearing NIOSH approved respiratory protection mask.
3 Once your first coat is completely dry, give the pole a light sand with a clean piece of 220 grit, remove the dust and apply the second coat. Follow the same process for the 3rd and (if you want, as we do here at The World PEACE Sanctuary) the 4th coat. While you are at the lumberyard you might want to pick up any of the items needed for the PEACE pole planting that are on the instruction for planting you received with your plates. Note on the use of Urethane:There are alternatives to urethane available and if you want to look in that direction, speak with the millwork specialist at your lumber-yard, but remember that you are basically putting a nice piece of furniture outdoors.
4 Recycling your Foam Brush:You can also try to use a single brush by putting it in a sealable sandwich bag, get out as much air as possible and put it in the refrigerator in between coats. Maintenance of your PEACE pole :We highly recommend that you lightly sand and add a new coat of polyurethane to your PEACE pole every few years. Support:If you have any questions while crafting your pole , feel free to call us at The World PEACE Sanctuary during business hours. Thank you for supporting The PEACE pole Project and remember to send us a photo of your PEACE pole Dedication!
5 The PEACE pole Projectat The World PEACE Sanctuary26 Benton RoadWassaic, NY