Transcription of Humidity Temperature Datalogger Model RHT10
1 USER GUIDE Humidity / Temperature Datalogger Model RHT10 RHT10 6/16 2 Introduction Congratulations on your purchase of the Relative Humidity and Temperature Datalogger . This Datalogger measures and stores up to 16,000 relative Humidity and 16,000 Temperature readings over 0 to 100%RH and 40 to +70 C ( 40 to +158 F) measurement ranges. The user can easily configure the logging rate, high/low alarm and start mode, and download the stored data by plugging the module into a PC's USB port and running the supplied PC software. Relative Humidity , Temperature and Dew Point data can then be graphed, printed and exported to other applications.
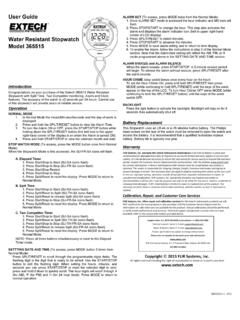
2 GPP (grains per pound) data can be viewed using the optional RHT10 SW software. The data logger is supplied with a long life lithium battery, which can typically allow logging for one year. This meter is shipped fully tested and calibrated and, with proper use, will provide years of reliable service. Please visit our website ( ) to check for the latest version of this User Guide, Product Updates, and Customer Support. Features Memory for 32,000 readings (16,000 Temperature and 16,000 Humidity readings) Dew point indication via supplied WindowsTM Software Grains per pound indication via optional WindowsTM Software (order RHT10 SW) Selectable data sampling rate: 2s, 5s, 10s, 30s, 1m, 5m, 10m, 30m, 1hr, 2hr, 3hr, 6hr, 12hr, 24hr Status Indication via Red/Yellow LED and Green LED USB Interface for Set up and Data Download User Programmable Alarm Thresholds for Relative Humidity and Temperature Long battery life RHT10 6/16 3 Description 1.
3 Protective cover 2. USB connector to PC port 3. Start button 4. RH and Temperature sensors 5. Alarm LED (red/yellow) 6. Record LED (green) 7. Mounting clip RHT10 6/16 4 Operation System Software Required: Windows 7, Windows or Windows 10 Minimum Hardware Required: PC or Notebook with Pentium 90 MHz or higher 32 MB RAM; At least 7 MB of hard disk space available to install Datalogger USB software. Recommended display resolution 1024X768 with High Color(16 bit). INSTALLING THE GRAPHING SOFTWARE and USB driver Install the supplied Windows PC Datalogger Software by placing the supplied program disk in the PC s CD ROM drive or by downloading the program from the web page.
4 If the installation program does not automatically open and provide on screen prompts, open and browse the CD ROM drive, then find and double click on the file included on the program disk. Follow the on screen prompts to complete the installation. Software Install Run and follow the defaults to install he RTH10 software USB Driver Install 1. Open the root folder of the RHT10 . 2. Open the folder Driver\DriverUSBXPRESS and double click on 3. Follow the default choices to load this USBX press driver. Note: When the RHT10 is connected to the USB port, the battery inside the device is discharged at a higher rate than normal. To conserve battery life, do not leave the RHT10 connected to the USB port for a prolonged period of time RHT10 6/16 5 RUNNING THE GRAPHING SOFTWARE With the RHT10 inserted in the PC s USB port, double click the Datalogger Graph icon on your desktop to launch the program.
5 The opening screen will appear as shown below. Click on Connect to open the main screen, Click on About to view the version number, Click on View File to open an existing file, Click on Quit to close the program. RHT10 6/16 6 MENU BAR DESCRIPTION The main menu for the software appears as follows: From left to right the MENU BAR icons represent DATA DOWNLOAD, LOGGER SETUP, FILE OPEN, FILE SAVE AS, FILE PRINT, VIEW ALL, and ZOOM. In addition, the FILE, VIEW, LINK, and HELP pull down menus are available here. All of these functions are described in the following paragraphs. LOGGER SETUP Click on the computer icon on the menu bar (2nd from left) or select LOGGER SET from the LINK pull down menu.
6 The Setup window will appear as shown below; descriptions for each field in the Setup window are listed directly below the illustration: The CURRENT TIME field will automatically synchronize with the PC date and time setting. The MANUAL and INSTANT select buttons allow the user to start data logging immediately when the Setup window is exited (INSTANT), or at a later time (MANUAL). The LOGGER NAME field allows the user to select a unique name for the RHT10 . The SAMPLE POINTS field instructs the RHT10 to take a fixed number of readings. The SAMPLE RATE pull down menu instructs the RHT10 to log readings at a specific rate. RHT10 6/16 7 The LED Flash Cycle can be set by the user: longer cycle times help to extend the battery life.
7 The ALARM SETTINGS area of the SETUP window allows the user to set high and low Temperature and Humidity limits and to disable the flashing of the RHT10 s LEDs, thereby conserving battery energy. Once the changes have been made, click on the SETUP button to save them. Press the DEFAULT button to set the RHT10 back to factory default conditions. Press the CANCEL button to abort the setup. Note: Any stored data will be permanently erased when the user clicks on Setup. To save the data before creating a new setup, click Cancel and then download the data. Note: The battery may run out before the RHT10 has finished collecting a specified number of sample points.
8 Always ensure that the remaining charge in the battery is sufficient to last the complete duration of your logging exercise. When in doubt, we recommend that you always install a fresh battery before logging critical data. If INSTANT was selected in the SETUP window, the RHT10 begins logging at the instant the SETUP button is pressed. If MANUAL was selected, the RHT10 must be manually started by pressing and holding the device s yellow button for approx. 3 seconds, or until the two LEDs on the RHT10 flash at the same time. Logging will continue at the programmed sample rate until the number of readings (sample points) specified in the Setup window is reached.
9 The green LED flashes once per sample point and the red or yellow LED flashes when user programmed alarm limits are exceeded. For details, see LED status guide. RHT10 6/16 8 DATA DOWNLOAD To transfer the readings stored in the RHT10 to the PC: 1. Connect the RHT10 to the same USB port used when the RHT10 was initialized. 2. Open the graphing software program if it is not still running. 3. Click the Download icon (1st on the left) or select Data Download from the LINK pull down menu 4. The Window shown below will appear. Press DOWNLOAD to begin transferring readings If the readings are successfully transferred, the VIEW screen and the SAVE screen (both shown below) will appear.
10 In the SAVE screen, name the file and save it to a convenient location. The data is saved as an .rec file for use in this program only. At a later time, the user can select SAVE AS and save the data as an Excel, Text, or Bitmap file (explained in next section). In the screen below press VIEW to see the data graphically. If there are no readings currently stored in the RHT10 , the program will let the user know via a warning screen. RHT10 6/16 9 When VIEW is pressed, the Data Graph window appears, The Data Graph window presents the transferred data in an x y graph format with Date/Time represented on the horizontal axis and Temperature / Relative Humidity / Dew Point / Grains per pound GPP (with optional RHT10 SW only) / Alarm Limits represented on the vertical axis: To zoom in and out of data regions, there are several approaches: 1.