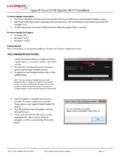
Transcription of HyperX Cloud Orbit and Orbit S - Kingston Technology
1 Firmware Guide HyperX Cloud Orbit and Orbit S Find the language and latest documentation for your HyperX Cloud Orbit and Orbit S here. HyperX Cloud Orbit and Orbit S Installation GuideSimplified Chinese .. For instructions in English .. Para instrucciones en Espa ol .. F r Anleitungen in Deutsch .. Pour des instructions en Fran ais .. Per le istruzioni in Italiano .. Por as instru es em Portugu s .. Instrukcje w jezyku Polskim .. Для инструкции на Pусском .. Turkce talimatlar icin .. xem h ng d n b ng ti ng Vi tTraditional Chinese ..Document No. HyperX Cloud Orbit software Page 1 of 4 Firmware This page provides the firmware versions on Orbit / Orbit S and the ability to update the headset firmware. Before Updating the Headset Firmware The GigaDevice GDDFU USB driver must be installed before updating the headset firmware.
2 This can be verified by checking for the driver under the Apps & features settings page. Document No. HyperX Cloud Orbit software Page 2 of 4 If the driver is not installed, please reinstall the Orbit software . During reinstallation, if a prompt asks if the GigaDevice Universal Serial Bus controller driver can be installed, click on the Install button. Updating the Headset Firmware 1. Start the Orbit app in Admin mode. 2. Move the headset mic mute switch to the down position (mute on) 3. Lay the headset flat with the earcups facing down. 4. Click on the Update FW button. 5. A prompt will pop up to reconfirm if the first three steps were performed. Click OK . Document No. HyperX Cloud Orbit software Page 3 of 4 6. Select the correct .mfw file for your headset model ( Orbit , Orbit S).
3 A. Refer to the Orbit / Orbit S support page in to download the latest firmware. 7. Wait for the headset to finish updating. 8. Once the headset is finished updating, a prompt will pop up. 9. Unplug the USB cable from the headset. 10. Wait 3 seconds, then power on the headset again. The headset update is now complete. Document No. HyperX Cloud Orbit software Page 4 of 4 Recovering from Failed Update If the update fails or if Orbit is no longer recognized by the PC, click the Recover button to restore your headset back to normal functionality. Questions or Setup Issues? Contact the HyperX support team at: Documento n. software HyperX Cloud Orbit P gina 1 de 4 Firmware Esta p gina proporciona las versiones de firmware de Orbit / Orbit S y la posibilidad de actualizar el firmware de los auriculares.
4 Antes de la actualizaci n del firmware de los auriculares El controlador USB GigaDevice GDDFU debe estar instalado antes de actualizar el firmware del auricular. Esto se puede verificar comprobando el controlador en la p gina de configuraci n Aplicaciones y funciones . Documento n. software HyperX Cloud Orbit P gina 2 de 4 Si el controlador no est instalado, reinstala el software Orbit . Durante la reinstalaci n, si un mensaje pregunta si se puede instalar el controlador denominado Controlador de bus serie universal GigaDevice , haz clic en el bot n Instalar . Actualizaci n del firmware de los auriculares 1. Inicia la aplicaci n Orbit en modo Admin. 2. Mueve el interruptor de silencio para el micr fono de los auriculares a la posici n abajo (silenciado) 3.
5 Deja los auriculares planos con los cascos hacia abajo. 4. Haz clic en el bot n Actualizar FW . 5. Se mostrar una ventana emergente para volver a confirmar si se han llevado a cabo los tres primeros pasos. Haz clic en Aceptar . Documento n. software HyperX Cloud Orbit P gina 3 de 4 6. Selecciona el archivo .mfw correcto seg n tu modelo de auriculares ( Orbit , Orbit S). a. Consulta la p gina de asistencia Orbit / Orbit S en para descargar el firmware m s reciente. 7. Espera a que los auriculares se acaben de actualizar. 8. Cuando los auriculares se hayan acabado de actualizar, se mostrar una ventana emergente. 9. Desconecta el cable USB de los auriculares. 10. Espera 3 segundos y, a continuaci n, vuelve a encender los auriculares. Ya ha finalizado la actualizaci n de los auriculares.
6 Documento n. software HyperX Cloud Orbit P gina 4 de 4 Recuperaci n de un error de actualizaci n Si se produce un error en la actualizaci n o si el PC ya no reconoce Orbit , haz clic en el bot n Recuperar para volver a restablecer los auriculares a su funcionamiento normal. Alguna pregunta o problema de configuraci n? Ponte en contacto con el equipo de soporte de HyperX en: Dokument Nr. HyperX Cloud Orbit software Seite 1 von 4 Firmware Auf dieser Seite findest du die Firmwareversionen von Orbit / Orbit S und die Update-M glichkeiten der Headset-Firmware. Vor dem Update der Headset-Firmware Der GigaDevice GDDFU USB driver muss vor dem Update der Headset-Firmware installiert werden. Dazu ist in den Einstellungen f r Apps & Features der Treiber zu berpr fen.
7 Dokument Nr. HyperX Cloud Orbit software Seite 2 von 4 Ist der Treiber nicht installiert, muss die Orbit software erneut installiert werden. Wenn du w hrend der Neuinstallation gefragt wirst, ob der GigaDevice Universal Serial Bus Treiber installiert werden kann, klicke auf Install ( Installieren ). Update der Headset-Firmware 1. Starte die Orbit App im Admin-Modus. 2. Schiebe die Mikrofonstummschaltung des Headsets nach unten (stummschalten) 3. Lege das Headset flach hin, mit den H rmuscheln nach unten. 4. Tippe auf Update FW. 5. Best tige die ersten drei Schritte in der Eingabeaufforderung. Klicke auf OK. Dokument Nr. HyperX Cloud Orbit software Seite 3 von 4 6. W hle die f r dein Headset-Modell ( Orbit , Orbit S) passende .mfw Datei. a. Auf der Orbit / Orbit S Supportseite unter kannst du die neueste Firmware herunterladen.
8 7. Warte, bis das Update abgeschlossen ist. 8. Sobald das Update abgeschlossen ist, erscheint ein Eingabefenster. 9. Trenne das USB-Kabel vom Headset. 10. Warte 3 Sekunden und schalte das Headset dann wieder ein. Das Headset-Update ist jetzt abgeschlossen. Dokument Nr. HyperX Cloud Orbit software Seite 4 von 4 Wiederherstellung nach nicht erfolgreichem Update Wenn ein Update fehlschl gt oder das Orbit vom PC nicht mehr erkannt wird, klicke auf Recover (Wiederherstellen), um das Headset wiederherzustellen. Fragen oder Probleme bei der Einrichtung? Wende dich an das HyperX Support-Team unter Document No Logiciel HyperX Cloud Orbit Page 1 de 4 Firmware Cette page pr sente des informations sur les versions du firmware du casque-micro Orbit / Orbit S et sur la mise jour de son firmware.
9 Avant la mise jour du firmware du casque Le pilote USB GigaDevice GDDFU doit tre install avant de mettre jour le micrologiciel (firmware) du casque. Vous pouvez v rifier la version utilis e en recherchant le pilote dans la page des param tres Apps & features (Applis et fonctions). Document No Logiciel HyperX Cloud Orbit Page 2 de 4 Si le pilote n'est pas install , veuillez r installer le logiciel Orbit . Pendant la r installation, si une invite demande si le pilote GigaDevice Universal Serial Bus controller peut tre install , cliquez sur le bouton Installer . Mise jour du firmware du casque 1. Ouvrez l'appli Orbit en mode Admin. 2. Placez la commande de d sactivation du micro sur la position basse pour d sactiver le microphone. 3. Posez le casque-micro plat avec les couteurs tourn s vers le bas.
10 4. Cliquez sur le bouton Update FW [Mettre jour le firmware]. 5. Une invite s'affiche pour reconfirmer l'ex cution des trois premi res tapes. Cliquez sur OK . Document No Logiciel HyperX Cloud Orbit Page 3 de 4 6. S lectionnez le fichier .mfw correct pour le mod le de casque ( Orbit , Orbit S). a. Allez sur la page Support Orbit / Orbit S sur le site internet pour t l charger la version la plus r cente du firmware. 7. Attendez la fin du processus de mise jour. 8. Un message est affich lorsque la mise jour est termin e. 9. D branchez le c ble USB sur le casque. 10. Attendez 3 secondes et rallumez le casque. La mise jour est maintenant termin e. Document No Logiciel HyperX Cloud Orbit Page 4 de 4 R cup ration en cas d' chec de la mise jour Si la mise jour choue, ou si le PC ne reconna t pas le casque Orbit , cliquez sur le bouton Recover (R cup rer) pour r tablir le fonctionnement normal du casque.