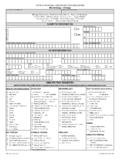
Transcription of ICE – Request Pathology/Microbiology Tests
1 ICE MM August 2012 Page 1 of 2 1. From the toolbar click the Requesting tab 2. Select the patient from the ICE Desktop screen. 3. From the toolbar click New Request Collection Panels The collection Panels open onto Blood Sciences, Ward Common Tests . Panels at the top lead to Tests for pathology & microbiology Pages on the left give access to further Tests At the bottom are listed the five most recent requests Always check the correct patient details are displayed at the top before ordering Tests . Select the Panel for Blood Sciences or microbiology If the required test is not in the Ward Common Tests select the Page to access further options. You can also click the Search page, enter the first three letters and search for the test. When you hover over Tests the yellow banner provides clinical guidance. In Profiles, one tick will order all the Tests in the profile. Tests become unavailable (grey) if not appropriate for the patient s gender or if they conflict with other Tests .
2 Selecting some Tests will trigger mandatory question fields for you to complete. If the test has been requested recently you will be prompted to view the results to avoid unnecessary repetition. 4. Tick all the required Tests . 5. Click Continue with Request (green button in the bottom left of the screen) General Details 6. Always enter a Bleep / Contact number 7. NOTE: Requesting Consultant: all results and reports will be sent to this consultant. It is therefore important to change it here if it is incorrect. Click the ellipsis button and search for their name. Order Details 8. You can copy results to another ICE user such as the GP if required. Click on the ellipsis button and search by name. 9. Change the Priority to Urgent if necessary. 10. Type Order Clinical Details if required any further information you want to pass onto the laboratory team. 11. Select the appropriate Collection Option (Refer to next page) ICE Request Pathology/Microbiology Tests ICE MM August 2012 Page 2 of 2 Sample Collection Options Collect Now This prints the labels immediately.
3 Sample Date/Time allows you to select a date and time for collection for today or future dates. The labels print immediately to be stored until the collection time. You select the date and time from the calendar. NOTE: It is important to get the time as accurate as possible as this is saved in ICE. NOTE: Always write on the label the precise date and time of collection. (Refer to Laboratory note below) The other two options add the requests to the Bookings Assistant list where it is picked up by the Phlebotomist. Phlebotomy next available slot - will tell you the date and time of the next available slot and book your Request with the phlebotomist. The phlebotomist will print labels before collection so you must tick the box Do not print the order form yet . Phlebotomy booked for future date - allows you to book a collection by the phlebotomist on a specific future date.
4 The phlebotomist will print labels before collection. 12. Click Accept Request at the bottom right of the Order Details screen. Alternatively, you can select the options to Request More Tests or Review. Depending on the chosen collection option, the labels will now be printed and the Request is complete. Click the Patient Search icon on the toolbar to return to the ICE Desktop screen. Printed Sample Labels Lab Tests no longer need a form. Simply stick the printed label to the container (Refer to lab note below) After collection write the date and time on the label (Refer to lab note below) Put the containers in a plastic envelope/bag to send to the labs, one bag per patient. When you book with Phlebotomy If the Phlebotomist is unable to take a patient s bloods as requested they leave the Request list and labels in the ward so that another member of staff can take them later. In this case the collection needs to be recorded in Sample Collection by the member of staff.
5 If you do not, the Request will stay on the phlebotomist s list and could be taken a second time. The options Collect Now or Sample Date/Time do not need to be recorded in Sample Collection. Note from the Laboratory Team It is important to write on the label the precise date and time of the collection. By default, the date and time of collection stated on the report is the time at which the requester clicks on Collect Now in ICE. Frequently, however, the labels are printed in advance, sometimes even the day before and as such the date and time of collection will be wrong, misleading and potentially detrimental to patient health. By filling in the details manually on the sample, the laboratory team can change the collection time on the system and ensure that the reports are as accurate as possible. Stick the label over the existing label on the container. This prevents the sample being completely obscured and allows the staff in the lab to see both the sample quality and quantity through the tube without having to peel back the label.
6
