Transcription of Information Paper: KVM Switches
1 Information paper KVM Switches BACKGROUND: KVM Switches enables an individual or company to utilize one keyboard, one video (monitor) and one mouse connected to two different CPU's. In accordance with the NISPOM, Chapter 8, Section 7, Para d, and ISL question 64 the answer states that a Controlled Interface must be used. These controlled interfaces must have been tested and meet specific standards. Companies have asked Defense Security Service if these KVM Switches can be utilized on two different networks within their facility, connecting keyboard, monitor, and mouse between a classified and unclassified network. They can be utilities, but have to meet the requirements of a Controlled Interface.
2 Some Switches have been tested and can be used for this purpose. TESTED KVM Switches : Attachment 1 contains a list of KVM Switches that have been tested by DISA and meet the requirements for a Controlled Interface. Any additional KVM Switches that are not listed in the attachment need to be tested under the Common Criteria standards. DOCUMENTATION NEEDED: System Security Plan: These Switches and all associated Information needs to be added to the System Security Plan on the Hardware Base Line and included in the network drawings. Also a copy of the Standards Operating Procedure will be attached. Standard Operating Procedure: When a company needs to put one of these KVM Switches on a network, guidance on how to operate the switch needs to be provided to the users.
3 Attachment 2 is a sample and will be edited to meet the specific requirements of the company's facility. Users will follow the start up and shut down procedures to ensure that no classified Information is inadvertently placed on the unclassified system. Attachments 1 - DISA Evaluated KVM Switches 2 - Sample Standard Operating Procedure Attachment 1 DISA Evaluated KVM Switches CPU Switches the DISA Certified TEMPEST Technical Authority (CTTA) tested to determine TEMPEST profiles and isolation characteristics are listed below. DISA only tests and certifies Switches for systems maintained and operated by DISA and its different organizations to include JSSC.
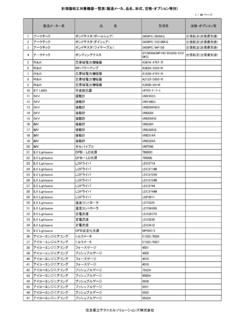
4 The local site DAA approved the use of these Switches based on user requirements and established procedures. Manufacturer & Type Model Results Aten Master View CPU Switch CS-142 CS-104 Recommend switching up to and including S only in areas with inspectable space of at least 15 meters. A separation of one meter should be maintained between switch and any Black processor. Meets level II limits*. Recommend switching up to and including TS. Meets level I limits*. Rose Electronics Ultra Matrix Switch UM4-CH Recommend switching up to and including TS only in areas with inspectable space of at least 10 meters. A metal plate must be used to cover any unused plug-in/expansion slots. A separation of one meter should be maintained between switch and any BLACK processor.
5 Meets level II limits*. Lightwave Communications PC/SUN Dual Platform Switch 5050 Recommend switching up to and including TS/SCI only in rings A, B, C, and D of the Pentagon. Meets level II limits*. Black Box KVM ServSwitch SW722A-R2 SW721A-R3 SW721A-R2 Recommend switching up to and including TS. Meets level I limits*. Recommend switching up to and including TS. Meets level I limits*. Recommend switching up to and including TS. Meets level I limits*. All equipment must be used in accordance with local TEMPEST/RED-BLACK requirements. *NSTISSAM TEMPEST/1-91 Attachment 2 BLACK BOX KVM SERVSWITCH STANDARD OPERATING PROCEDURES MANUAL SAMPLE TABLE OF CONTENTS PURPOSE ..6 BLACK BOX INC.
6 KVM SERVSWITCH .. 6 6 POWER UP PROCEDURES .. 6 Unclassified System .. 6 Classified System .. 7 SWITCHING BETWEEN 7 Unclassified System to the Classified System .. 7 Classified System to the Unclassified System .. 7 POWER DOWN 7 Classified System .. 7 Unclassified System .. 8 PURPOSE These procedures are for configuring and utilizing the Black Box Inc. KVM ServSwitch for use between a Unclassified personal computer using Windows (Insert Version) operating system and a Classified personal computer using Windows (Insert Version) operating system. KVM ServSwitch lets you use one keyboard, monitor, and mouse to access a number of IBM PC compatible computers. Configuring these two PCs with the KVM ServSwitch can cause an accidental release of classified Information into the Unclassified system if procedures are not properly followed.
7 These procedures are designed to avoid this risk and must be strictly adhered to in order to ensure the security of all classified Information . Any problems or incongruities noted during the execution of these procedures should immediately be reported to the Information Systems Security Manager (ISSM) for both systems. BLACK BOX INC. KVM SERVSWITCH - Ensure the Unclassified PC is connected to the CPU1 slot (See Diagram 1). - Ensure the Classified PC is connected to the CPU2 slot. - Ensure all connections have tamper seals to indicate when system connections have been tampered with. - Ensure Classified system has been powered down and classified removable hard drive properly stored in a GSA approved safe when room is vacated by the authorized user.
8 - When logged on to Classified system, ensure personnel in room have the proper clearance and need-to-know when classified Information is displayed on the screen. - KVM ServSwitch must be turned on before both PCs are powered up. - KVM ServSwitch must be turned off after both PCs are powered down. PROCEDURES The following procedures are to be performed when using the KVM ServSwitch. POWER UP PROCEDURES Unclassified System - Prior to turning on the Unclassified PC, ensure proper system configuration by checking system tamper seals on all connections. - Ensure the UNCLASSIFIED/SECRET label is properly placed on the monitor with the UNCLASSIFIED portion up. - Power up the KVM ServSwitch then the Unclassified PC.
9 - Ensure the KVM ServSwitch is set for 1 (CPU Status located at the front of the KVM ServSwitch, see Diagram 2). - If KVM ServSwitch is not set to 1, press the red NEXT button until the CPU Status display shows the connection with 1 (CPU1). - Check monitor and use keyboard and mouse to ensure correct connection to Unclassified System. Classified System - Ensure the SECRET/UNCLASSIFIED label is properly placed on the monitor with SECRET portion facing up. - Remove Classified PC hard drive from safe and place into Classified PC. - Turn hard drive key to the locked position. - Power up the KVM ServSwitch then the Classified PC. - Ensure the KVM ServSwitch is set for 2 (CPU Status located at the front of the KVM ServSwitch.)
10 - If KVM ServSwitch is not set to 2, press the red NEXT button until the CPU Status display shows the connection with 2 (CPU2). - Check monitor and use keyboard and mouse to ensure correct connection to Classified Systems. SWITCHING BETWEEN PCs Unclassified System to the Classified System - Press red NEXT button until the CPU Status display shows the connection with 2 (CPU2). - Turnover SECRET/UNCLAS label so that SECRET label is showing on the monitor. - Check monitor and use keyboard and mouse to ensure correct connection to Classified System. Classified System to the Unclassified System - Press red NEXT button until the CPU Status display shows the connection with 1 (CPU1).