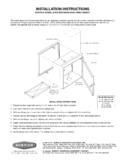
Transcription of Installation Instructions – Luminaire WaveStream ...
1 INS #Brand Logo reversed out of blackINS #ADF140666 Installation Instructions Luminaire WaveStreamInstructions d Installation - Luminaire WaveStreamInstrucciones de instalaci n de la luminaria WaveStreamIMPORTANT: Read carefully before installing fixture. Retain for future of fire, electrical shock, cuts and or other casualty hazards. This product must be installed in accordance with the applicable Installation code by a qualified electrician or a person familiar with the construction and operation of the product and the hazards involved. Cooper Lighting assumes no responsibility for claims brought about by improper or careless Installation or handling of this Department: note actual fixture description of any shortage or noticeable damage on delivery receipt.
2 File claim for common carrier (LTL) directly with carrier. Claims for concealed damage must be filed within 15 days of delivery. all damaged material, complete with original packing must be May Cut. Handle with of burn. Disconnect power and allow fixture to cool before changing bulb or handling of Fire and Electric Shock. if not qualified, consult an ground screw provided in proper location. Do not supply wires are located within 3 inches of ballast, use wire rated for at least 90 C (194 F). RENEWABLE RESOURCE RECYCLABE BIODEGRADABLE INSTALLATIONF ixture Installation /Wiring1. Remove product from packaging material. Carton should be lying down flat, oriented with THIS SIDE UP markings facing up so that top panel of carton can be folded back and fixture can be lifted straight up out of packaging materials.
3 Do not lift fixture by one end or pull on the end plates in any way. Luminaire should be handled by both aluminum side rails. Wear clean work gloves to prevent dirt and oil from being transferred to Note that the protective plastic insert that is shipped in the Luminaire is intended to stay in the Luminaire for protection of the lenses during Installation (Figure1.). Take caution when handling the Luminaire to not scratch or damage the lenses inthe 1. Plastic Insert2installation Instructions Luminaire waveStream0590 AWSIS ADF140666 3. Figure 4. Install in Ceiling T-Grid SystemEQ Clip InstalledAccess PlateFigure 5. Step 1 Step 2 Leading End3. Install the Luminaire into the ceiling T-grid system. Ensure that Luminaire sets snuggly in T-grid system (Figure 2.)
4 Ensure that all luminaires in an area are oriented in the same When required, attach EQ Clips to Luminaire end plate with supplied screws to secure Luminaire to T-grid system (Figure 3.). Take care to not over-torque and strip Remove electrical access plate and remove necessary knockouts from access plate for attachment of electrical supply cable (Figure 4. and Figure 5.).6. Remove two screws in Electrical Enclosure and review driver label for electrical ratings and proper wiring of the LED driver. Replace Electrical Enclosure and secure with the two screws previously access Plate installationGrounding conductor (if insulated) to be stripped min. 1". Insert end of wire into small hole. Wrap wire under and around head of screw counter-clockwise (Figure 4.)
5 Tighten Installation Step 1: To insert access plate, rotate until leading end is inside the wireway (Figure 5.). Step 2: Fold into horizontal position and slide forward into locking Make necessary wiring connections to driver AC line input and optional DALI or 0-10 Vdimming circuits. See Wiring Diagrams8. Replace electrical access plate and snap securely into place. If required, install optional screw to lock the access plate Instructions Luminaire WaveStreamElectrical Enclosure0-10V DIMDRIVERDALIDRIVERSTEP DIMDRIVERBLACK OR BROWN = LINEWHITE OR BLUE = NEUTRALGRN OR GRN/YLW = GROUNDPURPLE = DIM +GREY = DIM RED = LED +BLUE = LED BLACK OR BROWN = LINEWHITE OR BLUE = NEUTRALGRN OR GRN/YLW = GROUNDPURPLE = DALIGREY = DALIRED = LED +BLUE = LED BLACK OR BROWN = LINE 1 BLUE OR ORANGE = LINE 2 WHITE OR BLUE = NEUTRALGRN OR GRN/YLW = GROUNDRED = LED +BLUE = LED LEDLOADLEDLOADLEDLOADF igure 2.
6 Wiring Diagrams3 Installation Instructions Luminaire WaveStreaminstallation Instructions Luminaire waveStream0590 AWSIS ADF140666 Cleaning MethodsFingerprints and large dust particles can be removed by gently wiping the surface with a clean microfiber cloth. If additional cleaning is required a mild solution of distilled water and Dawn dish soap (between 1:20 and 1:10 parts Dawn to distilled water, respectively) could be used to wash the lens. The WaveStream lens should not remain wet any longer than necessary to remove the contaminants. Dry off surface with deionized air. Avoid pooling of water as that tends to leave streaks on the optical surface. This method is only recommended as a last resort as it increases the risk of damaging the :nAvoid any organic solvents.
7 In addition, avoid any cleaning products including ammonia, ketones, window cleaners, or other alcohol based cleaners and solvents containing thinners, acetone, benzene and :nFor additional information on material compatibility in regard to environmental contact with chemicals and solvents please visit public/en/lighting/products/indoor_ceil- ing_wall_mount_lighting/ceiling_ !metalux! 6. Removed Plastic InsertFinal Luminaire PrepThe Luminaire is shipped with a protective plastic insert that is intended to stay in the Luminaire during building construction to keep dust and dirt from accumulating on the Luminaire . Once allbuilding construction and cleanup is complete,the plastic insert is to be removed and recycled (Figure 6.).MAINTENANCEF ixture Maintenance/CleaningAlways follow recommended cleaning and handling procedures when cleaning the WaveStream lens.
8 It can be permanently damaged if cleaned or handled improperly. Before cleaning a WaveStream lens, take time to inspect the surfaces carefully in order to determine the type and severity of the contaminants. The process of cleaning the lens can result in damage to the optical surface if repeated multiple times. For WaveStream lens with multiple contaminants, the order with which they are removed can be important. For instance, if a WaveStream lens is contaminated with oil and dust, it is possible that wiping the oil off first will scratch the optical surface as the dust is drug along the surface by the off the Surface of an OpticDust and other loose contaminants should be blown off before any other cleaning technique is employed. Using compressed air over the entire lens is recommended to prevent static using compressed air, hold the can upright throughout the procedure.
9 Also, start the flow of air with the nozzle pointed away from the lens. Hold the can approximately 6" from the optic and use short bursts. Move the nozzle of the compressed air can over the optic with the nozzle at a grazing angle to the optical surface in a constant one-way direction. Due to the non-contact and solvent-free nature of this cleaning method, it should be used as a first step in cleaning all d Installation - Luminaire waveStream0590 AWSIS ADF140666 : Lisez attentivement avant d'installer le Luminaire . Conservez pour une r f rence d'incendie, de d charge lectrique, de coupures et autres accidents. Ce produit doit tre install conform ment au code d' Installation en vigueur par un lectricien qualifi ou une personne famili re avec la construction et le fonctionnement du produit, ainsi qu'avec les risques inh rents.
10 Cooper Lighting n'assume aucune responsabilit quant aux r clamations dues une Installation ou une manipulation inad quate ou imprudente de ce de la r ception : Veuillez fournir une description de tout l ment manquant ou de tout dommage constat la r ception du Luminaire . Les r clamations contre le transporteur g n ral (chargement de groupage) doivent tre d pos es directement aupr s dudit transporteur. Les r clamations pour des dommages cach s doivent tre remplies dans les 15 jours suivant la livraison. Tout mat riel endommag doit tre enti rement conserv avec son emballage d' En garDELes bords sont coupants. Manipulez avec En garDERisque de br lures. Mettez l alimentation lectrique hors tension et laissez refroidir le Luminaire avant de le manipuler ou de changer la d'incendie et de d charge lectrique.