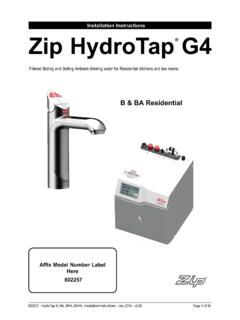
Transcription of Installation Instructions Zip HydroTap G4
1 802005 - Sparkling HT-BCS Residential- Installation Instructions - - Page 1 of 28 Zip HydroTap G4 Installation InstructionsFiltered Boiling, Chilled and Sparkling drinking water for Residential kitchens and tea rooms. Affix Model Number Label Here 802005 BCS Residential Page 2 of 28 802005 - Sparkling HT-BCS Residential- Installation Instructions - - Tap optionsThe HydroTap applaince series offers a range of interchangeable taps to suit the customer s needs (See options below). For ease of Installation , it is recommended to fit the tap before installing the undersink unit.
2 The Installation procedure for each of the taps is detailed in a separate tap Installation instruction book No. 803341, supplied with the all operational features of the HydroTap , please refer to the BCS User manual / Cube TapClassic TapElite Tap All-In-One Tap 802005 - Sparkling HT-BCS Residential- Installation Instructions - - Page 3 of 28 IndexHydroTap SpecificationsInstallation check list .. 4 General Product Features .. 5 Important Safety Instructions .. 6 Warnings and Regulatory Information.
3 7 Major components and Accessories .. 8 Technical Specification .. 9 Before Installation and site requirements ..10 Installation procedure:STEP 1 - Fit the tap to the benchtop or sink, before installing the undersink unit. (Refer to the Tap Installation instruction book 803341)STEP 2 - Check for adequate ventilation Section 2 - Ventilation - Cut out details .. 11-13 STEP 3 - Install the Booster Heater (if required) Section 3 - Booster heater Installation - Booster Heater specifications and Installation .
4 14-16 STEP 4 - Fit the CO2 Gas cylinderSection 4 - CO2 Cylinder - Connect and secure the CO2 gas cylinder .. 17-18 - Leak Test .. 18 STEP 5 - Install the undersink unit Section 5 - Undersink unit Installation - Check the external bypass valve setting .. 19 - Mains water supply hose .. 19 - Model BCS .. 20 - Model BCSHA - AIO Mains ..21 - Model BCSHAV - AIO Vented .. 22 STEP 6- Commission the HydroTap Section 6 - Commissioning - CO2 Purge.
5 23 - Filter Flush .. 23 - Boiling Calibration .. 24 - Booster activation .. 24-25 - Sensor calibration .. 25 Trouble ShootingTrouble Shooting Table .. 26 End of life disposal .. 26 Notes .. 27 Contact details .. 28 Page 4 of 28 802005 - Sparkling HT-BCS Residential- Installation Instructions - - Installation checklistBefore Installation :A. Read the Instructions and check if there is adequate space to mount all of the Note: Not all fittings are supplied with the appliance kit.
6 Isolation valves and special tools are not supplied (See Technical Specifications for details).C. Check the mains water pressure is between 250 - 700kPa D. Check the water quality to determine if extra filtration will be required. Note: This product must be fitted to a potable water Check the appliance rating plate and ensure correct power is available for the Check the under counter cupboard supporting the appliance is adequate for the total weight of the appliance, when full of water. Before Commissioning:1.
7 Check the unit has been installed Flush the supply line before connecting to the undersink Check all plumbing fittings have been Ensure the outlet and vent pipes are positioned to drain Ensure there is adequate Check all tubes from the underbench unit to the tap, have a constant rise and there are no sags or kinks in the Check all electrical connections are correct and there are no loose wires. Commission: (See section 5) 8. Turn on the gas and water and check for Turn on the Purge the CO2.
8 11. Flush the Where applicable, programme the unit to suit the customer s you for purchasing a Zip HydroTap . Please read and follow these Instructions carefully to ensure safe and trouble free service. If service is required, please call 1800 638 633 802005 - Sparkling HT-BCS Residential- Installation Instructions - - Page 5 of 28 What is the Zip HydroTap ?The Zip HydroTaps are electronically controlled, filtered, Boiling, Chilled and Sparkling water, drinking systems for kitchens and tea rooms. The HydroTap units are under bench drinking water appliances with a dispensing tap mounted on a sink or bench, which may be used for residential applications.
9 These units utilise a conventional refrigerant compressor to chill the water and (for BCS) an immersion heating element to boil the water and all utilise a CO2 gas cylinder to carbonate the chilled water. Depending on the model, these units will dispense boiling water (factory set to 98 C) chilled water (factory set to 5-10 C) These units are NOT designed to be used for sanitary boiling water units are fitted with a tap mounted, child safety lock. In addition, there are various energy saving options accessible via the main menu.
10 Each boiling unit is equipped with a self-calibrating program which caters for altitude adjustment. The 2kg CO2 bottle and the water filter are disposable items. Both will require periodic replacement and are covered by a limited OEM is important that the Installation be done safely, correctly and completely, in order to utilise all the benefits the HydroTap can provide. Each Classic and AIO HydroTap can be ordered with the Tap Head Assembly for Disabled use. The disabled levers are supplied with Braille caps for the visually impaired.