Transcription of Installation, Operation and Maintenance Manual
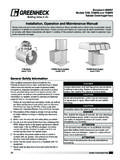
1 Ceiling Exhaust and Inline Fans1 Document 474680 model SP and CSPC eiling Exhaust and Inline FansInstallation, Operation and Maintenance ManualPlease read and save these instructions for future reference. Read carefully before attempting to assemble, install, operate or maintain the product described. Protect yourself and others by observing all safety information. Failure to comply with these instructions will result in voiding of the product warranty and may result in personal injury and/or property Drive Ceiling Exhaust FanDesigned for clean air applications where low sound levels are required.
2 Many options and accessories are available such as lights, motion detectors, ceiling radiation dampers and speed controls. Capacities range from 25 to 1,600 cfm (42 to 2,718 m3/hr) and 1 in. wg (248 Pa). AMCA Licensed for Sound and Air Drive Inline Exhaust FanDesigned for clean air applications where low sound levels are required. Capacities range from 70 to 3,800 cfm (119 to 6,456 m3/hr) and 1 in. wg (248 Pa). AMCA Licensed for Air !To reduce the risk of fire, electric shock, or injury to persons, observe the following: Suitable for use with solid state speed controls.
3 Use this unit only in the manner intended by the manufacturer. If you have questions, contact the manufacturer. Before servicing or cleaning unit, switch power off at service panel and lock service disconnecting means to prevent power from being switched on accidentally. When the service disconnecting means cannot be locked, securely fasten a prominent warning device, such as a tag, to the service panel. installation work and electrical wiring must be done by qualified person(s) in accordance with all applicable codes and standards, including fire-rated construction.
4 Sufficient air is needed for proper combustion and exhausting of gases through the flue (chimney) of fuel burning equipment to prevent back drafting. Follow the heating equipment manufacturer s guideline and safety standards such as those published by the National Fire Protection Association (NFPA), and the American Society for Heating, Refrigeration and Air Conditioning Engineers (ASHRAE) and the local code authorities. When cutting or drilling into wall or ceiling, do not damage electrical wiring or other hidden utilities. Acceptable for use over a bathtub or shower when installed in a GFCI protected branch circuit.
5 (Up through size SP-A390) Never place a switch where it can be reached from a tub or shower. Ducted fans must always be vented to the outdoors. These fans are not recommended for cooking exhaust applications. They are designed primarily for low temperature, clean air applications only. The diagram shows the minimum distance these fans should be placed in relation to cooking equipment. Fan/Light combination not to be installed in a ceiling thermally insulated to a value greater than ! For general ventilating use only. Do not use to exhaust hazardous or explosive materials and !
6 Pour r duire le risque d incendie, de choc lectrique ou de blessure corporelle, respecter cd qui suit: Appareil pouvant tre utilis avec un r gulateur de vitesse semi-conducteurs. Utiliser cet appareil exclusivement comme pr vu par le fabricant. En cas de questions, communiquer avec le fabricant l adresse ou au num ro de t l phone figurant dans la garantie. Avant tout entretien ou nettoyage de l appareil, couper l alimentation sur le tableau lectrique et verrouiller le dispositif de sectionnement pour emp cher toute mise sous tension accidentelle.
7 Si le dispositif de sectionnement ne peut pas tre verrouill , attacher un moyen de mise en garde bien visible, tel qu un panonceau, au tableau lectrique. La pose et le c blage lectrique doivent tre effectu s par des personnes qualifi es en conformit avec les codes et normes en vigueur, y compris pour la r sistance au feu du b timent. Une quantit d air suffisante est n cessaire pour la bonne combustion et l extraction des gaz br l s par le conduit d vacuation (chemin e) d appareils combustible afin d viter le refoulement. Veiller suivre les indications du fabricant du mat riel de chauffe, les normes de s curit telles que celles publi es par la National Fire Protection Association (NFPA) et l American Society for Heating, Refrigeration and Air Conditioning Engineers (ASHRAE) et la r glementation en vigueur.
8 Lors de la d coupe ou du per age de murs ou plafonds, ne pas endommager les c bles lectriques et autres conduites masqu es. Pose admissible au-dessus d une baignoire ou d une douche sous r serve de raccordement un circuit de d rivation protection GFCI (disjoncteur diff rentiel). (Jusqu la taille SP-A390 incluse) Ne jamais placer d interrupteur un emplacement port e d une baignoire ou d une douche. Les caissons d extraction gaine doivent toujours tre vacu s vers l ext rieur. Ces caissons ne sont pas conseill s pour les applications d aspiration de vapeurs de cuisson.
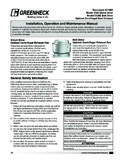
9 Ils sont con us essentiellement pour l aspiration d air propre basse temp rature. Le sch ma indique la distance minimale de placement de ces caissons par rapport l quipement de cuisson. Le combin ventilateur/luminaire ne devra pas tre install dans un plafond ayant une isolation thermique d une valeur sup rieure ! utiliser pour la ventilation g n rale uniquement. Ne pas utiliser pour l aspiration de mati res et vapeurs dangereuses ou Exhaust and Inline Fans2 B ModelA ModelPrepare the FanAirflowAirflowAccess PanelAccessPanelKnockoutsElectricalAcces sPanelPower AssemblyIf power assembly (motor, wheel, and scroll) is not installed in housing, insert the electrical plug into fan socket, then slide scroll end of power assembly into fan housing.
10 Attach by using two sheet metal screws Check ductwork to see if the fan s discharge requires rotation from horizontal to vertical RotationTo rotate from horizontal to vertical dischargeA Models OnlyA50-500, 710, 780 ModelsRemove the two screws holding the power assembly in and pull power assembly out. Rotate power assembly 180 degrees and put back into fan. Use the same screws to reattach power assembly to fan housing. Flip fan over and remove the four screws holding the discharge duct and damper assembly. Exchange the assembly with plate mounted on top of fan, as shown in these Wiring KnockoutRemove either top or side wiring knockout, depending on wiring direction, by bending it back and forth to break , 900-1500 ModelsRemove the eight screws holding the access panel or collar as shown in picture.