Transcription of INSTALLATION OPERATION AND SERVICE MANUAL
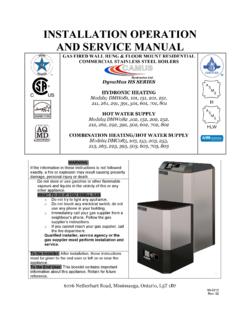
1 INSTALLATION OPERATION . AND SERVICE MANUAL . Dynaforce Series GAS FIRED COMMERCIAL CONDENSING STAINLESS. STEEL TUBE BOILERS. HYDRONIC HEATING. Models; DRH300, 350 400, 500, 600, 800, 1000, 1200, 1400, 1600, 1800, 2000, 2500, 3000, 3500, 4000, 4500, 5000 H. HOT WATER HEATER. Models; DRW300, 350 400, 500, 600, 800, 1000, 1200, 1400, 1600, 1800, 2000, 2500, 3000, 3500, 4000, 4500, 5000 HLW. WARNING: If the information in these instructions is not followed exactly, a fire or explosion may result causing property damage, personal injury or death Do not store or use gasoline or other flammable vapours and liquids in the vicinity of this or any other appliance. WHAT TO DO IF YOU SMELL GAS. o Do not try to light any appliance, o Do not touch any electrical switch; do not use any phone in your building, o Immediately call your gas supplier from a neighbour's phone. Follow the gas supplier's instructions, o If you cannot reach your gas supplier, call the fire department.
2 Qualified installer, SERVICE agency or the gas supplier must perform INSTALLATION and SERVICE . To the Installer: After INSTALLATION , these instructions must be given to the end user or left on or near the appliance. To the End User: This booklet contains important information about this appliance. Retain for future reference. 6226 Netherhart Road, Mississauga, Ontario, L5T 1B7. 99-0171. Rev. Table of Contents PART 1 GENERAL 1. INTRODUCTION .. 1. SPECIAL INSTRUCTIONS TO OWNER .. 1. CHECKING EQUIPMENT .. 1. HOW IT OPERATES (SEQUENCE OF OPERATION ) .. 1. HEAT TRANSFER PROCESS .. 2. END OF SEQUENCE .. 2. 3. 3. REMOVAL OF EXISTING APPLIANCE .. 3. BOILER ROOM OPERATING CONDITION .. 4. CLEARANCE FROM COMBUSTIBLE 4. INSTALLATION PROCEDURE AND LOCATION OF UNIT .. 5. PART 2 VENTING .. 7. GENERAL VENTING GUIDE .. 7. CATEGORY II AND CATEGORY IV 7. VENTING GUIDELINES FOR CATEGORY IV 7. APPROVED VENTING 8. VENT TERMINATION 8. INLET CAP FOR ROOFTOP TERMINATION.
3 8. LOCATION OF A ROOFTOP AIR INLET AND VENT CAPS .. 9. AIR INLET DAMPER .. 9. MASONARY CHIMNEY INSULATIONS .. 9. VERTICAL VENTING TERMINATION .. 9. COMBINED COMBUSTION AIR INLET .. 9. DRAIN TEE .. 10. CONVENTIONAL VENTING (INDOOR) INSTALLATIONS .. 10. AIR REQUIRED FOR COMBUSTION AND VENTILATION .. 10. EXHAUST FANS .. 11. OUTDOOR VENTING .. 11. SIDEWALL VENTING .. 11. SIDEWALL VENT TERMINAL & SIDEWALL INTAKE AIR 11. LOCATION OF A SIDEWALL VENT TERMINATION .. 11. LOCATION OF A SIDEWALL AIR INLET TERMINAL .. 12. LENGTH OF AIR INLET PIPE .. 12. PART 3 GAS CONNECTION .. 12. GAS CONNECTION .. 12. GAS PIPING .. 13. INSTALL 13. AIR/GAS RATIO 13. DIFFERENTIAL AIR PRESSURE (DR2000 DR5000) .. 14. GAS MANIFOLD DIFFERENTIAL PRESSURE ADJUSTMENT (DR2000 DR5000).. 14. CHECKING GAS SUPPLY PRESSURE .. 15. Regulated Gas Supply Pressures for Dynaforce Boilers & Water Heaters .. 15. CHECKING DIFFERENTIAL AIR AND GAS PRESSURES (DR2000 DR5000) .. 15. GAS TRAIN AND CONTROLS.
4 16. VENTING OF GAS VALVES AND PRESSURE SWITCHES .. 16. BURNER .. 16. PART 4 WATER 17. FREEZE PROTECTION .. 17. WARNING REGARDING CHILLED WATER AND HEATING COIL SYSTEMS .. 17. INLET AND OUTLET CONNECTIONS .. 18. MINIMUM PIPE SIZE REQUIREMENTS .. 18. HEAT EXCHANGER .. 18. LOW WATER TEMPERATURE SYSTEMS .. 18. INSTANTANEOUS WATER HEATER .. 18. WATER FLOW SWITCH .. 19. LOW WATER CUTOFF (If Equipped) .. 19. RELIEF VALVE .. 19. CIRCULATING PUMP SELECTION .. 19. CIRCULATING PUMP OPERATION OF HEAT 19. T HEAT EXCHANGER ALGORITHM .. 20. PART 5 ELECTRICAL & 20. ELECTRICAL CONECTIONS .. 20. VARIABLE FREQUENCY DRIVE (DR1200 5000).. 21. DIFFRENTIAL AIR PRESSURE SWITCH .. 21. BLOCKED FLUE SWITCH .. 21. DIFFERENTIAL GAS AND LOW GAS PRESSURE SWITCHES .. 21. HIGH LIMIT .. 21. DYNAFORCE SOLA .. 22. SERVICE PARTS .. 22. IGNITION MODULE LOCKOUT FUNCTIONS .. 22. DYNAFORCE CONTROLLER .. 22. ERROR 22. PART 6 CONTROL PANEL .. 24. APPLIANCE TEMPERATURE CONTROLLER .. 24.
5 CONFIGURE MENU .. 40. LEAD LAG SETUP UP TO 8 BOILERS .. 42. LOCAL/REMOTE SWITCH .. 43. COMM. PORT 2 ACTIVATION .. 43. VARIABLE FREQUENCY DRIVE (DR1200 - 5000) .. 44. FROST PROTECTION .. 44. PART 7 COMPONENTS .. 45. HOT SURFACE IGNITER (GLOW BAR).. 45. FLAME 45. COMBUSTION AIR FAN .. 45. INNER JACKET .. 45. OUTER JACKET .. 45. VENTING TRANSITION .. 45. PART 8 FIELD STARTUP PROCEDURE .. 46. CHECKING THE INSTALLATION .. 46. CHECKING THE 46. GAS VALVE ADJUSTMENT 46. COMISSIONING 48. PART 9 TROUBLESHOOTING .. 49. PART 10 56. EXAMINE THE VENTING 56. VISUALLY CHECK MAIN BURNER FLAMES .. 56. FLUE GAS PASSAGEWAYS CLEANING PROCEDURES .. 56. CONDENSATION TREATMENT .. 56. CONDENSATE VOLUME .. 57. BURNER MAINTENANCE .. 57. BURNER REMOVAL .. 57. BURNER CLEANING PROCEDURE .. 57. CHANGING THE HOT SURFACE 58. RE-INSTALLING THE IGNITER .. 58. HEAT EXCHANGER INSPECTION .. 58. RE-INSTALL HEAT EXCHANGER .. 58. COMBUSTION AIR FAN .. 58. COMBUSTION AND VENTILATION AIR.
6 58. CONTROL CIRCUIT VOLTAGE .. 58. COMBUSTIBLE 58. FREEZE PROTECTION .. 58. FREEZE PROTECTION FOR A HEATING BOILER SYSTEM (Optional) .. 59. PART 11 INSTALLATIONS .. 59. CHECKING THE INSTALLATION .. 59. CHECKING THE INSTALLTION .. 59. INSPECT & RECHARGE CONDENSATE COLLECTION & NEUTRALIZING RESERVOIR .. 59. HEATING BOILER INSTALLATIONS .. 60. WATER CONNECTIONS .. 60. PIPING 60. INTERMITTENT PUMP OPERATION .. 60. SUMMARY .. 60. DOMESTIC HOT WATER HEATER .. 61. WATER VELOCITY 62. TEMPERATURE RISE AT FULL FIRING RATE .. 62. WATER HEATERS .. 62. PART 12 EXPLODED VIEW .. 63. PART 13 ELECTRICAL DIAGRAMS .. 71. PART 1 GENERAL. CHECKING EQUIPMENT. INFORMATION. Check for signs of shipping damage upon receiving INTRODUCTION equipment. Pay particular attention to parts accompanying the boiler, which may show signs of being hit or otherwise The Dynaforce is a condensing forced draft appliance being mishandled. Verify total number of pieces shown on utilizing a premix power burner based on a push through packing slip with those actually received.
7 In case there is design which offers several venting options. Heat output is damage or a shortage, immediately notify carrier. controlled by a one to one air/gas ratio control gas valve which provides seamless modulation. The Dynaforce Figure 2: Checking the Dynaforce . provides central heating or domestic hot water at working pressures up to 160 PSI. It is designed for use with a fully pumped and pressurized system. The boiler/water heater will automatically modulate to provide heat outputs between 100% and down to 20%. The Dynaforce works on the principle of differential pressure. The OPERATION of the fan will generate a differential pressure, which the gas/air ratio control gas valve will match on the gas side. The steady state efficiency is maintained across the entire range of modulation. Air and gas are metered in precise proportion (1:1 Ratio) to modulation signal, allowing combustion characteristics which determine efficiency to remain the same over entire operating range.
8 Do not attempt to pry any panel off. To begin disassembly Figure 1: Dynaforce you must first remove the two machine screws from the top of the lid. Only then will you be able to remove the lid and disassemble the three outer panels. Once you have removed the lid carefully check and confirm that all copper tubing connections are intact and have not broken or loosened in shipment. Leaks at any connections on these lines will result in erratic appliance OPERATION . HOW IT OPERATES (SEQUENCE OF. OPERATION ). 1 Supply power connection as per table 10. 2 The power switch is placed in the ON position. 3 120 VAC power is supplied to the control transformer. 4 24 VAC is supplied to the ignition module and low SPECIAL INSTRUCTIONS TO OWNER voltage controls for all models. This MANUAL supplies information for the INSTALLATION , 5 After the appliance water pump starts, flow is proven OPERATION and servicing of the appliance. It is strongly by the flow switch and water pressure switch.
9 The recommended that this MANUAL be reviewed completely water pressure switch is set to close at 30 PSI and is before proceeding with an INSTALLATION installed in the unit. The flow switch is to be mounted in a tee at the outlet of the appliance. Take care to CAUTION properly trim the flow switch paddles so as not to jam It is important that all gas appliances are installed by a the switch in the tee. The normally open dry contacts in qualified installer/technician that is trained by Camus the low water cutoff (LWCO) are to be wired in series Hydronics. It is in your own interest and that of safety to with the normally open contacts of the flow switch. ensure that all local codes, and all the following NOTES Locate the probe type LWCO in the piping above the and WARNINGS are complied with. highest point of the heat exchanger. The low water Installing, servicing or adjusting this appliance should be cutoff and flow switch are shipped loose. In all cases performed only by a qualified installer/technician that is check with local codes.
10 Trained by Camus Hydronics. The serviceman must utilize 6 The Dynaforce controller receives a call for heat via a combustion analyzer with CO2, CO, and draft gauge, to the remote operator contacts and the Demand set the appliance according to Camus Hydronics' parameter reads Central Heating or DHW. recommendations, prior to commissioning. 7 DR 300 DR 1000: The Dynaforce controller NOTE energizes the pump contacts and starts to ramp up the RETAIN THIS MANUAL FOR FUTURE REFERENCE voltage to the electrically commutated DC motor of the combustion fan after internal safety checks are satisfied. 1. DR1200 DR5000: The local thermostat energizes the 4. The hot surface igniter is de-energized at the end of motor stop/start relay which closes the initiate contacts the ignition period to allow for ionisation detection. to the variable frequency drive (VFD) which starts to HEAT TRANSFER PROCESS. ramp up the frequency to the 230V 3 phase motor of the combustion fan.