Transcription of Instructions & Warranty - SharpClocks
1 Instructions & WarrantyThank you for your purchase of this quality clock . The utmost care has gone into the design and manufacture of your clock . Please read these Instructions and store them in a safe place for future receiver unit has a clear, easy-to-read display that shows indoor temperature and humidity, outdoor temperature,time, month, date, day. The remote sensor transmits the outdoor temperature. To receive the outdoor temperature,place the sensor anywhere within 30 meters; the 433 MHz technology means no wire installation is Atomic clock will always be accurate to within one second as it receives daily WWVB updates. Daylight SavingTime also automatically updates so there is no need to re-set the clock manually!IMPORTANT: If the Atomic clock does not receive the WWVB signal immediately, wait overnight and it will beset in the clock has a built in receiver that automatically synchronizes itself with the WWVB radio signal broadcast by the US Government s National Institute of Standards & Technology (NIST) in Fort Collins, : Atomic Clock1.
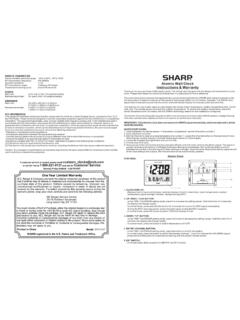
2 clock DISPLAY: - Displays time in hours and minutes; calendar display of day, month and year; indoor temperature and humidity; outdoor temperature; signal strength indicator; daylight saving (DST); and time Set BUTTON: - In TIME mode, press and hold the SET button to enter the time setting mode. - Press the SET button to confirm the setting and enter the next Channel BUTTON: - In the normal mode, press the button to switch the between channel 1, 2 and 3; press and hold the button for 3 seconds will pairing with the outdoor remote sensor. 4. + BUTTON: - In the TIME setting mode, press it to increase the setting values. Hold the button for 3 seconds, the display will change -/wave BUTTON: - In the TIME setting mode, press the button to decrease the setting values. Hold the button for 3 seconds, the display will change rapidly.
3 - In the normal mode, press and hold the button for 3 seconds for receive the RCC signal immediately. - During the RCC receiving period, press the button again to stop the RCC 12/24 BUTTON: - In normal mode, press the button to switch 12/24 time display C/ F BUTTON: - In normal mode, press the button to switch temperature unit C/ 4 63 5 78910 Set + 12/24 Channel -/wave C/ F Reset8. Reset BUTTON: - In case of malfunction, press RESET button to reset all values to default WALL MOUNT10. BATTERY COMPARTMENT AND DOOR: - Use 2 AA size batteries. Remote Transmitter1. LED INDICATOR: - LED Flashes when the remote unit transmits a reading2. CHANNEL SLIDE SWITCH: - Assign the transmitter to channel 1, 2 or 33. RESET BUTTON: - Press it to restart the transmitter and return all values to default BATTERY COMPARTMENT: - Use 2 AA Size BATTERY DOOR6.
4 WALL MOUNT7. TABLE STANDSETTING UP THE TRANSMITTER:1. Remove the battery door and insert 2 AA batteries into the battery compartment and follow the polarities Slide the switch to Channel 1. Press the RESET button to set the Press the CHANNEL button at the back of the clock to set channel Lock the transmitter battery door with the Place the units away from metal objects and electrical appliances to minimize interference. Position the receiver within the effective transmission range 30 meters in usual If Channel 1 signal is not received properly, change the transmitter slide button to Channel 2 or 3. Press CHANNEL button of the clock to 2 or 3 respectively. Press and hold the CHANNEL button for three seconds. The unit will start to find the new :1. To receive the transmitter signal, the channels of receiver and transmitter must match each Once the channel is assigned to transmitter, you can only change it by removing the batteries or resetting the UP THE ATOMIC clock :1.
5 Remove the battery door from the back of the weather station and insert 2 AA batteries. Insert them according to the marked Replace the battery Press the RESET button on the back of the clock to set and synchronize the transmitter STRENGTH INDICATOR:The signal indicator displays signal strength in 4 levels. Wave segment flashing means time signals are being :1. The unit will automatically search for the time signal at 2:00 (3:00, 4:00, 5:00,6:00 is also available if the signal was not received at 2:00)2. Closed area such as airport, basement, tower block or factory is not recommended. SPC936 SUGGESTION:Make sure you read the Instructions before operating this clock . We have developed this sophisticated instrument for the best reception performance; however, the signal transmitted from USA Atomic clock transmitter will be affected incertain situations.
6 We advise you to note the following Instructions :1. It is strongly recommended to start this clock at night and let the clock receive the signal automatically past Always place the unit away from interfering sources such as TV set, computer, Avoid placing the unit on or next to metal Areas with access to windows is recommended for better Do not start reception in moving articles such as vehicles or trains. DAYLIGHT SAVING TIME (DST):The clock has programmed to automatically switch when the daylight saving time is in effect. Your clock will show DSTduring the summer time if you turn on the ZONE SETTING:The default time zone is PACIFIC. If your location is not in the Pacific, set the time zone by pressing -/wave button to change the Pacific Time/ Mountain Time/ Central Time/ Eastern Time zone in the normal time mode and will disappearafter AND CALENDAR SETTING:Time and calendar can be set manually.
7 As soon as the transmitter signal is received again, the clock will automaticallysynchronize with the exact time and Press and hold the SET button on the back of the clock for 3 seconds, the year digits will be Press the + button and -/wave button to change the Press the SET button once until the Month digit flashes, press the + button and -/wave button to change it's Press the SET button once until the Date digit flashes, Press the + button and -/wave button to change it's Repeat the above operation to set the below data in this sequence: Month>Date>Language>Hour>Minute> DST(on/off).6. Press the SET button to save and exit the setting mode; or let it exit automatically 20 seconds later without pressing any REPLACEMENT:If the low battery indicator appears beside the outdoor temperature of main unit, it indicates that the transmitter batteries need replacement.
8 If the low battery indicator is displayed at the top left corner, it indicates that the atomicclock batteries need :Attention! Please dispose of used unit or batteries in an ecologically safe WARNING:- Clean the battery contacts and also those of the device prior to battery installation. Follow the polarity (+) and (-) to place Do not mix old and new Do not mix Alkaline, Standard (Carbon - Zinc), or Rechargeable (Nickel - Cadmium) Incorrect battery placement will damage the clock movement and battery may Exhausted battery is to be removed from the Remove batteries from equipment which is not to be used for an extended period of Do not dispose of batteries in fire. Batteries may explode or THE WALL MOUNT:The receiver and transmitter both have the desktop and wall mounting For the Atomic clock , use the recessed hold on the back of the clock to hang For the Transmitter, hang or place the separate wall-mounting part in an area protected from direct rain.
9 Once the stand is mounted, place the transmitter into the stand on the :MAIN UNITR ecommended operating range: 0 C to 45 C, 32 F to 113 FResolution: C/ F(above 0 C/32 F), 1 C/ F(below 0 C/32 F) Humidity measuring range: 20% RH to 95%RH Recommended operating range: 20% RH to 95%RHResolution: 1%RHCalendar range: from year 2000 to 2099 Radio controlled signal: WWVB REMOTE TRANSMITTERR ecommended operating range: -50 C to 70 C, -122 F to 158 FResolution: C/ F(above 0 C/32 F), 1 C/ F(below 0 C/32 F) Humidity measuring range: 20% RH to 95%RHOperating range: 20% RH to 95%RHResolution: 1%RHRF transmission frequency: 433 MHzRemote transmitter: 1 unitRF transmission range: maximum 30 metersTemperature sensing cycle: around 30 secondsPOWERMain unit: 3V, use 2 x AA alkaline batteryRemote transmitter: 3V, use 2 x AA alkaline batteryDIMENSIONMain unit: 300(W) x 210(H) x (D)mm (W) x (H) x 1(D)inchRemote transmitter: 40(W) x 130(H) x 24(D)mm (W) x (H) x (D)inchFCC INFORMATION:This equipment has been tested and found to comply with the limits for a Class B digital device, pursuant to Part 15 of the FCC Rules.
10 These limits are designed to provide reasonable protection against harmful interference in a residentialinstallation. This equipment generates, uses, and can radiate radio frequency energy and, if not installed and used in accordance with the Instructions , may cause harmful interference to radio communications. However, there is no guarantee that interference will not occur in a particular installation. If this equipment does cause harmful interference to radio or television reception, which can be determined by turning the equipment off and on, the user is encouraged to try to correct the interference by one or more of the following measures:- Reorient or relocate the receiving Increase the separation between the equipment and Connect the equipment into an outlet on a circuit different from that to which the receiver is Consult the dealer or an experienced radio/TV technician for device complies with Part 15 of the FCC Rules.