Transcription of Introduction to Microsoft Office 2016: Word
1 Introduction to Microsoft Office 2016: Word Last Updated: September 2018 Cost: $ 2 Microsoft Word is a word processing software. You can use it to type letters, reports, and other documents. This class introduces users to Microsoft Word 2016. NOTE: Experienced users may benefit from this tutorial, as 2016 is different from previous versions. Opening Word 2016 First, we will need to open Word 2016. This can be done by double-clicking on the Word 2016 icon on the desktop or, In Windows 10, 1. Open the Start Menu. 2. Clicking All Apps. In Windows 7, 1. Click the Start Menu. 2. Click All Programs. 3. Choose Microsoft Office . 4. Click Word 2016. Understanding the Backstage All of Microsoft Office 2016 contains the Backstage area. The Backstage is where you manage, save, and open your files. Here you can also print, select templates, and complete other useful tasks. Let s take an in depth look at the Backstage.
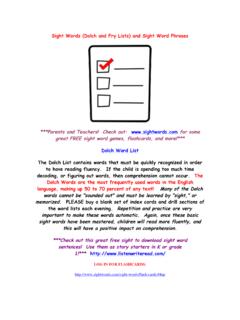
2 First, click your File tab (found at the top left corner of the window). Backstage The first page you see is the Info Page. Info displays your file s name, size, and authors. You can also see when the last AutoSave occurred. AutoSaves are Office s safety net. Periodically, your computer will automatically save your file as a temporary file. If you experience a computer shut down, you can recover some of your work from the AutoSaves. WARNING: Please do not rely on AutoSave. Save your work often! 3 New: You can create a new, blank document or select from Word s template library. Word provides resume, calendar, and flyer templates to help you get started. Open: Click this option to open a previously saved file and continue editing it. Save: Save your file frequently. You can also click the in the upper left corner. Or, press CTRL + S on your keyboard at the same time. Save As: The first time you save your file you will see the Save As menu.
3 See below for more information. Save as Adobe PDF: Lets you save the document as an Adobe PDF file. Print: Print your document using this screen. We will go into more details about this later in the class. Share: This is new to Office 2016. This allows you to email your file, upload it to a blog site or present your document online. You will need additional accounts to use these features, such as a Microsoft Account (to present) or a WordPress account (to blog). For this Introduction we will not cover these features in-depth, but be aware that these capabilities exist. Export: Allows you to export (or save) your document as a different document type. Account: Allows you to change the colors of your Office Background and sign in with a different Microsoft Account if needed. Options: Gives you access to the advanced features in Word. This feature also allows you to rearrange the ribbon or other settings in this application.
4 To return to the Word window, click the arrow at the top. Lesson 1: Creating New Documents Once you open Word 2016, you have actually started a new document. You will see a blank page and a blinking cursor. NOTE: Either before you start or shortly after, you should save your document. Saving a document frequently prevents a loss of file if your computer unexpectedly shuts down. At this point, you can start entering text. You may need several sessions in Word to complete final versions of lengthy or complex documents. 4 When you type text into a Word document, each character appears to the left of the blinking insertion point (the cursor) in the document window. The text you enter into a document can include letters, spaces, numbers, and symbols. As you type, the insertion point moves across the screen from right to left. NOW YOU TRY: Try typing: The quick brown fox jumps over the lazy dog. Lesson 2: Save As The Save As menu appears the first time you save your file.
5 You can also use the Save As menu to save different copies of the same file by giving each copy a slightly different file name. This can be done at any time. Example: and You can save your file before, during, or after you have finished your session. Let s save our file now so you can learn about the Saving screen. Open the Save As screen. Remember, you have to be in the backstage area. By default, you have two places that you can save your file: (1) directly on your computer, or (2) in a OneDrive Account. NOTE: The file paths are blocked out. 5 OneDrive Your OneDrive account is a cloud storage service where you can save your file on Microsoft s servers instead of your computer. This option allows you to access your files from any computer, anywhere that has Internet access. For this course we will not be going over OneDrive, only saving our file to the computer. For more information, including pricing, please visit Unless you want to use an OneDrive account, you will save most of your files onto a computer.
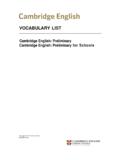
6 From the Save As screen: 1. Select This Computer. 2. Click Browse. The Browse button opens the Save As dialog box menu (see below). NOTE: A dialog box is a pop-up menu that displays additional options. You can also use the Save As dialog box to save different copies of the same file by giving each copy a slightly different file name. 6 1. File Name box Word will automatically insert a default filename when you first save a document. This default is always the first phrase in the document, but you have the ability to modify it. Word can handle filenames of up to 255 characters. These filenames can include uppercase and lowercase letters, numbers, and even spaces. However, they cannot contain the following symbols: < > : * | \ ? / 2. File Path At the top of the box, you can see the file path of the document. The File Path shows which folders the document is saved under. 3. File Location The default location where the document will be saved is My Documents.
7 To store the document in a different location (including flash drives), you can click on the folder or drive on the left side of the Save As dialog box. 4. Similar Files When you are saving a document, files of similar types will be displayed. For example, if you are saving a Word 2016 Document, you will see other Word 2016 (.docx) documents listed. 5. New Folder You might consider creating a new folder before saving your file. This step will help you organize and find them later. 6. File Type When you save a file, you can also change its format type. For example, you can save your file as a PDF (protected document format) or as a Word Document. Click the drop down box to save your preferred type. The file type is denoted by the file name s extension (.pdf, .doc, .docx, or .jpg). NOTE: You can also save files as older Word Documents (such as Word 2003). NOW YOU TRY: o Save your document to the Desktop.
8 O Change the name of your document. Use something simple, like the title of the document or your last name. o Make sure that the file type of the document is a Word Document. What happens when you exit out of Word before saving a document? If you click the X before you save, you will see the pop-up to the right. You have three options: 1. Save to open the Save as dialog box. 2. Don t Save to discard the document. 3. Cancel causes Word to return to the document. 7 Lesson 3: Opening Existing Documents Documents previously stored on your computer or OneDrive can be opened for revision. Choose Open from the backstage. If the file you that you want to open is on OneDrive, then select OneDrive to download and edit files stored in your OneDrive account (see page 5 for more information). Notice that recently saved documents are listed on the right side. You can open these by clicking on the folder or file name.
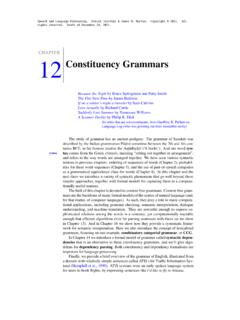
9 If you don t see the file that you need, choose Browse. This will cause the Open dialog box to pop up. It is very similar to the Save As dialog box. Use this tool to search for and open your file. 8 Open Dialog Box If you see your file in the current location, select it and click Open (4). A file saved in a specific folder is opened by double-clicking the folder to view the files in the folder (2). For a file saved on a flash drive, select the flash drive on the left (1) to view folders and files on it. If you do not remember where you saved the file, you can type the file name in the Search Box (3) and click the magnifying glass symbol to search for it. NOTE: Search will only look through one drive at a time. To search your flash drive, you need to click the icon located on the left side NOW YOU TRY: Opening a file o Click on the File tab in the upper-left corner. o Click Open. o Find the file that you saved in the last lesson and open it.
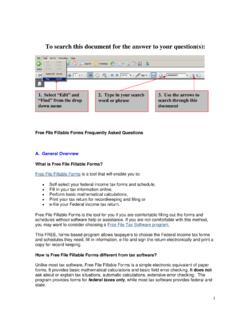
10 Lesson 4: Print Preview You can preview your document before you print it. This ensures the document will have your preferred look/layout. To access the print preview: 1. Click the File tab. 2. Click Print. 9 The Print Preview in Word 2016 is automatically displayed with the print menu. To return to the Word window without printing, click the arrow at the top-left corner. Lesson 5: Printing After you create a new document, you can print it. You do not have to save the document beforehand. Click the File tab and click Print. It s the same menu from the previous lesson. You can use this menu to adjust your current print settings. For example, you can specify how many copies you need or the portion of the document you would like to print ( single page or paragraph). Before we go any further, let s look at other Printing Options including selecting a range (set of pages you want to print) and choosing a printer.