Transcription of LabelManager 420P - DYMO
1 User Guide LabelManager . 420P. Copyright 2015 Newell Rubbermaid Europe, LLC. All rights reserved. Rev. 3/18. No part of this document may be reproduced or transmitted in any form or by any means or translated into another language without the prior written consent of Newell Rubbermaid Europe, LLC. Trademarks DYMO, DYMO Label, and LabelManager are registered marks in the US and other countries. All other trademarks are the property of their respective holders. FCC Statement Caution: The user is cautioned that changes or modifications not expressly approved by the party responsible for compliance could void the user's authority to operate the equipment. Note: This equipment has been tested and found to comply with the limits for a Class B digital device, pursuant to part 15 of the FCC Rules. These limits are designed to provide reasonable protection against harmful interference in a residential installation.
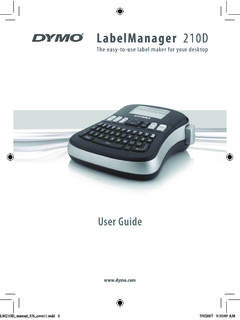
2 This equipment generates, uses and can radiate radio frequency energy and, if not installed and used in accordance with the instructions, may cause harmful interference to radio communications. However, there is no guarantee that interference will not occur in a particular installation. If this equipment does cause harmful interference to radio or television reception, which can be determined by turning the equipment off and on, the user is encouraged to try to correct the interference by one or more of the following measures: Reorient or relocate the receiving antenna. Increase the separation between the equipment and receiver. Connect the equipment into an outlet on a circuit different from that to which the receiver is connected. Consult the dealer or an experienced radio/TV technician for help. 17 18 19 20 21 22. 16 1. 15 2. 14 3. Insert 13 4. 5.. , - +. Shift 6. %. 7. 12. 8. 11 10 9. Figure 1 DYMO LabelManager 420P label maker 1 Print 9 Accented characters 17 Format 2 Preview 10 Space bar 18 LCD display 3 Save 11 Caps 19 Cancel 4 Settings 12 Numeric keys 20 Navigation 5 Symbols 13 Insert 21 OK.
3 6 Shift 14 Font Size 22 Open 7 Backspace 15 New label/Clear 8 Return 16 On/Off Contents About Your New Label Maker .. 4. Product Registration .. 4. Getting Started .. 4. Connecting the Power .. 4. Inserting the Battery.. 4. Recharging the Battery .. 4. Inserting the Label Cassette .. 4. Using the Label Maker for the First Time .. 4. Getting to Know the Label Maker .. 5. Power .. 5. LCD Display .. 5. Format .. 5. Font Size .. 5. Insert .. 5. Settings .. 5. CAPS Mode .. 5. Shift .. 5. Backspace .. 5. New Label/Clear .. 5. Navigation Keys .. 5. Cancel .. 5. Preview .. 5. Formatting Your Label .. 6. Font Type .. 6. Font Size .. 6. Font Styles .. 6. Adding Borders .. 7. Using Mirror Text .. 7. Vertical Text .. 7. Aligning the Text .. 7. Creating Fixed-Length Labels .. 7. Creating Multi-Line Labels .. 7. Using Clip Art, Symbols, and Special Characters .. 8. Adding Clip Art .. 8. Adding Symbols .. 8. Adding International Characters.
4 9. Using the Date/Time Stamp .. 9. Setting the Date and Time .. 9. Setting the Date and Time Format .. 9. Adding the Date and Time .. 9. Using Auto-Numbering .. 9. Adding Auto-Numbering .. 9. Deleting Auto-Numbering .. 9. Using Barcodes .. 9. Adding a Barcode .. 9. Editing a Barcode .. 10. Deleting a Barcode .. 10. Using the Label Maker Memory .. 10. Saving a Label .. 10. Opening Saved Labels .. 10. Inserting Saved Text .. 10. Caring for Your Label Maker .. 10. Using Your Label Maker with Your Computer .. 10. Connecting the Label Maker to your Computer .. 10. About the Built-In Software .. 11. About the DYMO Label Software .. 11. Label Maker Status .. 11. Troubleshooting .. 12. Documentation Feedback .. 12. Environmental Information .. 12. 3. About Your New Label Maker Inserting the Label Cassette With the DYMO LabelManager 420P electronic label Your label maker uses DYMO D1 label cassettes. Visit maker, you can create a wide variety of high-quality, self- for information about purchasing adhesive labels.
5 You can choose to print your labels in additional label cassettes. many different fonts, font sizes, and styles. The label maker To insert the label cassette uses DYMO D1 label cassettes in widths of 1/4 (6 mm), 1 Lift the label cassette cover to open the label 3/8 (9 mm), 1/2 (12 mm), or 3/4" (19 mm). These label compartment. See Figure 3. cassettes are available in a wide range of colors. Visit for information on obtaining labels and accessories for your label maker. Product Registration Visit to register your label maker online. Figure 3. 2 Make sure the tape and ribbon are taut across the Getting Started mouth of the cassette and that the tape passes Follow the instructions in this section to print your first label. between the label guides. See Figure 4. Connecting the Power If necessary, turn the ribbon rewind spool clockwise to The label maker is powered by a rechargeable, Lithium- tighten the ribbon.
6 Ion battery pack. To save power, the label maker automatically turns off after ten minutes of inactivity. Ribbon rewind Inserting the Battery spool The battery pack included with your label maker comes partially charged. To insert the battery Label 1 Slide the battery compartment cover away from the guides Figure 4. label maker. See Figure 2. 3 Insert the cassette and press firmly until the cassette clicks into place. See Figure 5. Figure 2. 2 Insert the battery pack into the battery compartment. Figure 5. 3 Replace the battery compartment cover. 4 Close the label cassette cover. ! Remove the battery pack if the label maker will not be used for a long period of time. Using the Label Maker for the First Time Recharging the Battery The first time you turn on the power, you are asked to select A charging adapter is included with your label maker for the language and label width. These selections remain set recharging the battery pack.
7 Use only the charging until you change them. adapter that came with the label maker. You can change these selections using the key. ! The charging adapter is only used for recharging the To set up the label maker battery pack; the charging adapter cannot be used to 1 Press to turn on the power. power the label maker. 2 Select the language and press . To recharge the battery 3 Select the width of the label cassette currently in the 1 Plug the charging adapter into the power connector on label maker and press . the top of the label maker. You are now ready to print your first label. 2 Plug the other end of the charging adapter into a power outlet. 4. To print a label Font Size 1 Enter text to create a simple label. Split The key displays the Font Size menu. This formatting backing feature is described later in this User Guide. 2 Press . 3 Press the cutter button to cut the label. 4 Remove the paper backing from the Figure 6.
8 Label to expose the adhesive, and then attach the label. Getting to Know the Label Maker Insert Become familiar with the location of the feature and function keys on your label maker. Refer to Figure 1. The The key allows you to insert symbols, clip art, Insert following sections describe each feature in detail. barcodes, auto-numbering, the date and time, or saved text on your label. These features are described later in Power this User Guide. The button turns the power on and off. After ten Settings minutes of inactivity, the power is switched off automatically. When the printer turns off, the last label The key displays the language, label width, and date/. created is remembered and displayed when the power is time submenus. turned back on. The previously selected style settings are CAPS Mode also restored. The key toggles capitalization on or off. When Caps LCD Display mode is on, the Uppercase indicator is shown on the The display can show four lines of text at a time.
9 The display and all letters that you enter are capitalized. When number of characters displayed on each line will vary due to Caps mode is off, all letters appear in lowercase. The proportional spacing. default setting is Caps mode on. With DYMO's exclusive graphical display, most of the Shift formatting you add is visible instantly. The key is used to select a symbol printed on a numeric Shift key. For example, when you press , the number 8. 1. appears in the display; however, if you press and then Shift 2 13. , an apostrophe ( ) appears in the display. 12. You can also use the key to toggle Caps mode on or off Shift 11 for a single alpha character. 10 Backspace 3. 9. The key removes the character to the left of the cursor. You can also use the key to exit from a menu without 4 5 6 7 8 making a selection. New Label/Clear Feature indicators along the top and right of the LCD. display appear black to let you know when a feature The key gives you a choice to clear all label text, just the is selected.
10 Text formatting, or both. 1 Font 8 Barcode Navigation Keys 2 Font size 9 Accented character You can review and edit your label using the left, right, up 3 Edit area 10 Shift and down navigation keys. You can also navigate through 4 Mirror text 11 Uppercase menu selections using the navigation keys, and then press 5 Vertical text 12 Battery to make a selection. 6 Text alignment 13 Fixed label length Cancel 7 Auto-numbering The key allows you to exit from a menu without making Format a selection or to cancel an action. The key displays the Font, Font Size, Style, Borders, Preview Mirror, Vertical, Alignment, and Label Length The key displays a preview of your label layout. The submenus. These formatting features are described preview shows how the text will print on the label. later in this User Guide. 5. Formatting Your Label The font sizes available depend on the label width you have selected. The font size applies to all characters on a label.