Transcription of Ltl-6210M Manual new shell - Z-aim AB
1 - 0 - Ltl Acorn MMS Wireless Scouting camera Ltl- 6210m HD Video Series USER S Manual - 1 - TABLE OF CONTENTS General Information .. 2 Features .. 2 Application .. 2 Illustration .. 3 Getting Start .. 6 Insert SIM Card .. 6 Load Batteries on the Front camera .. 6 Insert SD Card and Format It .. 6 Set up camera on PC .. 7 Set up MMS Function on PC .. 9 View Local MNOP Name and Signal Strength on TFT 11 camera Working with MMS .. 13 Enter Test Mode .. 13 Enter Live Mode .. 13 Advantages of Prep Sensors .. 14 Advanced Settings .. 15 Parameter 15 Set up MMS on camera .. 18 File Format .. 20 Ltl- 6210m Series Products .. 21 21 Models for 21 Important Information .. 22 Power Supply.
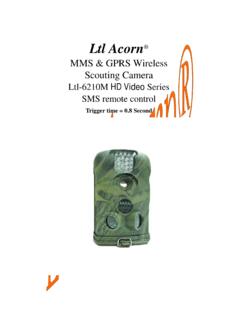
2 22 SD 22 Auto Adjustment on Video Length .. 22 850nm and 940nm IR LED .. 22 Mount on Tripod .. 23 FAQs on MMS 23 Battery Level 24 Firmware Upgrades .. 24 Firmware 24 Warranty Information .. 25 Appendix I Technical 26 Appendix II Package Contents .. 28 - 2 - GENERAL INFORMATION Introduction The Ltl Acorn Ltl- 6210m is a step-up to Ltl-5210M. It provides enhanced features and better performances. Bundled with the MMS-module (Multimedia Messaging Service) (Part # LTL-MM2), the standard scouting camera (Part # Ltl-6210MC) can be upgraded to work as a remote cellular camera . With its highly sensitive Passive Infra-Red (PIR) sensor, the camera detects the sudden change of ambient temperature caused by moving game in a region of interest (ROI), triggers to take pictures/videos, and sends the images via GSM network to the user s cell phone or email account.
3 Features: 5M/12M/2M pixel high-quality resolution. 1440 x 1080 / 1280 x 720 / 640x480 format HD video with audio Infrared night vision LEDs 850nm for flash range as far as 75 feet (25m) (No-glow model 940nm has 39 feet (13m) flash range) Cam + Video mode enables camera to take both picture and video at every trigger event Continuous shooting interval time about or seconds (stamp off or On) Extremely long in-field life (in standby mode, up to 6 months with 12 x AA batteries) Unique side Prep Sensor design provides wider sensing angle and enhances camera s response speed Perform in the most extreme temperatures from -22 F (-30 C) to 158 F (70 C) Compact size (5 x 3 x 3 inches).
4 Well designed to deploy covertly Impressively quick trigger time ( second) Programmable to work as Time-Lapse camera taking pictures/videos in long range day and night When Timer setting on, programmable to only work in specified period every day. This feature can be used together with Time Lapse feature to meet your timetable In camera s bottom cover built-in TFT color display to review images and videos. Date, time, temperature, moon phase and battery level can be stamped on picture Lockable and password protected Send 640 x 480 resolution MMS image Setup is a snap by running the user-friendly software on the enclosed CD on the computer, or directly on the built-in TFT display. Can change several language of the menu through setting country in MMS menu or in PC Setup Separation of the camera and the MMS module provides users flexibility: starting with the value models a standard scouting camera , and upgrading to the premium model with MMS function.
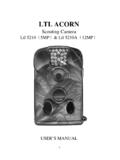
5 - 3 - SD card can be set in Cycling Save mode, which automatically deletes the earliest photos or videos and makes room for new ones. Advanced Remote Cellular Technology transmits images to your cell phone and/or email account constantly at lower battery consumption and shorter transmission time, compared to products of its kind on the market. Text alert when battery power level goes low Check cellular signal reception on the built-in TFT display on the field Internal antenna design. External antenna is available when using security box. Operates globally via GSM/GPRS network. Supports four bands: 850 / 900 / 1800 / 1900 MHz. Application trail camera for hunting Animal or event observation Motion-triggered security camera , for home, office and community All other indoor/outdoor surveillance where intrusion evidence and live alert needed Illustration Figure shows the front view of the camera (Part # Ltl- 6210m ) Figure shows the bottom view of the camera (Part # Ltl- 6210m ) Figure shows the back view of the camera (Part # Ltl- 6210m ) - 4 - Figure : Front View of Ltl- 6210m Figure : Bottom View of Ltl- 6210m The camera provides the following connections for external devices: USB port, SD card slot, TV out jack, and external DC power in jack.
6 The 3-way Power/Mode Switch is used to select the main operation modes: OFF, ON and TEST. - 5 - To power up the camera , install four NEW high-performance alkaline or lithium AA batteries in the camera . FOR BETTER PERFORMANCE, WE RECOMMEND USING ENERGIZER LITHIUM AA BATTERIES. To achieve longer in-field life, always install 12 AA batteries. Figure : Back View of Ltl- 6210m CAUTION: If you are not using the camera for an extended period of time, it is highly recommended that you remove the batteries from the camera to avoid possible acid leak that may damage the camera which would void the warranty. - 6 - GETTING START Insert SIM Card (Only for Model Ltl-6210MM) A SIM card is needed from a Mobile Phone Network Operator (MPNO).
7 Make sure they provide Multimedia Messaging Service (MMS). Insert the SIM card into the slot at the bottom of the camera . Push once to insert, twice to get out. Figure 2-1 MMS-module - 7 - Load Batteries on the Front camera Open the bottom cover by pulling down the lock hole. Push or dig two battery boxes and release the battery door. Install 4 AA batteries in front of camera and 8 AA batteries in back of camera . Make sure the polarity matches the sign on the cover. Push to close the door. Alternatively the camera can run on an external 6V~12V DC power source (optional). When both external power and batteries are connected, the camera will be powered by the external one preferentially.
8 Hooked up with Ltl-SUN Solar Power Panel (purchased separately), the camera can work in the field over one year without changing batteries. When battery level gets low, the Motion Indicator in the LED array will flash blue. The MMS Wireless camera will automatically send a Battery Low text alert to the user s cell phone or email account. Meanwhile, the battery level will be shown as Code B1/B2/B3 on the received MMS pictures. B3 stands for high level and B1 indicates the level is low and you need to change the batteries soon. Insert SD Card and Format It The camera does not come with internal memory. It will not work without a SD (Secure Digital) memory card or SDHC (High Capacity) card.
9 Before inserting the SD card into the card slot, please make sure the write-protect switch on the side of the SD card is off (NOT in the Lock position). The supported memory capacity is up to 32GB. If you use a card capable of above 32GB, make sure you test it before putting the camera in use. Figure 2-2 Always format the SD card on the camera when use it first time. Switch to the TEST position to enter the Test mode. Press MENU button to access the main menu. Scroll down to Format. Press OK to format the SD card. - 8 - Set up camera on PC After formatting it, pull the SD card out from the camera and insert it in your computer. If your computer is too old to read the SD card, you need to purchase an SD card reader.
10 Of course ,you can use the camera 's USB port connected to PC directly. Find the enclosed compact CD from the package box and put it on the CD tray. Run the file. You can also visit the national distributor s website to download the latest version of the program, or download from The following window prompts: Select your language and the correct model from the drop-down list. Click on camera Setup, and you will see the following menu: - 9 - Set up the camera based on your own need. Please reference to Parameter Settings in Advanced Settings section to find detailed explanations of each setting. Click on to retrieve the computer time. Click on to find and choose the drive where the SD card is placed, usually a letter after E:\.