Transcription of LW 4XL User Guide - DYMO
1 User Guide Copyright 2008 Sanford, All rights reserved. Version Revised 7/08. No part of this document or the software may be reproduced or transmitted in any form or by any means or translated into another language without the prior written consent of Sanford, Trademarks DYMO and LabelWriter are registered trademarks of Sanford, All other trademarks are the property of their respective holders. Contents About the LabelWriter 4XL Printer .. 1. Printer Features .. 1. System Requirements.. 1. About Labels .. 3. Loading Labels.. 4. Ordering Labels .. 5. Caring for Your Printer.
2 7. Getting Help .. 9. Troubleshooting .. 9. Status Light.. 9. Performing a Printer Self-Test .. 9. Clearing Label Jams .. 9. Correcting Poor Print Quality.. 10. Labels Do Not Feed Correctly .. 10. Printer Does Not Print or Stops Printing .. 10. Limited Warranty.. 11. Obtaining Technical Support .. 11. Returning Your Printer for Repair .. 12. Technical and Environmental Information .. 13. Technical Specifications .. 13. Declaration of Conformity .. 14. Device Certification .. 14. Documentation Feedback.. 15. iii iv Chapter 1. About the LabelWriter 4XL Printer Congratulations on purchasing a DYMO LabelWriter label printer.
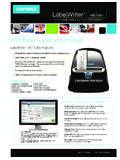
3 Your LabelWriter printer will give you years of reliable label printing. We encourage you to take a few minutes to review how to use and care for your printer. Using the standard Windows and Mac OS printer drivers, you can print shipping labels with Endicia software, print from standard Windows or Mac applications, or even integrate label printing into your own custom applications. We have no doubt that the LabelWriter 4XL printer will make your job easier and more efficient. Printer Features Your LabelWriter printer is a direct thermal printer and does not use ink or toner.
4 Instead, the printer uses heat from a thermal print head to print on specially treated, heat-sensitive labels. Labels are the only supplies you will ever need to buy. Become familiar with the major components of the printer. Top cover USB Label roll connector DC power connector Platen release Label exit slot and tear bar Label spool Form-feed Cable button and Label eject channel status light button The form-feed button on the front of the printer advances a single label. The label eject button is used to remove labels from the printer when changing rolls. The status light visually shows the current state of the printer: Solid blue - power is on and the printer is ready.
5 Flashing blue - labels are not loaded properly or the label roll is empty. System Requirements The LabelWriter printer requires a USB or USB connection and one of the following: Windows XP 32-bit Windows Vista 32 or 64-bit Mac OS or later 1. About the LabelWriter 4XL Printer 2. Chapter 2. About Labels DYMO LabelWriter printers use advanced thermal printing technology to print on specially treated, heat-sensitive labels. This means you will never have to replace toner, ink cartridges, or a ribbon to print labels. Note DYMO's warranty does not cover malfunction or damage that may be caused by the use of labels other than DYMO-branded labels.
6 Because DYMO LabelWriter printers use thermal printing technology, you must use specially designed and manufactured labels. The thermal coatings used on labels other than DYMO-branded labels may not be compatible, and may provide unsatisfactory printing or cause the printer to malfunction. How long your labels will last depends on how the labels are used. Thermal paper labels, such as those printed by the LabelWriter printer, are susceptible to fading in two ways: Exposure to direct sunlight, to fluorescent light for an extended period of time, or to extreme heat will cause fading.
7 Contact with plasticizers (for example, labels placed on plastic ring binders) will cause fading. In the original packaging , the shelf life for LabelWriter labels is 18 months. When labels are used for short-term applications (envelopes, packages, and so on), fading is not a problem. When labels are used to label files in a file cabinet, fading is very gradual over many years. Labels applied to the edge of a notebook that is then placed on a shelf in the sun will show signs of fading within a few months. To prolong label life when labels are not in use, store the labels in a cool, dry place and in the black bag in which they were originally packaged.
8 3. About Labels Loading Labels Each label roll comes in a black plastic bag. Make sure to store the label roll in this bag when the labels are not being used. Important! In order for the labels to feed properly during printing, pay attention to the following when loading labels on the spool and into the printer: The label spool Guide must be pushed flush against the label roll, with no gap. See Figure 2. The labels must be loaded with the left edge of the label inserted against the left edge of the label feed slot. See Figure 4. To load a label roll Spool Spool spindle Guide 1 With the printer plugged in, press the form-feed button to eject the labels that protected the printer during shipment.
9 2 Open the top cover and remove any packing material inside the label compartment. 3 Remove the label spool from inside the cover and separate Figure 1. the spool Guide from the spindle. 4 Hold the spool spindle in your left hand and place the label roll on the spindle so that the labels feed from underneath and the left edge of the label roll is firmly against the side of the spool. See Figure 1. 5 Slide the spool Guide onto the right side of the spool and press the Guide tightly against the side of the label roll, leaving no gap between the roll and the spool.
10 See Figure 2. Figure 2. Note To ensure proper feeding of labels during printing, the label roll must fit snugly against both sides of the label spool, with no gaps. 6 Insert the label spool into the slot in the printer cover with the labels extending from underneath the roll. See Figure 3. 7 Align the left edge of the label with the left edge of the label feed slot and insert the label into the slot. See Figure 4. Figure 3. The printer feeds the labels, stopping at the beginning of Align label with left the first label. If the printer does not feed the labels, make edge of label path sure the first label is fully inserted and then press the form-feed button.