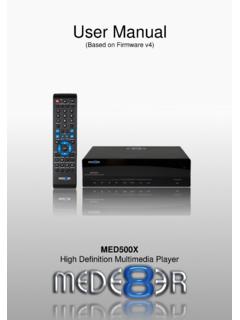
Transcription of MED500X2 High Definition Multimedia Player - …
1 High Definition Multimedia PlayerMED500X2 Quick Start Guide TMPage1 INDEX page 1page 2page 3page 4page 5page 6page 7page 8page 9page10page11page12page13page14page15pag e16page17page18page19page20page21page22p age23page24page25page26page27page28page2 9page30 IndexIntroduction General OverviewInstalling a Hard DriveConnectionsConnections continuedTV Output SettingsFormatting the Hard DriveRemote FunctionalityHome Network Samba ServerWired Network Connection and SetupWireless Network Setup / Firmware Update / Web BrowserHome Page Home Page StripMedia LibraryMedia Library ContinuedMedia Library Metadata DisplayMedia Library Music PlayerCover Art Preview in Media LibraryPlay Folder / Play from Cover Art / Watched IndicatorMedia ScannerFolder Lock/ System LockVideo Play Info Search / GOTOS creen Calibration / Video Zoom SubtitlesFile Manger File Manager ContinuedPicture View Media LibraryPlasma Mode / Autoplay / Internet Streams / Web BrowserNFS Setup Thank you for purchasing the Mede8er Multimedia products carry a 24 month from date of purchase warranty.
2 In the event of warranty service please provide proof of purchase. Return your product to the store that it was purchased from or return it directly to Sanji Electronics (Pty) Ltd 106, 16th Rd Midrand, Gauteng, South Africa. Warranty does not cover damage bya) Lightning or over voltageb) Water damage or liquid spillc) Misuse or abused) User tamperinge) Using non Mede8er approved FirmwareSanji Electronics is not responsible for any loss of data irrespective of the Safety Instructions Read these instructions for all components before using this product. Do not use this apparatus near water or moisture. Do not use this product near a bathtub, washbowl, kitchen sink, laundry tub, in a wet basement, near a swimming pool, or anywhere else that water or moisture are present. Clean only with a soft dry cloth and as directed by the manufacturer. Unplug this product from the wall outlet before cleaning. Do not block any ventilation openings.
3 Install in accordance with the manufacturer instructions. To ensure reliable operation of the product and to protect it from overheating, put the product in a position and location that will not interfere with its proper ventilation. For example, do not place the product on a bed, sofa, or similar surface that may block the ventilation openings. Do not put it in a built-in system, such as a bookcase or a cabinet that may keep air from flowing through its ventilation openings. Do not install near any heat sources, such as radiators, heat registers, stoves or other apparatus that produce heat. Protect the power cord from being walked on or pinched, particularly at plugs, convenience receptacles, and the point where they exit from the apparatus. Only use attachments or accessories specified by the manufacturer. Unplug this apparatus during lightning storms or when unused for long periods of time to prevent damage to this product.
4 Refer all servicing to qualified service personnelThe MED500X2 is the latest generation Multimedia Player specially developed by Sanji for today s demanding media enthusiast. The Mede8er has some very unique features so we suggest you read this guide and visit the Mede8er forum for additional help and information. The firmware is always work in progress so we suggest you regularly check the Mede8er forum for updated firmware releases and updated User check the Mede8er forum for the latest user guide. Page2 UpDownLeftRightEnterReturnStopOn/OffTV OutGENERAL OVERVIEWC omponent Video OutDC - 12 Volt 2 Amp inputRJ45 - Lan connectorCoax Digital Audio OutOptical Audio OutCooling FanComposite Video OutAnalogue Audio OutLRSD Card USB HostUSB SlaveStatus LedUSB Host PortHDMI connectorPCIe WiFi AntennaPCIe WiFi Antenna**PCIe WiFi Module Plus Antenna Under DevelopmentPage3 INSTALLING A HARD DRIVEa)b)c)Make sure that the DC cable is unplugged.
5 Cover screws x and y. Lift the hard drive cover and remove it, place it on a flat surface with the mounting tabs facing upright. Fit a compatible SATA hard drive into place with the label facing upwards and the connectors facing the side with the air vents. Secure the hard drive with the four screws the hard drive power connector and the red SATA data connector from the Player to the hard drive diagram c. Re fit the hard drive cover into the Mede8er body and tighten the two securing screws x and y. To reduce hard drive vibration noise you can use optional Neoprene pads. Just peel of the adhesive side and stick onto the base as indicated in diagram d. Turn the Mede8er upside down and unscrew the hard drive d)Lift cover fromthis sidePage4 CONNECTIONSA nalogue Audio and Composite Video connection to Video offers the most basic picture quality connection and should only be used if your TV does not have a HDMI or Component input.
6 Use RCA analogue audio outputs in the absence of HDMI or Digital Audio inputs on your TV or Home Theatre system. RCA analogue outputs will output a downmix from mutli-channel to stereo. AUDIO INLRVIDEO INHDMICoax DigitalConnect LAN cable to router or switchOptical DigitalHDMI - RJ45 Network - Coax Digital - Toslink Connection to a TV or AmplifierFor digital audio connection to your Home Theatre System you can either use the TOSLINK Optical or the Co-Ax Digital output. The MED500X2 supports both Passthrough and Downmix for both Dolby Digital and DTS signals. If you want your Home Theatre Amplifier to decode the surround sound stream you should use either Digital Audio output and set the Audio Output to SPDIF Passthrough in the Setup menu. Page5 Component Video Connection to Amp or TVComponent Video offers the next best picture quality to HDMI so if your system does not have a HDMI input we suggest you use the Component Video Connection.
7 Power up and StandbyPlug the AC/DC adapter into the mains outlet and plug the DC Jack into the DC IN at the rear of the MED500X2 . DO NOT USE ANY AC/DC ADAPTER AND ONLY USE THE ONE SUPPLIED otherwise you may cause damage to the unit. Press the On/ Off button on the Mede8ers front panel and front facia LED will turn on Blue. You can put your Mede8er into standby by pressing the On/ Off button on the remote. When in standby the front facia LED will turn Red. PrPbYMulti Voltage AC/DC Power Adapter Page6TV OUTPUT SETTINGSC onnect the Mede8er to your TV by one of the connection options as shown on page 6 & 7 and change the input option on your TV to match the option you selected. If you do not get to see the Mede8er GUI on your TV you will need to toggle the Mede8er TV output until you get a SYS Toggle ProcedureThe Mede8er has three video output options ie Composite Video (yellow RCA connectors, Component Video (Red - Green- Blue connectors) and HDMI.)
8 Each output option also offers different screen resolution settings and these will need to be adjusted to match the type of TV used. To change the Video Output on the Mede8er just press the TV SYS button on the remote and it will change the Video Output to the next available output option. If after pressing the TV SYS button you still do not get a picture then after a short pause press the TV SYS again until you see the Mede8er GUI on your TV. Keep repeating this procedure until you see a picture on your TV. AUDIO SETTINGSS urround Sound Select Don t Care if you are using 2 CH stereo. If you are using SPDIF or Co-Axial Digital then select AC3". If you are using HDMI Audio to amplifier then select True HD HDMI Downmix (2 channel)Use this setting if you are connecting the Mede8er directly to the HDMI input on your TV. The sound will be downmixed to 2 channel stereo. HDMI PassthroughUse this setting if you are connecting to the HDMI input of a Home Theatre Amplifier.
9 The audio will be passed through as Bitstream or LPCM and the amplifier will do the multichannel decoding. SPDIF Downmix (2 channel)Use this setting to connect to a Amplifier via Toslink optical cable or Co-Axial Digital RCA cable. The sound will be downmixed to 2 channel stereo. SPDIF Passthrough Use this setting to connect to amplifier via Toslink optical cable or Co-Axial Digital RCA cable. The sound will be passed through as Bitstream or LPCM and the amplifier will do the multichannel you see the Mede8er GUI on your TV then you must enter the Video Setup mode and adjust the Video settings to match the screen size resolution of your THE HARD DRIVEThe MED500X2 has a built in Hard Drive format feature that formats the hard drive with a main NTFS partition and other small internal partitions for propriety use. The Hard Drive should be formatted in the Mede8er MED500X2 to ensure full functionality. A pre formatted Hard Drive can be used but you may not be able to use all the internal features of the MED500X2 .
10 To Format the internal Hard Drive select SETUP menu and then HDD Format. The Hard Drive format function can be protected by the built in Pin Code Lock function. To enable Hard Drive Format protection just enable Pin Protection option in the Setup menu. WARNING: FORMATTING THE HARD DRIVE WILL ERASE ALL DATA Formatting ..USB CONNECTION TO PCYou can transfer files to and from the Mede8er via fast or transfer. Use the included Blue USB cable to connect the Mede8er MED500X2 to your PC. After you have connected the USB cable press the on/off button on the MED500X2 front panel and the LED will go off . The Mede8er drive Dialogue Screen will open on your PC. The Computer will automatically install the correct drivers and then you will be able to navigate the Mede8er like any normal external USB drive. Note: Some Computers may take up to a few minutes to install the correct USB drivers. If you cannot connect to the Mede8er than try another USB Port on your USB DEVICE DRIVER NOT REQUIRED Page8 REMOTE FUNCTIONALITYA udio SelectionSubtitleSetup Return Goto Numbers Info Screen / Movie Sheet ( ) Zoom Audio MuteOn / Off TV System Fast Forward / RewindHome PageDVD AngleZoom Play / PauseSkip Forward/BackMedia Library ShortcutSlowVolume DownVolume UpFast ForwardFast RewindPause / Play Navigation Buttons Additional FunctionalityTo assist ease of use operation - The Mede8er remote has been designed to be ergonomic and simple to use.
![Untitled-1 [www.mede8er.com]](/cache/preview/a/9/9/e/2/9/0/6/thumb-a99e2906a8d94f06ae021807476212dd.jpg)