Transcription of Merkur Displacement Pump - Graco
1 repair /PartsMerkur Displacement Pump312792 HENFor use with high-performance finishing and coating pumps in hazardous and non-hazardous locations. For professional use page 3 for model information, including maximum working Safety InstructionsRead all warnings and instructions in this manual. For complete warnings and instructions see your pump or package manual. Hazard symbols refer to specific procedure risks. Save all Manuals 2312792 HContentsRelated Manuals .. 2 Models .. 3 Component Identification .. 4 repair .. 5 General Information .. 5 Preparation .. 5 Disassembly .. 5 Reassembly .. 6 Parts .. 9 Standard repair Kits .. 11 Optional Kits .. 11 Dimensions .. 12 Technical Data .. 13 Graco Standard Warranty .. 14 Graco Information .. 14 Related ManualsManualDescription312796 NXT Air Motor312794 Merkur Pump Assembly312797 Merkur Spray Packages, ambient, AA and Airless312798 Merkur Electrostatic Spray Packages313255 Merkur Heated Spray PackagesModels312792H3 ModelsCheck your Displacement pump s identification marking for the 6-digit part number.
2 Use the following matrix to define the construction of your displace-ment pump. For example, Displacement pump model LW025A represents a wet-cup style stainless steel Displacement pump, 25 cc, with a Chromex coated rod and 3 UHMWPE, 2 PTFE order replacement parts, see Parts section starting on page 9. The digits in the matrix do not correspond to the reference numbers in the Parts drawings and lists.* Cycle refers to combination of one upstroke and one DigitSecond Digit(Description)Third, Fourth, and Fifth Digits ( Displacement Pump Volume Per Cycle* in cc)Sixth Digit(Packings; Displacement Rod Coating)L(Lower)WWet-cup style, stainless steel025A3 UHMWPE, 2 PTFE; Chromex 050075100125150 Model, SeriesMaximum Working Pressurepsi (MPa, bar)Fluid InletFluid OutletLW025A, Series A3000 ( , 207)1/2 in. npt3/8 in. nptLW050A, Series A4500 ( , 310)3/4 in. npt3/8 in. nptLW075A, Series A4800 ( , 331)3/4 in. npt3/8 in. nptLW100A, Series A3600 ( , 248)3/4 in. npt3/8 in. nptLW125A, Series A2900 ( , 200)1 in.
3 Npt1/2 in. nptLW150A, Series A2400 ( , 165)1 in. npt3/4 in. nptComponent Identification 4312792 HComponent IdentificationKey:APiston/Rod AssemblyBWet CupCFluid OutletDFluid InletELower CylinderFUpper CylinderGIntake ValveFIG. 1. Component IdentificationABDEGFti11645aCRepair31279 2H5 RepairGeneral InformationPreparationFollow all warnings and instructions in your pump man-ual for the following preliminary steps:1. Flush the Relieve the Remove the Displacement pump from the pump assembly. DisassemblyLay out all removed parts in sequence to easereassembly. Clean all parts with a compatible solvent and inspect them for wear or Place cylinder (1) sideways in a vise with soft Use an adjustable wrench on hex of intake housing (23) to unscrew it from the lower cylinder (2). Loosen vice briefly and tip out the ball (24 ).3. Remove the seat (22 ) and use an o-ring pick to remove the seal (26 ) from the intake housing. See FIG. Use an adjustable wrench on hex of lower cylinder (2) to remove it from the upper cylinder (1) and slide it straight off the pump.
4 Be careful not to damage the piston/rod assembly (3).5. Remove the o-ring (21* ) from the top of the lower Loosen the wet cup (5).7. Pull the piston/rod assembly out the bottom of the upper cylinder. Remove the spring (10*), piston packings (12* and 13*) and glands (11* and 14*). 8. Remove the wet cup (5).9. Remove the throat packings (7*, 8*) and glands (6*, 9*) from the bottom of the wet Remove the spring (4*) from the top of the upper cylinder (1). NOTICER eference numbers and letters in parentheses in the text refer to the callouts in the figures and the parts use Genuine Graco Parts and Accessories, available from your Graco distributor. If you supply your own accessories, be sure they are adequately sized and pressure rated for your Kits are available. See the chart on page 11 to order the correct kit(s) for your pump. Parts included in the Seal repair Kit are marked with an *, for example 8*. Parts included in the Seat repair Kit are marked with a . Parts included in the Check Ball Kit are marked with a.
5 Threads are very sharp. Use a rag to protect jam nut can remain attached to the upper 6312792H11. Remove the wet cup seal (27*) and the upper cylin-der seal (28*).12. Clamp the piston in a vice. Use a hex wrench to remove the nut (17 ) from end of piston. LW025A LW050A: 7 mm (1/4 in.) hex LW075A LW150A: 13 mm (1/2 in.) hex13. Remove the o-ring (18 ), seat (15 ) and ball (16 ). See FIG. Clean and inspect all Lubricate and install new wet cup seal (27*) and upper cylinder seal (28*).3. Assemble the female gland (9*), v-packings (7*, 8*), and male gland (6*), as shown. Alternate the v-packings with the lips facing down. Lubricate the packings. Install the packing stack into the wet cup (5).4. Install the spring (4*) in the top of the upper Lubricate the threads and screw the wet cup (5) into the upper cylinder (1), hand 2. Remove Flow-Through Nutti12782aNOTICER eplace all o-rings removed from the pump. Com-pressed o-rings may cause the pump to 3. Replace Throat PackingsNOTICEAll threads, packings, and seals must be well lubri-cated.
6 Use Lubriplate ( Graco Part Number 111920) or a similar product.*28*9*7*8*7*8*7*65ti11691aLips mustface down.*27 Repair312792H76. Assemble the male gland (11*), v-packings (12*, 13*), and female gland (14*), as shown. Alternate the v-packings, with the lips facing up. Lubricate the packings. Install the spring (10*) and packing stack into the bottom of the upper cylinder (1).7. Place the ball (16 ) in the piston body. Install the seat (15 ) and o-ring (18 ). Lubricate the o-ring and the threads of the flow-through nut (17 ). Screw the flow-through nut (17 ) into the piston/rodassembly (3).8. Place piston in vice and torque flow-through nut (17 ) as specified in the following Push the piston/rod assembly (3) into the uppercylinder (1).10. Lubricate and install the seal (21*) on the top of the lower cylinder (2).11. Lubricate the threads and screw the lower cylinder (2) onto the upper cylinder (1). Torque to 95-105 ft-lb (128-142 N m).FIG. 4. Replace piston *11*12*13*12*13*14*12*54*1 Lips mustface upDisplacement PumpTorqueLW025A LW050A58-62 ft-lb (78-84 N m)LW075A LW150A78-82 ft-lb (105-111 N m)FIG.
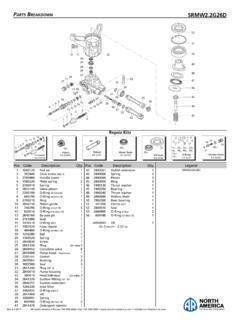
7 5. Replace piston ball and 16 15 18 17ti11692aRepair 8312792H12. Lubricate and install the seal (25* ) on the bottom of the lower cylinder (2).13. Install the o-ring (26 ) and intake seat (22 ) into the top of the inlet housing. Lubricate the o-ring. The seat (22 ) is reversible. Turn over or replace as Lubricate the seal (25* ) and threads of the lower cylinder (2). Place the ball (24 ) on the seat (22 ).15. Keep upright to screw the housing (23) into the lower cylinder (2) hand tight, so the seat remains firmly in place. Then clamp the cylinder in a vice and torque as specified in the following Torque wet cup (5) to 58-62 ft-lb (78-84 N m).FIG. 6. Assemble piston/rod assembly and *2ti12414a25* FIG. 7. Replace intake ball and PumpTorqueLW025A LW050A58-62 ft-lb (78-84 N m)LW075A LW150A78-82 ft-lb (105-111 N m)25 24 22 26 23ti11694aParts312792H9 Parts527*28*9*7*8*7*8*7*6*116 15 18* 17 10*11*12*13*12*13*12*14*21* 25* 24 22 26* to 95-105 ft-lb (128-142 N m)3 Torque to 58-62 ft-lb (78-84 N m)Torque varies by lower : 58-62 ft-lb (78-84 N m)LW075A-LW150A: 78-82 ft-lb (105-111 N m)3353637ti11644a4*32 Apply thread *521 Parts 10312792H----- Not sold separately.
8 * Included in Seal repair Kit. See page 11. Included in Seat repair Kit. 316 stainless steel seats also are available. See page 11. Included in Check Ball Kit. Tungsten carbide and 316 stainless steel check balls also are available. See page KIT, upper; includes 21, 28, 32, and 33 (qty. 1)1LW025A24A813LW050A24A814LW075A24A815L W100A24A816LW125A24A817LW150A24A8182 CYLINDER KIT, lower; includes 21 and 251LW025A24A822LW050A24A823LW075A24A824L W100A24A825LW125A24A826LW150A24A8273 PISTON/ROD, assembly; includes 15-18, 36, and37 (qty. 1)1LW025A24A643LW050A24A644LW075A24A645L W100A24A646LW125A24A647LW150A24A6484*SPR ING, throat -----15 WET CUP; includes 27 and 28 (qty. 1 each)1LW025A24A807LW050A24A808LW075A24A8 09LW100A24A810LW125A24A811LW150A24A8126* GLAND, male, throat-----17*PACKING, throat, UHMWPE -----38*PACKING, throat, PTFE -----29*GLAND, female, throat-----110*SPRING, piston-----111*GLAND, male, piston-----112*PACKING, piston, UHMWPE-----313*PACKING, piston, PTFE -----214*GLAND, female, piston-----115 SEAT, piston valve, tungstencarbide-----116 BALL, piston valve, 440 stainless steel-----117 NUT, flow through -----118* O-RING, piston -----121* O-RING, lower cylinder -----122 SEAT, intake valve, tungstencarbide-----123 INTAKE VALVE KIT; includes 261LW025A24A834LW050A24A835LW075A24A836L W100A24A837LW125A24A838LW150A24A83924 BALL, intake valve, 440 stainless steel-----125* O-RING, lower cylinder -----226* O-RING, intake valve -----127*O-RING, wet cup; package of 101LW025A24A630LW050A-LW075A24A631LW100A 24A632LW125A-LW150A24A63328*O-RING, wet cup-----132 FITTING, outlet, 3/8-18 npt X 3/4-16 unf; includes 33 (qty.)
9 1)1LW025A-LW100A24A840LW125A24A841LW150A 24A84233*O-RING, outlet; package of 101LW025A-LW100A24E457LW125A24E458LW150A 24E45935 JAM NUT1LW025A24A634LW050A24A635LW075A24A636 LW100A24A637LW125A24A638LW150A24A63936 NUT, coupling1LW025A15M758LW050A-LW150A15T311 37 COLLAR, coupling; pkg. of 101LW025A24A618LW050A-LW150A24A619 Ref. repair Kits312792H11 Standard repair KitsOptional Kits** Use with materials that cause chemical compatibility concerns with UHMWPE, such as acid catalyst materials.** Replaces standard kits for high corrosive DescriptionLW025A LW050 ALW075 ALW100 ALW125A LW150A* Seal repair KitThroat v-packings (7* and 8*) and glands (6* and 9*), piston v-packings (12* and 13*) and glands (11* and 14*), o-rings (18*, 21*, 25*, 26* 27*, 28*, and 33*), and springs (4*and 10*)24A25124A25224A253 24A25424A255 24A256V-Packing repair KitThroat v-packings (7* and 8*), piston v-packings (12* and 13*, and o-rings (18*, 21*, 25*, 26* 27*, 28*, and 33*)------24R167 24R168------ Tungsten Carbide Seat repair KitSeats (15 and 22 ), o-rings (18 , 21 , 25 , and 26 ), and flow-through nut (17 )24A78124A78224A783 24A78424A785 24A786 440 Stainless Steel Check Ball KitPiston ball (16 ) and intake ball (24 )24A26124A26124A263 24A26424A264 24A264 Wet-Cup O-Ring (27)Package of 1024A63024A63124A631 24A63224A633 24A633 Coupling Collars (37)
10 Package of 1024A61824A61924A619 24A61924A619 24A619 Kit DescriptionLW025A LW050 ALW075 ALW100 ALW125A LW150 AReinforced PTFE V-Packing Kit**Reinforced PTFE throat packings and glands, reinforced PTFE piston packings and glands, o-rings, and springs24J85224J85324J85424J85524J85624J 857 316 Stainless Steel Seat repair Kit**Seats (15 and 22 ), o-rings (18 , 21 , 25 , and 26 ), and flow-through nut (17 )24A79424A79524A796 24A79724A798 24A799 Check Ball KitPiston ball (16 ) and intake ball (24 )316 Stainless Steel**24P61224P61224P613 24P61424P614 24P614 Tungsten Carbide24A66724A66724A669 24A67024A670 24A670 Dimensions 12312792 HDimensionsDisplacement Pump Dimensions* Height measured at 8 Displacement PumpA(Height*)in. (mm)B(Inlet Size)in. nptC(Outlet Size)in. nptWeightlbs (kg) (378)1/2 ( ) (376)3/4 (6) (391)3/4 ( ) (391)3/4 ( ) (396)1 ( ) (396)1 (10)CCAAM odel LW025 AModel LW150A ti11643ati11645aBBTechnical Data312792H13 Technical DataMaximum fluid working pressureLW025A.