Example: biology
MICROWAVE HOOD COMBINATION INSTALLATION …
A 120 Volt, 60 Hz, AC only, 15- or 20-amp electrical supply with a fuse or circuit breaker. Recommended: A time-delay fuse or time-delay circuit breaker. A separate circuit serving only this microwave oven. A.2" x 4" wall stud B.Grounded 3 prong outlet 66" (167.6 cm) min. 12" (30.5 cm) min. 14" (35.6 cm) max. A B
Tags:
Information
Domain:
Source:
Link to this page:
Documents from same domain
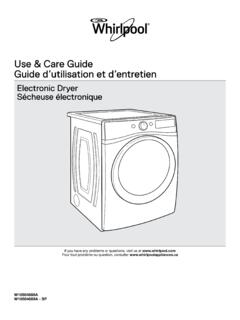
Use & Care Guide - Whirlpool
www.whirlpool.comUse the Automatic Cycles to provide the most energy savings and enhanced fabric care from the dryer. During Automatic Cycles, drying air temperature and moisture level are sensed in the load.

INSTALLATION INSTRUCTIONS AND OWNER’S …
www.whirlpool.comINSTALLATION INSTRUCTIONS AND OWNER’S MANUAL Top Mount Refrigerator Do Not Throw Away — Additional important safety information included. Para las instrucciones en español, visite nuestro sitio de internet.

MICROWAVE HOOD COMBINATION …
www.whirlpool.comMICROWAVE HOOD COMBINATION INSTALLATION INSTRUCTIONS MICROWAVE HOOD COMBINATION SAFETY This product is suitable for use above electric or gas cooking products up to 36" (91.4 cm) wide.

Use & Care Guide - Whirlpool
www.whirlpool.comW10607424B W10607425B - SP If you have any problems or questions, visit us at www.whirlpool.com Pour tout problème ou toute question, consulter www.whirlpool.ca Use & Care Guide

Use & Care Guide - Whirlpool
www.whirlpool.comW10680139D W10680140D - SP If you have any problems or questions, visit us at www.whirlpool.com Pour tout problème ou question, consulter www.whirlpoolappliances.ca Use & Care Guide Guide d’utilisation et d’entretien
DISHWASHER USER INSTRUCTIONS - Whirlpool
www.whirlpool.comTHANK YOU for purchasing this high-quality product. If you should experience a problem not covered in TROUBLESHOOTING, please visit our website at www.whirlpool.com for additional information. If you still need assistance, call us at 1-800-253-1301.
WHIRLPOOL CORPORATION MAJOR APPLIANCE LIMITED …
www.whirlpool.com2/14 WHIRLPOOL CORPORATION MAJOR APPLIANCE LIMITED WARRANTY ATTACH YOUR RECEIPT HERE. PROOF OF PURCHASE IS REQUIRED TO OBTAIN WARRANTY SERVICE. Please have the following information available when you call the
ELECTRIC RANGE USER INSTRUCTIONS - Whirlpool
www.whirlpool.comTHANK YOU for purchasing this high-quality product. If you should experience a problem not covered in TROUBLESHOOTING, please visit our website at www.whirlpool.com for additional information. If you still need assist ance, call us at 1-800-253-1301.

REFRIGERATOR USER INSTRUCTIONS - Whirlpool
www.whirlpool.comYour safety and the safety of others are very important. We have provided many important safety messages in this manual and on your appliance. Always read and obey all safety messages. This is the safety alert symbol. This symbol alerts you to potential hazards that can kill or hurt you and others.

ELECTRIC DRYER OWNER’S MANUAL GUIDE D’UTILISATION …
www.whirlpool.comELECTRIC DRYER OWNER’S MANUAL GUIDE D’UTILISATION DE LA SÉCHEUSE ÉLECTRIQUE Table of Contents Dryer Safety.2 Dryer Safety.2 Dryer Maintenance and Care.5 Cleaning the Dryer Location.5 Cleaning the Dryer Interior.5 Removing Accumulated Lint.5 Cleaning the Lint Screen.5 Changing the Drum Light (on some models).6 Check Your Vent …
Related documents

MERRINEE VIA MILDURA (VIC) Part B
farmclearingsales.net.auKC Tools ¾” metric & imperial long reach drive sockets Large size spanners Stillson & 1” pipe threader Tormex 2000 elec. Super Grind wet grinding machine Tanaka ECS-320 chainsaw Mastercraft 38cc chainsaw Hardi 12 Volt compressor Mechanic car truck repair trolley creeper sliding board 2 door steel cabinet, 2.4m H x 900mm W x 450mm D

INSTALLATION MAP QUICK INSTALL GUIDE Install the …
enphase.comOct 23, 2021 · B ) Torque the mounting fasteners (1/4-inch or 5/16-inch) as follows. Do not over torque. • 6 mm (1/4 inches) mounting hardware: 5 N m (45 to 50 in-lbs) • 8 mm (5/16 inches) mounting hardware: 9 N m (80 to 85 in-lbs) • Connecting the IQ GatewayWhen using UL 2703 mounting hardware, use the manufacturer’s recommended torque value 3 5

Service and Maintenance Manual - JLG Industries
csapps.jlg.comJan 23, 2009 · Service and Maintenance Manual Model E300A E300AJ E300AJP P/N - 3120772 January 23, 2009

MICROWAVE HOOD COMBINATION INSTALLATION …
images.thdstatic.comA 120-volt, 60 Hz, AC-only, 15- or 20-amp electrical supply with a fuse or circuit breaker Recommended: A time-delay fuse or time-delay circuit breaker A separate circuit serving only this microwave oven GROUNDING INSTRUCTIONS SAVE THESE INSTRUCTIONS For all cord connected appliances: The microwave oven must be grounded. In the event of