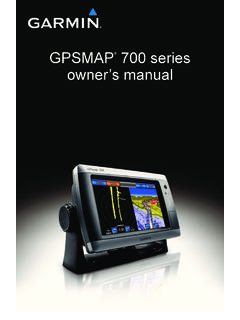
Transcription of Oregon 700 Series - Garmin
1 Oregon 700 SeriesOwner s Manual 2016 Garmin Ltd. or its subsidiariesAll rights reserved. Under the copyright laws, this manual may not be copied, in whole or in part, without the written consent of Garmin . Garmin reserves the right to change or improve its products and to make changes in the content of this manual without obligation to notify any person or organization of such changes or improvements. Go to for current updates and supplemental information concerning the use of this , the Garmin logo, ANT+ , Auto Lap , City Navigator , Oregon , TracBack , and VIRB are trademarks of Garmin Ltd. or its subsidiaries, registered in the USA and other countries. BaseCamp , chirp , Garmin Connect , Garmin Express , Garmin HuntView , Connect IQ , HomePort , tempe , and GSC are trademarks of Garmin Ltd.
2 Or its subsidiaries. These trademarks may not be used without the express permission of BLUETOOTH word mark and logos are owned by the Bluetooth SIG, Inc. and any use of such marks by Garmin is under license. Wi Fi is a registered trademark of Wi-Fi Alliance Corporation. Mac is a registered trademark of Apple Computer, Inc. Windows is a registered trademark of Microsoft Corporation in the United States and other countries. microSD and the microSDHC logo are trademarks of SD-3C, LLC. Other trademarks and trade names are those of their respective is a registered trademark of the National Marine Electronics Association. NMEA 2000 and the NMEA 2000 logo are registered trademarks of the National Marine Electronics product is ANT+ certified. Go to for a list of compatible products and of AA a NiMH Battery On the the the Satellite Feature to a Wireless Up Wi Fi Your IQ Connect IQ Connect IQ Features Using Your an Activity Data an a New an Activity an Activity an Your Activity the Current a Location on an the Output Activity the Elevation Plot of an the Color of an Activity the Current an an Activity Your Track the Current a Location on a Track the Elevation Plot of a a Track Your Device at to for a for a Geocache on the to a Hints and Clues to find a the the Geocache a Custom Geocache a Custom Geocache a Custom Filter to a Geocache Geocaches Using a chirp a Geocache with a Live Geocache Data from the
3 Your Device Registration From to a with the Using TracBack ..7 Finding a Location Near Another an with the the and Starting Navigation to a Man Overboard with Sight 'N to a Point on the Elevation the Plot the Elevation the Barometric a a a a the Accuracy of a Waypoint a a Route Using Route a Route Using the the Name of a a a Route on the a the Active a the Elevation Plot of a Files to and from an an and a and Receiving Data a Proximity the Size of an the Calendar and Weather Conditions and an the Countdown the the Satellite Off a a VIRB Action an Activity an Activity from Your Garmin Fitness of ContentsiAbout Heart Rate Your Heart Rate the the the Backlight the Touchscreen the the Map Data Fields and the Map
4 Data the Data the Data the App a Shortcut to the Main a and the Device Format the Units of + Sensor Your Fitness User Laps by Up Marine Data and Default Values for Specific Default Values for Specific Page All Default the Home Screen to Classic Up Garmin More Your the Carabiner the the a Memory the Device to Your Files to Your the USB the Device ..17 Data Rate Zone of ContentsIntroduction WARNINGSee the Important Safety and Product Information guide in the product box for product warnings and other important OverviewCamera lens (not available on all models)Power, menu, apps, and backlight keyBattery cover D-ringUser key (Customizing the Keys, page 12)microSD card slot (under battery door)Mini-USB port (under weather cap)Battery Information WARNINGThe temperature rating for the device may exceed the usable range of some batteries.
5 Alkaline batteries can rupture at high not use a sharp object to remove batteries. CAUTIONC ontact your local waste disposal department to properly recycle the batteries lose a significant amount of their capacity as the temperature decreases. Use lithium batteries when operating the device in below freezing the Battery LifeYou can do several things to extend the life of the batteries. Reduce the backlight brightness (Adjusting the Backlight Brightness, page 12). Reduce the backlight timeout (Display Settings, page 12). Use battery save mode (Turning On Battery Save Mode, page 1). Decrease the map drawing speed (Configuring the Maps, page 12).Turning On Battery Save ModeYou can use battery save mode to prolong the battery the app drawer, select Setup > Display > Battery Save > battery save mode, the screen shuts off when the backlight times out.
6 You can select to turn on the StorageWhen you do not plan to use the device for several months, remove the batteries. Stored data is not lost when batteries are AA BatteriesInstead of the optional NiMH battery pack (Installing a NiMH Battery Pack, page 1), you can use two alkaline, NiMH, or lithium batteries. This is useful when you are on the trail and cannot charge the NiMH battery pack. Use NiMH or lithium batteries for best : Standard alkaline batteries are not recommended for the Oregon 750 models when using the camera the D-ring counter-clockwise, and pull up to remove the two AA batteries, observing the battery cover, and turn the D-ring .5 Select Setup > System > Battery Alkaline, Lithium, NiMH, or Precharged Information WARNINGThe temperature rating for the device may exceed the usable range of some batteries.
7 Alkaline batteries can rupture at high not use a sharp object to remove batteries. CAUTIONC ontact your local waste disposal department to properly recycle the batteries lose a significant amount of their capacity as the temperature decreases. Use lithium batteries when operating the device in below freezing a NiMH Battery PackThe device operates using a NiMH battery pack (optional) or two AA batteries (Installing AA Batteries, page 1).1 Turn the D-ring counter-clockwise, and pull up to remove the the battery pack .3 Insert the battery pack, observing press the battery pack into the battery cover, and turn the D-ring the Battery PackNOTICETo prevent corrosion, thoroughly dry the USB port, the weather cap, and the surrounding area before charging or connecting to a not attempt to use the device to charge a battery that was not provided by Garmin .
8 Attempting to charge a battery that was not provided by Garmin can damage the device and void the you can connect the straight connector of the USB cable to your device, you may need to remove optional mount : The device does not charge when outside the approved temperature range (Specifications, page 17).You can charge the battery using a standard wall outlet or a USB port on your up the weather cap from the USB port .2 Plug the small end of the USB cable into the USB port on your the large end of the USB cable into an AC adapter or a computer USB necessary, plug the AC adapter into a standard wall you connect the device to a power source, the device turns the battery : You can view the battery gauge by swiping down from the top of the Energy While Charging the DeviceYou can turn off device features while your device to an external power the power button until the screen turns device goes into a low power, battery charging mode, and the battery gauge the device On the DeviceHold.
9 Home ScreenSelect to view activity data screens or record an to open the app left or right to scroll through the activity left or right during an activity to scroll through the pages for the down to view widgets and the battery to search for a to open Connect IQ to change the device settings and settings for the displayed the Touchscreen Tap the screen to select an item. Make each touchscreen selection a separate action. Select to save your changes and close the page. Select to return to the previous page. Select to return to the main menu. Select to view specific menu items for the page you are the TouchscreenYou can lock the screen to prevent inadvertent screen > .Unlocking the TouchscreenSelect > .Acquiring Satellite SignalsBefore you can use the GPS navigation features, you must acquire satellite signals.
10 The device may need a clear view of the sky to acquire satellite signals. It may take 30 to 60 seconds to acquire satellite down to view the status until the GPS indicator bars turn FeaturesConnected features are available for your Oregon 700 device when you connect the device to a compatible smartphone using Bluetooth wireless technology. Some features require you to install the Garmin Connect Mobile app on the connected smartphone. Go to for more information. Some features are also available when you connect your device to a wireless notifications: Displays phone notifications and messages on your Oregon 700 : Allows friends and family to follow your races and training activities in real time. You can invite followers using email or social media, allowing them to view your live data on a Garmin Connect tracking uploads to Garmin Connect: Automatically sends your activity to your Garmin Connect account as soon as you finish recording the IQ: Allows you to extend your device features with widgets, data fields, and Updates: Allows you to update your device Downloads: Allows you to download an extended prediction orbit file to quickly locate GPS satellites and reduce the time it takes to calculate your Geocache Data: Provides free and subscription-based services to view live geocache data from FeaturesWeather: Allows you to view current weather conditions and weather forecasts.