Transcription of Owner’s Manual
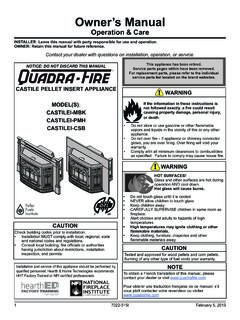
1 7086-171D July 10, 2014 heater meets the Environmental Protection Agency s emission limits for wood heaters sold after July 1, Pellet StoveModel(s):PP130 WARNINGIf the information in these instruc-tions is not followed exactly, a fi re may result causing property damage, personal injury, or death. Do not store or use gasoline or other fl am-mable vapors and liquids in the vicinity of this or any other appliance. Do not overfi re - If heater or chimney connec-tor glows, you are overfi ring. Overfi ring will void your warranty. Comply with all minimum clearances to com-bustibles as specifi ed. Failure to comply may cause house fi , problems, missing parts?
2 Before returning to your retailer, visit or call customer service at 877-427-3316. HOT SURFACES! Glass and other surfaces are hot during operation AND cool down. Hot glass will cause burns. Do not touch glass until it is cooled NEVER allow children to touch glass Keep children away CAREFULLY SUPERVISE children in same room as fi replace. Alert children and adults to hazards of high temperatures High temperatures may ignite clothing or other fl ammable materials. Keep clothing, furniture, draperies and other fl ammable materials NOTICE: PLEASE READ THIS ENTIRE Manual BEFORE INSTALLATION AND USE OF THIS PELLET FUEL-BURNING ROOM HEATER.
3 FAILURE TO FOLLOW THESE INSTRUCTIONS COULD RESULT IN PROPERTY DAMAGE, BODILY INJURY OR EVEN DEATH. CONTACT LOCAL BUILD-ING OFFICIALS ABOUT RESTRICTIONS AND INSTALLATION INSPECTION REQUIREMENTS IN YOUR s ManualInstallation & OperationINSTALLER: Leave this Manual with party responsible for use and operation. OWNER: Retain this Manual for future reference. NOTICE: SAVE THESE INSTRUCTIONSNOTETo obtain a French translation of this Manual , please contact your dealer or visit obtenir une traduction fran aise de ce manuel, s il vous pla t contacter votre revendeur ou visitez LTested and Listed byPortlandOregon USAOMNI-Test Laboratories, #: 061-S-88-27086-171D July 10, 2014 START GUIDE4.
4 Check all three baffl es are hooked into slots. *Before you plug in this appliance, follow these instructions*3. Verfi y fi repot s orientation is Plug power cord into wall receptacle.*Green light will start fl ashing one time per second*NOTE: If the light does not change to solid green, turn the control back to off, unplug the appliance and repeat steps 5 & 6. 7. Stove will feed for two minutes. *Green light will start blinking continuously, to indicate startup sequence* NOTE: Allow the unit fi ve minutes for ignition to take Once a fi re has been established in the unit, leave the unit burning on HI for 30 minutes to allow the paint to : Odors and vapors released during initial operation.
5 Curing of high temperature paint . Open windows for air circulation.*Odors may be irritating to sensitive After 30 minutes have passed, turn dial control to OFF, and allow unit to cool completely. Once unit has cooled, open door and clean fi repot according to the cleaning instructions found on the inside of the hopper lid, or in the owners Manual .*Unit is now ready to resume normal operation* 6. To prime the feed tube, QUICKLY turn the dial control from OFF to HI, back to OFF, then back to HI.*The light should stop blinking and light up solid green*NOTE: Priming is only required the fi rst time the appliance is lit, or after the hopper has run completely out of ignition is missed, empty the fi repot and repeat step 3.
6 1. Turn Dial Control to material needs to be removed from the door glass and fi rebox before operation2. Add pellets to hopper and close for IgniterVELF ront of fi repot has the 7086-171D July 10, 2014 3 TABLE OF CONTENTS Safety Alert Key: DANGER! Indicates a hazardous situation which, if not avoided will result in death or serious injury. WARNING! Indicates a hazardous situation which, if not avoided could result in death or serious injury. CAUTION! Indicates a hazardous situation which, if not avoided, could result in minor or moderate injury. NOTICE: Indicates practices which may cause damage to the appliance or to Listing and Code Approvals.
7 5A. Appliance Certifi cation ..5B. Mobile Home Approved ..5C. Glass Specifi cations ..5D. Electrical Rating (On High) ..5E. BTU & Effi ciency Specifi General Information ..6A. Fire Safety ..6B. Non-Combustible Materials ..6C. Combustible Materials ..6D. Fuel Material and Fuel Storage ..6E. Before Your First Fire ..63 General Operating Information ..7A. User Dial Control ..7B. Filling the Priming the Feed Tube ..7D. Firepot Purge ..8E. Shutdown ..8F. Starting Your First Fire Characteristics ..8H. Your Pellet Appliance - General Operating LED Color Coding Chart and Ignition Cycles ..11K. Running in Minimum or Maximum ..11L. Running in the Comfort Level Clear Space.
8 11N. Trim Adjustment ..114 Maintaining & Servicing the Appliance ..12A. Proper Shutdown Procedure ..12B. Quick Reference Maintenance General Maintenance ..12D. High Ash Fuel Content Maintenance ..16E. Frequently Asked Questions ..175 Replacement Parts ..18A. Convection Blower Replacement ..18B. Exhaust Blower Snap Disc Replacement ..19D. Igniter Replacement ..19E. Baffl e Removal & Replacement ..19F. Glass Replacement ..20G. Feed Motor Replacement ..20H. Feed Spring Replacement ..20I. Control Board Replacement ..20J. Fuse Replacement ..206 Getting Started ..21A. Design, Installation & Location Considerations .. 21B..21C. Negative Pressure.
9 21D. Locating Your Appliance & Chimney ..22E. Inspect Appliance & Components ..22F. Tools And Supplies Needed ..227 Dimensions and Clearances ..23A. Appliance Dimensions ..23B. Clearances to Combustibles (UL and ULC) ..23C. Hearth Pad Requirements (UL and ULC) ..248 Vent Information ..25A. Chimney and Exhaust Connection ..25B. Venting Termination Requirements ..25C. Pellet Venting Charts ..269 Venting Systems ..27A. Vertical - Interior - Typical Installation ..27B. Through The Wall & Vertical - External - Horizontal ..27C. Vertical into Existing Class A Chimney ..27D. Masonry ..28E. Alternate Masonry ..28F. Through The Wall ..2910 Mobile Home ..30A. Mobile Home Installation.
10 3011 Appliance Set-Up ..31A. Removal From Pallet ..31B. Outside Air Kit Instructions ..31C. Power up the Unit ..31D. Hopper Extension (Optional Accessory) ..3112 Troubleshooting ..3213 Reference Materials ..35A. Component Function ..35B. Wiring Diagram ..35C. Replacement Parts ..36D. Service & Maintenance Warranty ..397086-171D July 10, 2014 reading these instructions, if you have any doubt about your ability to complete your installation in a pro-fessional manner you should obtain the services of an installer versed in all aspects as to the correct and safe installation. Do not use temporary makeshift compromises during INSTALLATION OF YOUR APPLIANCE1.