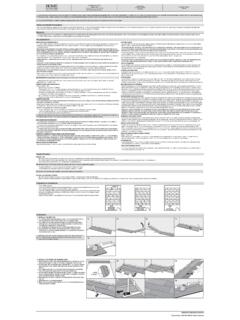
Transcription of OWNER’S MANUAL
1 OWNER'S MANUAL . INSPIRED BY. TABLE OF CONTENTS. Product Product Recommended Installation Troubleshooting . 5 Year TABLE DES MATI RES. Informations sur le Sch ma du produit ..5. Les pi ..6. Outils recommand Types d' Guide de d Garantie de 5 PRODUCT INFORMATION PRODUCT DIAGRAM. Information produit Diagramme de produit Product Features Caract ristiques du produit Metal lever handle Poign e levier en m tal 2 function spray head T te de pulv risation Single-hole or 3-hole installation 2 fonctions Drip-free ceramic cartridge Installation monotrou ou 3 trous gal/min max at 60 psi Cartouche en c ramique Metallic waterway anti-goutte Dual-sensor functions: infrared 1,8 gal / min max 60 psi activated & pull down activated Voie navigable m tallique Trouble-free installation with Fonctions double capteur: patented mounting hardware and infrarouge activ et pull quick-connect down activ.
2 Installation sans probl me avec le mat riel de montage brevet et la connexion rapide Codes/Standards Applicable: Codes / normes applicables: Complies with: Conforme : ASME A ASME A (cUPC) (cUPC). NSF/ ANSI 61 NSF/ ANSI 61. NSF/ ANSI 372 (AB1953) NSF/ ANSI 372 (AB1953). Model Number/Colors/Finishes: num ro de mod le/. CP Polished Chrome couleurs/ finitions: BN Brushed Nickel PVD. Chrome poli CP. ORB Oil Rubbed Bronze BN PVD nickel bross . Bronze huil ORB. 4 5. PARTS RECOMMENDED TOOLS (NOT INCLUDED). Les Pi ces OUTILS RECOMMAND S (Non Inclus). Adjustable Wrench Cl molette Safety Goggles Lunettes de s curit . Screwdriver Tournevis Silicone Sealant Mastic silicone Faucet Drill Percer Spray Head 4 AA Batteries 4 piles AA.
3 Robinet T te de pulv risation Counter Weight MAINTENANCE. Contrepoids Entretien Your new faucet is designed Votre nouveau robinet est for years of trouble-free con u pour des ann es de performance. Keep it looking performance sans probl me new by cleaning it periodically Gardez l'aspect neuf en le with a soft cloth. Avoid abrasive nettoyant p riodiquement avec cleaners, steel wool and harsh un chiffon doux. vitez les chemicals as these will dull the nettoyants abrasifs, la laine Mounting Hardware finish and void your warranty. d'acier et les produits chimiques (silicone washer, agressifs, car ils terniraient la finition rubber washer, metal et annuleraient votre garantie.)
4 Washer, mounting nut, Control Box &. screws set). Zip Tie Mat riel de montage Bo te de (rondelle de silicone, contr le et rondelle de caoutchouc, cravate rondelle m tallique, crou de tirette de montage, jeu de vis). Deck Plate Aerator Key Plaque de pont Cl d' a rateur 6 7. INSTALLATION TYPES NOTE BEFORE INSTALLING. Types d'installation Remarque Avant L'installation SINGLE HOLE INSTALLATION This product includes a safety clip. The safety plug must be removed Installer Avec Un Orifice when switching between motion activated and MANUAL operation. Normal Operating Condition Ce produit comprend un clip de s curit . La s curit la prise doit tre retir e lors de la commutation entre le mouvement activ et op ration manuelle.
5 A B Condition de fonctionnement normale THREE HOLE INSTALLATION. Installer Avec Un Orifice Switch to MANUAL operation when the power is low or the sensor is out of order. Pull out the safety clip and turn the dial counterclockwise to the bottom. Put the safety A B clip back into place and resume MANUAL operation. Passez en mode manuel lorsque la puissance est faible ou que le capteur est en panne. Retirez le clip de s curit . ettourner le cadran dans le sens antihoraire vers le bas. Remettez le clip de s curit . en place et reprenez le fonctionnement manuel. 8 9. INSTALLATION. Installation NOTE: Flush water lines before installation to release built up Step Step impurities of water supply.
6 First slide the rubber washer over Use a philips head screwdriver to REMARQUE: Rincez les conduites d'eau avant l'installation pour lib rer les the hoses and data cable. Then slide tighten the 2 screws. impuret s accumul es dans l'alimentation en eau. the metal washer over, and lastly the mounting nut. Hand tighten firmly. Step 1 for 1-hole sink Step 1 for 3-hole sink Insert the O-ring over the hoses, Insert the deck plate over the cable, and stem which are located cable and hoses in the mounting at the bottom of the faucet. Then stem. Align the grooves in the deck tape tape mount the faucet onto the sink. plate with the arches on the faucet Faites d'abord glisser la rondelle Utilisez un tournevis cruciforme pour bottom.
7 Then mount the faucet on en caoutchouc sur les tuyaux et le serrer les 2 vis. the sink. c ble de donn es. Faites ensuite glisser la rondelle m tallique sur, tape 1 pour un vier 1 trou tape 1 pour un vier 3 trous et enfin l' crou de montage. Serrez fermement la main. Ins rez le joint torique sur les tuyaux, Ins rez la plaque de pont sur le le c ble et la tige qui se trouvent au c ble et les tuyaux dans la tige de bas du robinet. Ensuite, montez le montage. Alignez les rainures de la robinet plaque de pont avec les arches sur le sur l' vier. fond du robinet. Ensuite, montez le robinet sur l' vier. 10 11. INSTALLATION (CONT.). Installation (suite).
8 250mm( ). 450mm(17 .7in ). Outle t connection Raccor t de sortie Step 3 Step 4 Step Step The preferred mounting distance Mount the control box under the Connect the outlet hose to the Connect the spray hose between the spray hose and the sink using a philips head screwdriver control box with our innovative to the control box. control box is (250mm). The according to the preferred quick connection . preferred mounting distance from dimensions. Make sure to leave some control box to the floor is room to adjust. (450mm). tape 3 tape 4 tape tape La distance de montage pr f r e Montez le bo tier de commande Connectez le tuyau de sortie Connectez le flexible de entre le flexible de pulv risation sous l' vier l'aide d'un tournevis au bo tier de commande pulv risation au bo tier et le bo tier de commande est de cruciforme selon les dimensions gr ce notre connexion de commande.
9 9,8 (250 mm). La distance de souhait es. Assurez-vous de laisser rapide innovante montage pr f r e entre le bo tier de de la place ajuster. commande et le sol est 17,7 (450 mm). 12 13. INSTALLATION (CONT.). Installation (suite). Weight location label tiquette d'emplacement de poids Step Step Step 7 tape 7. Connect the data cables and secure Tie the data cables together with Install the counterweight on the pull Installez le contrepoids sur le tuyau them tightly by hand. the outlet hose using a zip tie. down hose at the marked position (it d roulant la position marqu e (il Do Not include the pull down should be placed on the line). doit tre plac sur la ligne).
10 Hose in the zip tie. tape tape Connectez les c bles de donn es et Attachez les c bles de donn es fixez-les fermement la main. avec le tuyau de sortie l'aide d'une attache zipp e. N'incluez pas le tuyau flexible dans l'attache zipp e. 14 15. INSTALLATION (CONT.). Installation (suite). Step 8 tape 8 Step 9 Step 10. Remove the battery pack Retirez le couvercle de la batterie Connect the hot and cold supply Turn on the water supply. cover and battery pack. Insert et la batterie. Ins rez 4 piles lines onto the matching water valves 4 AA batteries. Put the battery AA. Remettez la batterie dans le and secure the connection with an pack back in the control box bo tier de commande et replacez adjustable wrench.