Transcription of Owner’s Manual Contents
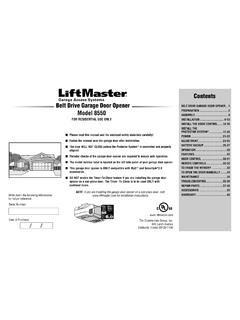
1 TO WATCH VIDEOS GO TO: ContentsPreparation .. 2-5 Assembly .. 6-10 Installation .. 11-28 Install the Door Control .. 21-22 Install the Protector System .. 23-26 Connect power .. 27-28 Adjustments .. 29-31 MyQ Smartphone Control .. 32 Operation .. 33-39 Using your Garage Door Opener .. 34 To Open the Door Manually .. 34 Motion Detecting Control Panel .. 35-36 Multi-Function Control Panel .. 37-38 Remote Control .. 38 Homelink .. 38 To Erase the Memory .. 39 Maintenance .. 40 Troubleshooting .. 41-42 Accessories .. 43 Warranty .. 44 Repair Parts .. 45-47 Owner s ManualB550 B750 Belt Drive Garage Door OpenerFOR RESIDENTIAL USE ONLYPRE-PROGRAMMED REMOTE CONTROL Garage Opener Please read this Manual and the enclosed safety materials carefully!
2 Fasten the Manual near the garage door after installation. The door WILL NOT CLOSE unless the Protector System is connected and properly aligned. Periodic checks of the garage door opener are required to ensure safe operation. The model number label is located on the left side panel of your garage door opener. This garage door opener is compatible with MyQ and Security+ accessories. DO NOT install on a one-piece door if using devices or features providing unattended close. Unattended devices and features are to be used ONLY with sectional ,operated, , , :Thisproductcanexposeyoutochemicalsinclu dinglead, (TTC)feature,theMyQ SmartphoneControlapp,andMyQ (TTC)feature,theMyQ SmartphoneControl,andanyotherMyQ INJURY orDEATH:lALWAYS callatraineddoorsystemstechnicianifgarag edoorbinds,sticks, ,moveoradjustgaragedoor,doorsprings,cabl es,pulleys,bracketsortheirhardware,ALL locksandremoveALL ,60 ,itshouldstayinplace, ,sticks,orisoutofbalance, (6mm).
3 Otherwise, ,itmaybeinstalledwithin4 feet( ) SpringExtensionSpringORPreparation3 TesttheWi-Fi signal is weak. The garage door opener will likely connect to your Wi-Fi network. If not, try one of the options below. No Wi-Fi signal. Try one of the following: Move your router closer to the garage door opener to minimize interference from walls and other objects Buy a Wi-Fi range extender Buy a Chamberlain MyQ Internet Gateway (CIGBU) see page 41 Check Signal Strength. If you see:Wi-Fi signal is strong. You re all set!Install your new garage door opener. Visit for more detailsSeeMyQ :Surveyyourgarageareatoseeifyouwillneeda nyofthefollowingitems:l(2)2X4 (MODEL041A5281-1)orwoodblocks:Dependingu pongarageconstruction, :Requiredifyouhavealightweightsteel,alum inum, :Requiredifyourgaragedoorismorethan7feet ( ) 7/161/2 5/32 5/165/89/161/47 Multi-Function3-button(2) B750 PlusLiftPowerSystem MotionDetecting3-button(2) (Packagedinsidefrontrailsection) (1frontand4centersections) (2)(Packagedinsidethefrontrailsection) (motorunit) U Safetyreversingsensorswith2conductorwhit eandwhite/blackwireattached.
4 SendingSensor(1),ReceivingSensor(1),andS afetySensorBrackets(2)NOTSHOWNW irelessKeypadWhiteandred/whitewireOwner' smanualHardwareNABCHKJOPIDEFGLMORP reparation5 HardwareASSEMBLYINSTALLATIONDOOR CONTROLI nsulated Staples(Not Shown) Clevis Pin 5/16"x1-1/2" RingFastener (3)Hex Bolt 5/16"-18x7/8" (4)Self-Threading Screw 1/4"-14x5/8" (2)Clevis Pin 5/16"x1"Clevis Pin 5/16"x1-1/4"Carriage Bolt 1/4"-20x1/2" (2)Wing Nut1/4"-20 (2)Lag Screw 5/16"-9x1-5/8" (4)Screw 6 ABx1" (2) Drywall Anchors (2)Screw 6-32x1" (2) Hex Screw #8x3/8" (3)(packed with the sprocket cover)Bolt 1/4"-20x1-3/4"Lock Nut 1/4"-20 BoltNut 3/8"Lock Washer 3/8"Master Link Threaded Shaft withSpring Trolley NutLock Washer 5/16"-18 (4)Nut 5/16"-18 (4) Preparation6 AssemblySTEP1 AssembletherailandinstallthetrolleyTopre ventINJURY frompinching, , window , , ,insertascrewdriverintotheholeinthesecon drailsectionfromthemotorunit, , U bracket,untilitreachesallthestopsontheto pandsidesofthe U PadsFront Rail Section(TO DOOR) U Bracket(TO MOTOR UNIT)
5 TrolleyRail TabOn TopSlide to stops on top and sides of U bracket Screwdriver7 AssemblySTEP2 FastentherailtothemotorunitToavoidSERIOU S damagetogaragedooropener, "-20x1-3/4" " U bracket, U bracketwiththepreviouslyremovedbolts; "-20x1-3/4"Lock Nut1/4"-20 HARDWARE U BracketCover Protection Bolt Hole Bolt 1/4"-20x1-3/4"Lock Nut 1/4"-20 Bolts (Mounted in thegarage door opener) , "(30cm) , , " (90 ).RailIdler PulleyGrease Inside PulleyBoltBeltLock WasherNutBoltNut 3/8"Lock Washer 3/8"HARDWARET rolley Connector Rail (Figure1). ,dispensetheremainderofthebeltalongthera illength towardthemotorunitandaroundthesprocket(F igure2).
6 (Figure3). LinkFigure 3 Threaded Shaft with Spring Trolley NutThreaded ShaftMaster LinkSprocketFigure 2 Figure 1 TrolleyConnectorRetainingSlot , " NutNut Ring SlotNut RingNut RingAFTER1-1/4" ( cm) BEFORE1" ( cm)STEP6 " Screw #8x3/8"(Packed with the sprocket cover)HARDWAREHex Screw #8x3/8"Sprocket Cover11 , ( ) ,butatleast6feet( ) , feet( m)abovefloors,landings, , "( cm)highobject(ora2x4laidflat) , :lHeaderbracketMUSTbeRIGIDLY fastenedtostructuralsupportonheaderwallo rceiling, ,moveoradjustgaragedoor,springs,cables,p ulleys,brackets,ortheirhardware, ,sticks, ( )oftheleftorrightofthedoorcenteronlyifat orsionspringorcenterbearingplateisinthew ay;oryoucanattachittotheceiling(seepage1 3)whenclearanceisminimal.
7 (Itmaybemountedonthewallupsidedownifnece ssary,togainapproximately1/2"(1cm).Ifyou needtoinstalltheheaderbracketona2x4(onwa llorceiling),uselagscrews(notprovided) "(5cm)abovethehighpoint:l2"(5cm) "(20cm) :Ifthetotalnumberofinchesexceedstheheigh tavailableinyourgarage,usethemaximumheig htpossible, WallVertical Centerline of Garage Door 2x4 Structural SupportsLevel (Optional)Unfinished Ceiling2x4 OPTIONAL CEILING MOUNT FOR HEADER BRACKET Sectional door with curved trackHeader WallTrack2" (5 cm)Highest Point of Travel DoorOne-piece door with horizontal trackHeader WallTrack2" (5 cm)Highest Point ofTravel DoorOne-piece door without track.)
8 Jamb hardware Header Wall8" (20 cm)HighestPoint ofTravel DoorJamb HardwareOne-piece door without track:pivot hardwareHeader Wall8" (20 cm)HighestPoint ofTravel DoorPivot13 InstallationSTEP2 InstalltheheaderbracketYoucanattachthehe aderbracketeithertothewallabovethegarage door, ,useconcreteanchors(notprovided).Lag Screw 5/16"-9x1-5/8" (withthearrowpointingtowardtheceiling). " ,nomorethan6"(15cm) " MountingHolesWALL INSTALLATIONCEILING INSTALLATIONO ptional Mounting Holes Vertical Centerline of Garage DoorHeader WallHeader Bracket2x4 StructuralSupportDoorSpringGarage DoorHighest Point of Garage Door Travel HorizontalLineLagScrewUPHeader WallCeiling Mounting HolesFinished CeilingVertical Centerline of Garage DoorHeaderBracket6" (15 cm)Maximum Door SpringGarage DoorLag.
9 Ifthedoorspringisintheway, Pin5/16"x1-1/2" Ring Fastener Clevis Pin Ring Fastener STEP4 PositionthegaragedooropenerTopreventdama getogaragedoor, (laidflat) ,laythe2x4onit' , door without tracks 2x42x4 All other door types15 InstallationSTEP5 HangthegaragedooropenerToavoidpossibleSE RIOUSINJURY fromafallinggaragedooropener, ,usethelagscrewstoattachasupportbracket( notprovided) (notprovided). ,lockwashers, , Ceiling Lag Screw123 NotProvidedNot ProvidedNot ProvidedHex BoltNutLockWasher456 Lag ScrewFinished CeilingEXAMPLESU nfinished CeilingHARDWAREHex Bolt5/16"- 18x7/8"Nut5/16"-18 Lock Washer 5/16"-18 Lag Screw5/16"-9x1-5/8" 16 InstallationSTEP6 InstallthelightbulbsTopreventpossibleOVE RHEATING oftheendpanelorlightsocket:lUseONLYA19in candescent(100 Wmaximum)orcompactfluorescent(26 Wmaximum) (100 Wequivalent).
10 (100 Wmaximum)orcompactfluorescent(26W,100 Wequivalent) :Donotusehalogen,shortneck, :lIfpossible, , NOTICE "( ) ,butatleast6feet( )abovefloor, :Ifitisnecessarytocuttheemergencyrelease rope, 8 Installthe door bracketFiberglass, aluminum or lightweight steel garage doorsWILLREQUIRE reinforcement BEFORE installation of door bracket. Contact the garage door manufacturer or installing dealer for openerreinforcement instructions or reinforcement kit. Failure to reinforce the top section as requiredaccording to the door manufacturer may void the door horizontal and vertical reinforcement is needed for lightweight garage doors (fiberglass, aluminum,steel, doors with glass panel, etc.)