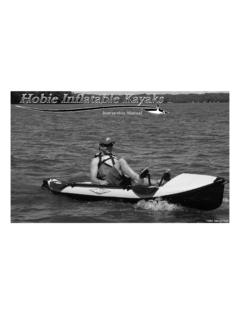
Transcription of Owners Manual - Hobie
1 TandemHobie MirageIsland Owners Manual 1 WELCOME TO THE Hobie WAY OF LIFEC ongratulations on the purchase of your new Hobie Mirage Tandem Island and welcome to the Hobie sailing family. The Hobie Tandem Island cannot be outgrown (how do you outgrow fun?) and will provide years of enjoyment for everyone, from children through senior citizens. A fun-seeking pair or a single adult can sail it at top performance or cruise in comfort. We offer this Manual as a guide to increased safety and enjoyment of your new Mirage. The purpose of this publication is to provide easy, simple, accurate instructions on how to get your Hobie Tandem Island ready for the water and use it safely. Please read the instructions carefully and familiarize yourself with your boat and all its you are a new sailor or a veteran of many years, we recommend that you read this Manual thoroughly before your first sail and TRY IT OUR WAY FIRST!
2 If you are new to sailing, this Manual alone is not intended to teach you how to sail. There are many excellent books, videos and courses on the safe handling of small sailboats. We suggest you contact your local Hobie sailboat or kayak dealer, college or Coast Guard Auxiliary for for overhead wires whenever you are rigging, launching, sailing or trailering with the mast up. MAST CONTACT WITH POWER LINES COULD BE FATAL! Be certain that the rigging area and the area you will be sailing in are free of overhead power lines. Report any such power lines to your local power authority and sail take pride in presenting the Tandem Island to you and hope that you'll take as much pride in owning winds and good sailing! Hobie CAT COMPANYThis assembly Manual takes you step-by-step through the set-up and sailing of your new Tandem Island, and will help you understand each part in detail.
3 Contents PAGEH obie Island Terminology ..3 List of Assembly ..5 Mast Assembly ..5-6 Aka and Ama Installation ..7 Mast Akas ..9 Furling the Sail ..9 Reefing the Sail ..10 Rudder Installation & Storage Bag ..11 MirageDrive ..12 Basic Kayak MIRAGE TANDEM ISLANDOWNERS MANUAL2 Breakaway the Tandem mast is a two-piece design for easy trailering and Tandem Island's main and ama hulls are contructed from Polyethlene, prividing an extremely durable hull that is highly resistant to dings and SYSTEMThe mainsheet is designed with a pulley system to allow the sailor to trim the sail with minimal are long thin pieces of fiberglass rod. These rods give the sail stiffness and help maintain sail shape. The unique angles of the battens allow the sail to easily TAILSTell tails are small ribbons to help determine the trim of the sail. They will tell you whether you need to sheet your sail in or (not shown here)The V-frame is an internal structure that gives support to the base of the sail is a square-top design, utilizing the latest technology in sail FURLERThe roller furler allows the sail to be rolled around the mast for easy Amas are the small outer hulls that provide ultimate stability under sail Akas are the pivoting arms that connect the Amas to the Mirage Tandem Island SpecsHull Length= 18 6" / Length= 13'4" / Hull Width= 30 /.
4 76mWidth Amas Out= 10' / Amas In= 4' / Rigged Weight= 190lbs. / integrated centerboard enhancesyour upwind of PartsWhen unwrapping your new Tandem Island, be sure to check that all parts are included and that the boat is in good order. Find a clean spot, lay out all of your components and run through the and Crossbars1. Hobie Tandem Island Hull with Deck Mounted Crossbars and Mainsheet2. Two Amas3. Two Forward Akas4. Right Rear Aka5. Left Rear Aka6. Aka Carrying BagSail Components and Small Parts7. One Sail8. One Two-Piece Mast9. Three Battens 10. Full Length Mast/Sail Bag11. Bag of Small Parts a. Allen Wrench b. Two Nylon Screws and Nuts c. Small Line for Downhaul 426457109811a11b11c3 Sail Assembly Instructions51. Find a large clean area where you can lay the sail flat. 2. The sail battens are the long flexible white rods which are inserted into long pockets on the sails. These pockets run diagonally along the face of the sail.
5 Simply insert the battens into the pockets and run them all the way to the bottom. 3. Once the battens are fully installed, apply tension to them to keep them in the pocket. Follow the diagram below for the proper lacing procedure. Make sure to tie a knot at the end of the line to prevent it from falling off the batten. 4. The Island s composite mast is two pieces, so simply slide the top of the mast into the lower Now slide the small end of the mast into the sail sleeve all the way to the top of the sail. Once the mast reaches the top of the sail, make sure the webbing gets pressed into the fitting at the top of the sail, as shown below. 6. In the small parts bag, there is a small length of line that is used to apply a down force along the sleeve of the sail (called downhaul). Tie one end of the line to the small webbing loop at the base of the sail sleeve using a bowline off line in batten and tie a knot at the end of the on line to press batten into Now rotate the base of the mast so that the hole on the mast collar aligns with the line.
6 Feed the line through the hole and pull back up to the sail sleeve. Pull some tension in the line and cleat off the end into the jam cleat on the sail Roll the sail onto the mast. If the sail is in the same orientation as shown in the image below, rotate the mast counterclockwise. Basically you're looking to have the plastic hook located at the clew (near where the mainsheet attaches) of the sail on the outside when the sail is rolled.!CAUTION!WATCH FOR OVERHEAD POWER LINES WHEN HANDLING THE SAIL AND MAST. NEVER RIG, TRAILER, OR SAIL THE BOAT NEAR OVERHEAD POWER LINES. MAST CONTACT WITH A POWER LINE COULD BE FATAL!9. Once fully rolled, take the small line with the knot and wrap it around the hook sewn to the keep your sail in good condition, we highly recommend that you store the sail rolled around the mast and inside the included full length storage bag. It is also important to bag the sail and mast when transporting on a car top or trailer.
7 It is recommened to store the sail dry and not wet. Island Assembly The instructions below will help guide you through the most efficient way to assemble your Tandem Island. Depending on how you transport your kayak (roof racks/ trailer), you may be able to eliminate some the Akas1. Lay the Tandem Island hull on flat dry ground. If you are planning to transport the kayak after it is assembled, now is a good time to plug in your heavy-duty plug-in cart. (Assembling the Island on the cart is much easier.)2. Remove the akas from the carrying bag and install them on the deck-mounted bars. It is important to differentiate the rear bars from the forward bars. The rear bars have an additional smaller tube that can swivel. With the rear akas, it is also important to note that there are port and starboard bars. The diagram below will show you proper To install the akas, slide the casting on the aka into the deck mounted crossbar until it clicks into place.
8 Please note the layout of the bars in the diagram the Amas1. Both amas are identical, so they can go on either side. Simply install the end of the aka into the scupper holes on the ama. Keep the Bungee on the ama on the outside of the scupper. 2. Once completely installed, stretch the Bungee cord over the eyelet posts on the akas. Make sure the aka is fully When transporting the Island, it is easier to keep the amas folded along the side of the hull. Pivot the bars back and stretch the Bungee underneath the forward aka over the eyelet post near the map Rear AkaPort Rear AkaForward Akas7 Removing the AkasTo remove the aka bars from the deck mounted bars, squeeze the two buttons on the deck mounted crossbar and pull out the aka IMPORTANT! Before raising the mast, look overhead for powerlines.!CAUTION!WATCH FOR OVERHEAD POWER LINES WHEN HANDLING THE SAIL AND MAST. NEVER RIG, TRAILER, OR SAIL THE BOAT NEAR OVERHEAD POWER LINES.
9 MAST CONTACT WITH A POWER LINE COULD BE FATAL!2. To install, take the bottom of the mast, and insert it through the bearing on the forward deck-mounted crossbar and into the mast cup. It is important to have good control of the mast as you install it so it goes straight into the As the mast collar goes into the bearing, you should hear the lock snap over the collar. When installed, there should be a 1/8 -1/4 gap between the collar on the mast and the plastic bearing ring. 4. Unwrap the furling line from the mast and feed it through the inboard crossbar cleat as shown in the picture Feed the mainsheet hook through the grommet at the clew of the sail. For the best performance, make sure the line isn't twisted around itself. See page 13 for a 3:1 mainsheet the MastWhen storing or transporting the boat, be sure to take down the mast. Before pulling the mast out, look overhead for powerlines that could make contact with the Pull back on the mast release Apply a little side pressure on the mast away from the trigger as you lift it out.
10 As soon as the mast is free, grab it with both hands and pull the mast all the way out. Always pull the mast straight ! IMPORTANT ! The mast cup must be completely clear of sand that can collect at the bottom. Collection of sand will prevent the mast from fully going inside of the cup. To rinse the mast cup out, lay the boat on its side and splash water into the cup to allow it to rinse the Working Features of your Tandem Island Now that your Island is assembled, it is important to familiarize yourself with how some of its features work before taking it on the water. We recommed that you practice the following procedures before Akas and the Locking Crossbrace The Tandem Island is equipped with pivoting akas to make it easy to get on and off the boat from a dock or beach. As the akas fold in, they also move down to give you plenty of stability even when folded in. Do not sail the boat with the akas folded keep the akas in the out position, you will need to lock them using the pivoting crossbrace and ball locking system.

