Transcription of PDS-800 - Precision Garage Door Services
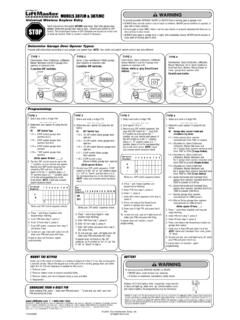
1 2 Remote ControlsThis opener is supplied with a three-button remote control (the second and third buttons can be used to control an additional opener or gate). Additional single and multi-button remote controls can be purchased. The short wire on the back of the opener serves as an antenna for the remote controls. Do not cut off the wire or the remote controls will not operate Add or Remove a Remote Control 1 Press the opener s LEARN button. The opener s light and red light will flash once and turn on for about 15 seconds. A remote must be added or removed while the red light is still Send a signal from a remote. The opener s light and the red light will flash once if a remote was added, or the opener s light and the red light will flash four times if a remote was Repeat Steps 1 & 2 for any additional remote Remove all Remote Controls1 Press and hold the opener s LEARN button for ten seconds or Release the LEARN button.
2 The red light and opener s light will blink three times signaling that all of the remotes in the opener s memory were erased. The red light will turn off, then turn on for 15 seconds. A remote control can be entered during this time using Step 2 Before testing the remote control, straighten out the opener s antenna wire so it points Stand clear of the door, press the remote control s button and verify that the opener starts. Replacing a Remote Control s BatteriesWhen the red light on the remote glows dimly, or fails to light at all when the remote is activated, the batteries need Open the remote s case and remove the circuit Replace old battery with a Type CR032 Re-assemble the Garage Door Opener MaintenanceWeather conditions may affect the door operation which could require some re-setting of the opener s adjustments.
3 doors may swell and become heavier during wet periods, door hinges and rollers might bind during cold periods. To insure safe operation of the door, perform the following tests, including any additional test steps Month1 With the door closed, pull the red release handle to disconnect the opener from the From outside the Garage , slowly open the door manually all the way, and then close it all the way. Notice if there is any binding, sticking or rubbing. The door should move smoothly in both Raise the Garage door about halfway up. Carefully release the door and see if the door balances. It should stay in place. Close the door. NOTE: If the Garage door is unbalanced or the door travel isn t smooth, have a qualified Garage door professional adjust or repair the To reconnect the opener, flip the release lever up and run the Perform the Safety Beam Test (Section 4).
4 6 Perform the Safety Reversal System Test as described in Section Servicing the Opener1 Perform the Safety Beam Test (Section 4).2 Perform the Open and Close Limit Adjustments (Section 5).3 Perform the Safety Reversal System Test (Section 8).Every 6 MonthsCheck the belt or chain tension. For belt-drive rails, examine the length of the tension spring in the traveler. It should be about 1 long. For chain-drive rails, examine the spacing between the turnbuckle and the rail. The turnbuckle should be slightly above the rail. NOTE: Too much or too little chain tension will cause excessive sprocket AdjustmentIf necessary, use the following steps to adjust the Hold the turnbuckle with a flat blade screwdriver and loosen the two locknuts with a 7/16 end Twist the turnbuckle to adjust the chain tension.
5 Adjust the chain until the turnbuckle is sightly above the Hold the turnbuckle with a flat blade screwdriver and tighten the two locknuts with a 7/16 end AdjustmentThe tension spring in the traveler keeps the belt taut. The factory setting for the tension spring length is .9 long. If the tension spring is longer than 1 , adjust the Hold the traveler so the adjustment wheel is visible through the large Use a flat blade screwdriver to turn the adjustment wheel to compress the tension spring until its length is between .9 and 1 YearCheck the door hardware for lubrication needs. Lubricate door hinges, rollers and bearings according to door manufacturer s recommended or chain-drive DC motor Garage door operatorHomeowner s instructions For Sectional Type DoorsIMPORTANT SAFETY NOTESP lease read the instructions carefully!
6 This Garage door opener is designed to provide safe and reliable service if installed and tested as described in these instructions. A Garage door is the largest mechanical appliance in a residence. Care must be taken to prevent injury or death during installation and operation of the Garage door and Garage door FOLLOWING FORMATS ARE USED FOR SAFETY NOTES IN THESE Using the Garage Door OpenerOpening the Door1 With the door in view, press the wall station s UP/DOWN ARROW button, the button assigned to the opener on the remote control, or enter a valid access code and press START/STOP on a remote When the opener is activated, the opener s light will turn on and the door will begin to The door will open until the open limit is reached. If an obstacle is encountered (opener s light flashes four times) while the door is opening, the door will The opener s light will stay on for about five minutes after the door the Door1 With the door in view, press the wall station s UP/DOWN ARROW button or the button assigned to the opener on the remote control, or enter a valid access code and press START/STOP on a remote When the opener is activated, the opener s light will turn on and the door will begin to The door will close until the close limit is reached.
7 If an obstacle is encountered (opener s light flashes four times), or the safety beam is interrupted (opener s light flashes three times) during closing, the door will stop, then The opener s light will stay on for about five minutes after the door the Door Mid-travel1 The door can be stopped immediately at any time by pressing the wall station s UP/DOWN ARROW button, the remote control s pushbutton, or press the START/STOP button on a remote keypad (if the remote keypad was used to start the door).2 The next time the opener is activated, the door will move in the opposite Lock for Additional Security1 Slide the wall station s LOCK switch to the locked position to prevent remote controls from opening the door after the door is completely closed.
8 The remotes can close the door, but not open it. The door can still be opened or closed by using the wall station s UP/DOWN ARROW pushbutton. NOTE: To signal that the vacation switch is locked, the opener s light and red light will flash five times if a remote is activated in an attempt to open the Slide the wall station s LOCK switch to the unlocked position to return the opener to normal the Opener s Light1 The opener s light can be lit by pushing the wall station s LIGHT button. The light will remain on until the LIGHT button is pressed again or the opener is If the opener s light is on, pushing the wall station s LIGHT button will turn the opener s light the Door from the Opener1 With the door in any position (preferably closed), carefully pull the red release handle.
9 USE CAUTION IF THE DOOR IS OPEN, THE DOOR MAY The disconnected door can be opened or closed To reconnect the opener, flip the release lever up. Raise or lower the door manually until the opener USER SAFETY INSTRUCTIONS WARNING A MOVING Garage DOOR CAN CAUSE INJURY OR DEATH! TO REDUCE THE RISK OF DEATH OR SEVERE INJURY:1 READ AND FOLLOW ALL Use this operator only with sectional overhead doors no more than 10 ft. NEVER LET CHILDREN OPERATE, OR PLAY WITH DOOR CONTROLS! KEEP REMOTE CONTROL AWAY FROM CHILDREN!4 Always keep moving door in sight and away from people and objects until it is completely closed. NO ONE SHOULD CROSS THE PATH OF THE MOVING NEVER GO UNDER A STOPPED, PARTIALLY OPEN Test door opener monthly. The Garage door MUST reverse on contact with a 1-1/2 inch object (or a 2x4 board laid flat at the center of the door) on the floor.
10 If adjusting either the force or the limit of travel, re-test the door opener. Failure to adjust the opener properly may cause severe injury or If possible, use the red emergency release handle only when the door is closed. Use caution when using this release with the door open. Weak or broken springs may cause the door to fall rapidly, causing injury or KEEP Garage doors PROPERLY BALANCED. (See Garage Door Opener Maintenance) An improperly balanced door could cause severe injury or death. Have a qualified service person make repairs to cables, spring assembly and other SAVE THESE DOOR SHOULDBALANCE WITHOUTGOING UP OR DOWNCHECKING THE DOOR BALANCETEST WITH SMALL OBSTACLETHE DOOR MUST REVERSEWITHIN 2-SECONDS AFTERIMPACT WITH A 2 x 4 BOARD2 x 4 BOARD LAID FLATUNDER CENTER OF DOORTESTING THE SAFETY REVERSAL SYSTEMIF PROPERLYBALANCED, THE DOOR WILL STAY AT A HALFWAY POSITIONIF PROPERLYBALANCED, THE DOOR WILL STAY AT A HALFWAY POSITIONPRINTER S INSTRUCTIONS: INSTR,HOMEOWNERS,LDCO,PVT LBL GDD; GTO PN: 231604-D; INK: BLACK; MATERIAL: 20# MEAD BOND; SIZE: x ; FOLDING: 1-FOLD VERTICAL, 1-FOLD HORIZONTAL, FINISH X WITH LOGO SHOWING; SCALE: 1-1.