Transcription of PEDALWORKSTM FAUCET CONTROLLER - Pedal …
1 Owners ManualPEDALWORKSTMFAUCETCONTROLLERM odel PVI-213 Year Limited WarrantyPedal Valve Inc. will repair or replace units with defectsin materials or workmanship for a period of three yearsfrom date of purchase. Return unit to factory at theaddress below, freight pre-paid, and your unit will berepaired and shipped back at no due to mineral deposits from your water,or damage to the finish are not covered by thiswarranty, but will be repaired at a nominal can obtain 2-3/8 compression union from ahardware store and connect the hoses together if everyou need to have the unit out for name, daytime phone #, dated proof ofpurchase for warranty repairs, and return addresswhen shipping unit to Warranty Service or Repairs, Ship To: Pedal Valves River RoadLuling, LA 70070 Tech Support 985-785-0594 Fax 985-785-0082E-mail 12 Congratulations on your purchase of aPEDALWORKStm FAUCET CONTROLLER .
2 It is awonderful product that provides the cleanest, fastest,and most efficient way to operate any sink. It isdesigned to connect to and control any FAUCET , andbuilt to provide you years of enjoyable the steps in the installation instructions, andyou should have no problems installing this you do, check the troubleshooting section on page11, and if that doesn t clear it up, give our technicalsupport department a get the most pleasure & benefits from thistechnology, review the operating instructions and tipswhich you ll find beginning on page appreciate you purchasing this product, and ifyou ever need any additional support from us, feelfree to give us a call, e-mail us, or visit our web Valves Inc.,13625 River Road,Luling, LA 70070 USAP hone 985-785-9997 Fax 985-785-0082e-mail; pvi@ ; 2 Trouble Shooting and ServiceInstallation ProblemsMost problems are due to the hoses being crossedup.
3 Double check that the water supply to the pedalis coming in to the top connections, and the lines goingto the FAUCET are coming out of the lower left side is the hot and the right side is the trickles or drips when Pedal is off - Seeabove first. If not, determine which side is cartridge and look for sand or debris holdingcartridge will not latch or unlatch - Check forinterference with the floor or cabinet. Loosenadjustable bracket bolts and slide unit up and downand front to back to reposition. Sometimes you mayhave to tilt the unit in the bracket, or remove some ofthe cabinet toe after unit has been in use forsome Drips When Pedal Is Off - Close stopvalves. Pull cartridges and inspect for debris or cartridges if Procedure - Install new cartridgeshand tight plus a quarter of turn.
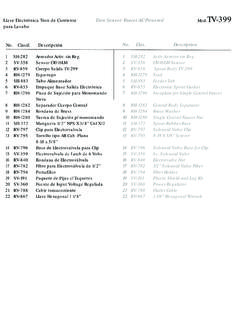
4 Check that pedalpusher cams are touching both cartridges at same not, tighten appropriate cartridge a little problems may require a plumber for repairs,or contact Pedal Valves 11 Contents Of BoxInstallation Tools Needed Drill with 2 hole saw. A jigsaw or keyhole sawcan be used instead, but the 2 hole saw is theeasiest. Drill bit Crescent wrench 5/8 end wrench 9/16 end wrench end wrench 13/16 endwrench Phillips head screwdriver (#2) Snips,sharp knife, or scissors Ruler or tape measure Flash light Rags PencilInstallation Steps for PEDALWORKSTM 1. Remove contents from box and review instructions before proceeding. 2. Remove phillips head screw at bottom side of Pedal arm, and pull out the lower part of the Pedal . It can be a little snug, so give it a good pull if 3 Ref # Part #Name of Part Qty 1 PVI21P11 Cover, White Plastic1 PVI21P12 Cover, Metal1 2 PVI21P20 Valve Body1 3 PVI21P30 Set Screw1 4 PVI21P40 Pedal Mounting Shaft w/nuts1 5 PVI21P50 Cartridge (hot and cold are identical)1 6 PVI21P60 Pusher Cam Bolt1 7 PVI21P71 Pusher Cam (Aluminum)1 PVI21P72 Pusher Cam (Chrome)1 PVI21P73 Pusher Cam (Polished Brass)1 PVI21P74 Pusher Cam (Satin Nickel)1 8 PVI21P81 Pedal Control Arm (alumilux)1 PVI21P82 Pedal Control Arm (Chrome)1 PVI21P83 Pedal Control Arm (Polished Brass)1 PVI21P84 Pedal Control Arm (Satin Nickel)1 9 PVI21P92 Toe Button (Chrome)1 PVI21P93 Toe Button (Polished Brass)1 PVI21P94 Toe Button (Satin Nickel)1 10 PVI21P101 Pedal , Lower Piece(Alumilux)
5 1 PVI21P101 Pedal , Lower Piece(White)1 PVI21P101 Pedal , Lower Piece(Bone)1 PVI21P101 Pedal , Lower Piece(Chrome)1 PVI21P101 Pedal , Lower Piece(Polished Brass)1 PVI21P101 Pedal , Lower Piece(Stain Nickel)1 11 PVI21P110 Lower Pedal Mounting Screw1 12 PVI21P120 Adjustable Bracket Anchors4 13 PVI21P130 Cover Screws4 14 PVI21P140 Adjustable Bracket1 15 PVI21P150 Bracket Bolt Nut & Washer2 16 PVI21P160 Flex line 3/8 C X FIP X 42 1 17 PVI21P170 Flex line 3/8 C X 3/8 C X 30 1 18 PVI21P180 Adapter 3/8 C X MIP1 19 PVI21P190 Owners Manual Models 211 Parts BreakdownPage the template, mark the hole locations forthe Pedal arm, and the 4 mounting screw have the freedom to mount the unit whereever you want. From our experience these aresome guidelines we recommend: If the cabinet has a divider between the left andright door, mount it right behind the divider.
6 If there is framing around the cabinet, but nodoor divider, mount it right behind the frame. Ifthe sink is a single compartment as in bathrooms,mount it towards the hinged side of the space. Ifthe sink is a double compartment as in kitchens,the center of the sink is recommended. If the cabinet is frameless, you can cut the slotinstead of drilling the 2 hole. Observe if the cabinet door recesses into thecabinet when closed. If so mount the unit backenough so it doesn t interfere with the Using a drill and bit, drill four holes for themounting screw Drill hole for Pedal using 2 hole saw, or cut holewith jig saw. If using jig saw slot can be 4 More Tips and BenefitsMore tips for the kitchenWhen rinsing vegetables, fish, or meats; step on and offthe Pedal instead of leaving the water from handling raw chicken, hamburger, etc.
7 Likesalmonella and E-Coli are safely washed down the draininstead of going on to the hands are covered with flour, you can wash themess off your hands without making another mess on thefaucet holding babies, or on the phone, you can still turnthe water on and off without having to put things children can get water, even though they can t reachthe Utility Rooms, Basements, and WorkshopsBig messes are sometimes made at these lets you wash the mess down the drain in-stead of making a mess of the FAUCET , sink, mirrors, s great when washing pets. A hose with a showerheadfor the spout is also helpful. Step on and off the pedalwhen washing and rinsing your pets. You hands stay freeto hold the pet and you don t have to keep re-adjustingthe cleaning paintbrushes, muddy shoes, the hands-free operation of PEDALWORKS helps you cleanup onemess without making another BathroomsWhen washing your hands and/or your face, your faucetswill stay bright, shiny, and germ free because you don thave to touch the brushing teeth or shaving use PEDALWORKS tosave children s baths, little ones can use the sink when theyare too short to reach the FAUCET .
8 No more climbing on thecounter, to turn on the water and hot water energy is a wayyou and your family will make a real positive contribution to protecting the 96. Insert a plastic mounting screw anchor in each ofthe holes (4 total).7. Lower PEDALWORKSTM through hole as shown,and install a mounting screw in each Re-insert Pedal and phillips head Loosen bracket bolts so valve will slide up & down,and front to back. Position the valve in bracket sothat bottom of the Pedal is at least 3/4 above thefloor, and the Pedal operation is not obstructed byany part of the cabinet. Firmly tighten bracket 5 Operating InstructionsUsing your PEDALWORKSTM FAUCET CONTROLLER is verysimple. We do suggest you read the following tips andshare them with your family. This will help you get themost benefits from this the handles on your FAUCET open to anydesired setting.
9 Step on and off the Pedal toactivate water flow at that the latch button in with your foot to latchthe Pedal open. You do this when you needconstant flow; as when waiting for the water toheat up, or running the garbage disposer. Stepon the Pedal again, and latch the Pedal is latched open you can useyour FAUCET handles the old fashioned disable the Pedal from being used you canclose the FAUCET a tremendous amount of hot Operations in the washing your hands, step on the Pedal to wet yourhands. Step off while lathering with soap. Step on thepedal again to rinse. This saves more than 50% of thewater used for your FAUCET set for cold water only during the dayand after dinner. When preparing dinner and doing thedishes, set it for warmer. This keeps you using cold watermost of the rinsing dishes, generally latch the Pedal open longenough for the water to heat up.
10 Then, step on and off thepedal as you rinse dishes and load the dishwasher. Thissaves a tremendous amount of hot e Butt on Pedal Page 8 The flex linesshould be handtightened, and thenturned gently witha wrench till youfeel the rubberseals begin to firmup. About one fullturn. Do not Connect the stainless steel braided lines as toCold SupplyValveConnects toCold Side of FaucetMake the connections at thefaucet. The two hoses withthe larger ends (1/2 FPT) areused; one on the hot, and oneon the faucets have 3/8 connections instead of . If thisis the case with your FAUCET , usethe adapters provided and connectas shown. The compressionconnector should be hand tightplus 1-1/2 illustration shows where to connect the flex linesConnects to Hot SupplyValveConnects to Hot Side of FaucetAfter making the connections at the FAUCET , connect the otherends of these hoses to the bottom connections onPEDALWORKS.