Transcription of PM1000 2 -Place Intercom System Operation and Installation ...
1 200-190-0002 1 Rev. 2, Jan. 2001 9800 Martel Road Lenoir City, TN 37772 PM1000 2 -Place Intercom System Operation and Installation manual FAA-Approved TSO C50c Document P/N 200-190-0002 Revision 2 PS Engineering, Inc. 2001 Copyright Notice Any reproduction or retransmittal of this publication, or any portion thereof, without the expressed written permission of PS Engineering, Inc. is strictly prohibited. For further information contact the Publications Manager at PS Engineering, Inc.
2 , 9800 Martel Road, Lenoir City, TN 37772. Phone (865) 988-9800 PS Engineering Incorporated PM 1000 FAA TSO Approved Intercom Installation and Operation manual 200-190-0002 2 Rev. 2, Jan. 2001 Section I General Information Introduction The PM1000 is an FAA-TSO approved, panel mounted, 2 -Place Intercom System (ICS). Please read this manual completely before Installation to minimize the risk of damage to the unit and to become familiar with all the features. Scope This manual contains Installation and operational instructions for the following PS Engineering unit: Model Description Part Number PM1000 2 -Place Intercom System 11900 Description The PM1000 is a 2 -Place , panel-mounted Intercom with individual volume and squelch controls for the pilot and copilot positions.
3 A front panel mode switch allows the pilot to select one of two possible configurations: "ISO" mode isolates the pilot from the Intercom and connects to the aircraft radio. The copilot can continue listen to entertainment without distracting the pilot. This position will not hear radio communications. "ALL" mode places all headsets on a party line. Each one hears aircraft radio, entertainment and can use the Intercom . The PM1000 has an automatic fail-safe interconnect to the aircraft radio. If power to the Intercom is disrupted, an internal relay will connect the pilot's headset to the aircraft radio. This allows continuous radio communications. Note: The copilot will no longer hear aircraft radio when power is removed. The LED shows green when power is applied to the unit. An auxiliary input is provided, allowing the pilot and copilot the option to listen to music during flight.
4 During Intercom activity, this music is automatically muted to allow communications without distraction. When the activity ceases, the music returns to the original listening volume. Note: the music is NOT muted during radio reception. During times when radio communication is vital, the pilot should select ISO mode. Other occasions where radio is of lessor importance, it is possible to put the Intercom in the background by reducing the PM1000 volume. The pilot volume control doesn t effect the volume of the aircraft radio, so it can be adjusted to a more prominent level. Both pilot and copilot have transmit capabilities over the radio. The PM1000 allows only the person who presses their PTT to be heard over the aircraft radio. If both pilot and copilot press the PTT at the same time, PS Engineering Incorporated PM 1000 FAA TSO Approved Intercom Installation and Operation manual 200-190-0002 3 Rev.
5 2, Jan. 2001 the copilot will override (Ideally suited for training environments). Pilot regains priority by switching the unit off. Approval Basis The PM1000 , part number 11900 is FAA-approved under TSO-C50c. Specifications Input power: - Volts DC Current Drain: <110 mA (Externally fused at 1 Amp) Headphone Impedance: 150-1000 typical Audio Distortion: <10% @ 75mW into 150 load Aircraft Radio Impedance: 1000 typical Mic Frequency Response: 3 dB, 350 Hz 6000 Hz Unit weight.
6 Ounces ( kg) Dimensions: " H x " W x " D ( x x cm) Environmental and technical qualifications: RTCA DO-160B/DO-170 Temperature -20 C to +55 C Equipment required but not supplied A. Headphone and microphone jacks as needed B. Headphones, 150 monaural, 2 each C. Microphones, two each D. Interconnect wiring E. Circuit Breaker 1 Amp. License Requirements None PS Engineering Incorporated PM 1000 FAA TSO Approved Intercom Installation and Operation manual 200-190-0002 5 Rev.
7 2, Jan. 2001 Section II Installation General Information The PM1000 comes with all mounting hardware for Installation . A 2 -Place jack kit is available, part number 250-000-0040. Installation of the PM1000 , using the hardware supplied and available wiring, does not require special tools or knowledge other than described in FAA Advisory Circular It is the installer's responsibility to determine the approval basis for this Installation . An FAA Form 337, or other approval may be required. See Appendix B for example of FAA Form 337. Unpacking and preliminary inspection The PM1000 was carefully inspected mechanically and thoroughly tested electronically before shipment. It should be free of electrical or cosmetic defect. Upon receipt, verify that the parts kit (p/n 250-001-0001) includes the following: Part Number Description Quantity 475-440-0318 #4-40 Machine screws, black 2 625-001-0002 Concentric inner knobs 2 001-001-0002 Outer knobs w pointer 2 430-001-0003 Aluminum doubler plate 1 425-025-0002 25 pin Sub-d male connector 1 425-025-0003 Connector hood 1 475-002-0000 Connector Thumbscrews 2 575-001-0001 PM1000 label set 1 200-190-0001 Operator's and Installation manual 1 122-001-0000 Drill Template 1 Equipment Installation procedures 2 ea.
8 Ea. TO SCALE Figure 2-1 Hole Spacing PS Engineering Incorporated PM 1000 FAA TSO Approved Intercom Installation and Operation manual 200-190-0002 6 Rev. 2, Jan. 2001 1. Using the template, drill six holes in the instrument panel in a location convenient to the pilot position(s). 2. Insert the PM1000 from behind the instrument panel, aligning the holes for the knobs, LED, and switch. 3. Depending on the instrument panel thickness (< ), you may elect to use the aluminum faceplate to provide additional support. Place the aluminum plate over the knob shafts and secure, using the two # 4-40 round head screws provided. 4. Remove the backing from either the horizontal or vertical graphics label provided with the unit, carefully align over the knob shafts, and press firmly in place.
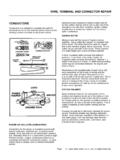
9 5. Install the knobs over the volume and squelch control shafts. Cable harness wiring To complete the Installation , a wire harness must be made as shown in Appendix D. PS Engineering can make a custom-tailored wiring harness for the installer. All harnesses use Mil-spec quality components with professional techniques, and are fully tested before shipment. Contact PS Engineering for more information. If the aircraft already has pilot and copilot headset jacks installed, you may re-use them. Remove and discard all wires from the copilot headset jacks. You may use the existing pilot headset jacks as the Auxiliary Aircraft Radio Headset Jacks, but they should be moved to a new location to avoid confusion with the pilot's headphone jacks. In the event the Intercom has to be removed for any reason, these jacks provide access to the aircraft radio System .
10 To connect Intercom into the aircraft audio System , parallel the appropriate set of cables from the Intercom to the Auxiliary Aircraft Radio Headset Jacks. Finally, install new headset jacks into the aircraft and connect them directly to the appropriate pins of the PM1000 . See the wiring diagram for all details of the wire harness interconnects. Electrical Noise Issues WARNING: You must use separate shielded cables for the microphone and headphone jacks. Combining these two wires WILL cause loud oscillations and degrade the Intercom function. The oscillation is caused by the cross-coupling between the large headphone signal and the small microphone signal. The resulting feedback is a high-pitched squeal that varies with the volume controls. Due to the variety of the radio equipment found in today's general aviation aircraft, there is the potential of both radiated and conducted noise interference.