Transcription of PORTABLE FORCED AIR HEATERS - Desa Tech
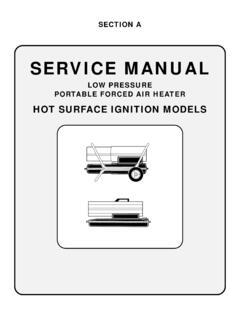
1 PORTABLE . FORCED . AIR HEATERS . OWNER'S MANUAL. 100 SIDE FRONT HANDLES PFA/PV 003. 150 SIDE FRONT HANDLE PFA/PV 007. Heater Sizes: 110,000 150,000 155,000 165,000 Btu/Hr IMPORTANT. Read and understand this manual before assembling, starting, or servicing heater. Improper use of heater can cause serious injury. Keep this manual for future reference.. ARL LOGO G 004. 110,000 150,000 155,000 165,000 BTU/HR. PORTABLE FORCED AIR HEATERS . SAFETY e) At no time shall more than one day's supply of heater fuel be stored inside Locate heater on a stable and level sur- face if heater is hot or running or a fire INFORMATION a building in the vicinity of the heater.
2 May occur. Bulk fuel storage shall be outside the When moving or storing heater, keep WARNINGS structure. heater in a level position or fuel spill- f) All fuel storage shall be located a age may occur. IMPORTANT: Read this Owner's minimum of 25 feet from HEATERS , Manual carefully and completely Keep children and animals away from torches, welding equipment, and before trying to assemble, oper- heater. similar sources of ignition (excep- ate, or service this heater. Im- tion: the fuel reservoir integral with Unplug heater when not in use. proper use of this heater can the heater unit).
3 When used with thermostat, heater may cause serious injury or death g)Whenever possible, fuel storage shall start anytime. from burns, fire, explosion, elec- be confined to areas where floor pen- Never use heater in living or sleeping trical shock, and carbon monox- etrations do not permit fuel to drip areas. ide poisoning onto or be ignited by a fire at lower Never block air inlet (rear) or air outlet elevation. h)Fuel storage shall be in accordance (front) of heater. DANGER: Carbon monoxide with the federal, state, or local au- Never move, handle, refuel, or service poisoning may lead to death!
4 Thority having jurisdiction. a hot, operating, or plugged-in heater. Never use heater where gasoline, paint Never attach duct work to front or rear Carbon Monoxide Poisoning: Early of heater. thinner, or other highly flammable va- signs of carbon monoxide poisoning re- pors are present. semble the flu, with headaches, dizziness, and/or nausea. If you have these signs, the Follow all local ordinances and codes heater may not be working properly. Get when using heater. fresh air at once! Have heater serviced. HEATERS used in the vicinity of tarpau- Some people are more affected by carbon lins, canvas, or similar enclosure ma- monoxide than others.
5 These include preg- terials shall be located a safe distance nant women, persons with heart or lung from such materials. The recommended disease or anemia, those under the influence minimum safe distance is 10 feet. It is of alcohol, and those at high altitudes. further recommended that these enclo- sure materials be of a fire retardant na- Make certain you read and understand all ture. These enclosure materials shall be Warnings. Keep this manual for reference. securely fastened to prevent them from It is your guide to safe and proper operation igniting or from upsetting the heater of this heater.
6 Due to wind action. Use only kerosene or No. 1 fuel oil to Use only in well-vented areas. Before avoid risk of fire or explosion. Never using heater, provide at least a three- use gasoline, naphtha, paint thinners, square-foot opening of fresh, outside alcohol, or other highly flammable fuels. air for each 100,000 Btu/Hr of rating. Fueling This heater produces carbon monoxide, a) Personnel involved with fueling shall which is listed by the State of Califor- be qualified and thoroughly familiar nia as a reproductive toxin under Propo- with the manufacturer's instructions sition 65.
7 And applicable federal, state, and lo- Use only in places free of flammable cal regulations regarding the safe vapors or high dust content. fueling of heating units. b)Only the type of fuel specified on the Use only the electrical voltage and fre- heater's data plate shall be used. quency specified on model plate. c) All flame, including the pilot light, Use only a three-prong, grounded ex- if any, shall be extinguished and the tension cord. heater allowed to cool, prior to fueling. Minimum heater clearances from com- d)During fueling, all fuel lines and fuel- bustibles: line connections shall be inspected Outlet: 8 Ft.
8 Sides: 4 Ft. for leaks. Any leaks shall be repaired Top: 4 Ft. Rear: 4 Ft. prior to returning the heater to ser- vice. 2 102439. OWNER'S MANUAL. PRODUCT IDENTIFICATION UNPACKING. 1. Remove all packing items applied to Hot heater for shipment. Upper Air Shell 2. Remove all items from carton. Outlet Fan 3. Check items for shipping damage. If Guard heater is damaged, promptly inform Lower dealer where you bought heater. Shell Fuel Cap Fuel Tank Side Cover Power Flame-Out Control Cord Reset Button Figure 1 - Product Identification ASSEMBLY. These models are furnished with wheels and a front handle.
9 Some models are furnished with a rear handle also. Wheels, handle(s), and the mounting hardware are found in the shipping carton. Front Tools Needed Handle Medium Phillips Screwdriver 3/8" Open or Adjustable Wrench Hammer Screw Hot Air Outlet Rear 1. Slide axle through wheel support Handle frame. Install wheels on axle. IMPORTANT: When installing wheels, point extended hub of wheels toward wheel support frame (see Figure 2). Air Fuel Inlet 2. Place cap nuts on axle ends. Gently tap Tank with hammer to secure. Flange 3. Place heater on wheel support frame.
10 Make sure air inlet end (rear) of heater Wheel is over wheels. Line up holes on fuel Support tank flange with holes on wheel sup- Frame port frame. 4. Place front handle (and rear handle if Wheel Nut provided) on top of fuel tank flange. Insert screws through handle(s), fuel tank flange, and wheel support frame. Cap Nut Extended Attach nut finger tight after each screw Axle Hub is inserted. 5. After all screws are inserted, tighten ASSEMBLY PFA/PV 018. nuts firmly. Figure 2 - Wheel and Handle Assembly 102439 3. 110,000 150,000 155,000 165,000 BTU/HR.