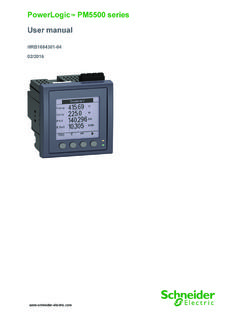
Transcription of PowerLogic™ PM5100 Series Power and Energy …
1 PQSP owerLogic PM5100 Series Power and Energy MeterUser GuideEAV15105 - EN0402/2015 Safety InformationImportant InformationRead these instructions carefully and look at the equipment to become familiar with the device before trying to install, operate, service or maintain it. The following special messages may appear throughout this manual or on the equipment to warn of potential hazards or to call attention to information that clarifies or simplifies a addition of either symbol to a Danger or Warning safety label indicates that an electrical hazard exists which will result in personal injury if the instructions are not is the safety alert symbol. It is used to alert you to potential personal injury hazards. Obey all safety messages that follow this symbol to avoid possible injury or noteElectrical equipment should be installed, operated, serviced and maintained only by qualified personnel. No responsibility is assumed by Schneider Electric for any consequences arising out of the use of this qualified person is one who has skills and knowledge related to the construction, installation, and operation of electrical equipment and has received safety training to recognize and avoid the hazards indicates a hazardous situation which, if not avoided, will result in death or serious indicates a hazardous situation which, if not avoided, could result in death or serious indicates a hazardous situation which, if not avoided, could result in minor or moderate is used to address practices not related to physical injury.
2 powerlogic PM5100 Series user guideTable of Contents 2015 Schneider Electric All Rights Reserved5 Chapter 1:IntroductionPower and Energy Meter Hardware .. 9 Parts and Accessories .. 9 Box Contents .. 9 Firmware .. 9 Chapter 2:Safety Precau-tionsBefore You Begin .. 11 Notices .. 11 Chapter 3:Hardware Refer-enceModels, Features and Options .. 13 Functions and Characteristics .. 13 Technical Specifications .. 14 Before you begin .. 16 Safety precautions .. 16 Dimension ..17 Meter mounting .. 17 Mounting the PM5100 .. 18 Meter wiring .. 19 Recommended cables .. 20 Wiring Diagrams .. 21 Power system .. 22 Direct connect voltage limits .. 22 Voltage and current input wiring .. 24 Balanced system considerations .. 25 Control Power wiring .. 25 Communications .. 25 Serial communications .. 25 Digital outputs .. 27 Chapter 4:Front panel dis-play and meter setupLED indicators ..29 Heartbeat / communications LED.
3 29 Alarm / Energy pulsing LED modes .. 29 Notification icons ..30 Meter screen menus .. 30 Menu tree .. 31 Meter setup screen navigation .. 32 Front panel meter setup .. 32 Configuring the basic setup parameters .. 32 Communications setup .. 34 Setting up serial communications .. 34 HMI settings ..35 Setting up the display .. 35 Setting up regional settings .. 35 Setting up the screen passwords .. 36 Lost password .. 37 Setting the clock ..37 Advanced setup .. 38 Setting up the alarm / Energy pulsing LED .. 39 Output setup ..40 Demand setup .. 40 Alarms setup ..41 Remote Meter Setup .. 41 Chapter 5:Viewing Meter DataViewing meter data from the front panel .. 43 Meter data display screens .. 43 Using ION Setup to view or modify configuration data .. 46 Using software to view meter data .. 46 Chapter 6:Input / OutputDigital output applications .. 47 Digital output setup .. 47 Alarm / Energy pulsing LED setup.
4 48 Table of ContentsPowerLogic PM5100 Series user guide 2015 Schneider Electric All Rights Reserved6 Chapter 7:AlarmsAbout Alarms ..511-Second Alarms .. 51 Unary Alarms .. 53 Alarm Priorities .. 53 Alarm Setup ..54 Setting Up 1-Second Alarms .. 55 Setting Up Unary Alarms .. 57 Viewing Alarm Activity and History .. 57 Viewing Active Alarms and Alarm Counters .. 58 Viewing Unacknowledged Alarms and the Alarm History Log .. 59 Chapter 8:Measurements and calculationsReal-time readings .. 61 Energy .. 61 Min/max values .. 61 Power factor .. 61 Power factor min/max convention .. 62 Power factor sign convention .. 62 Demand .. 63 Power demand calculation methods .. 63 Current demand .. 65 Predicted demand .. 65 Peak demand .. 66 Chapter 9: Power qualityHarmonics overview .. 67 Total Harmonic Distortion and Total Demand Distortion .. 67 Displaying harmonics data .. 68 Viewing harmonics using the front panel.
5 68 Viewing TDD .. 69 Viewing THD/thd using the front panel .. 69 Chapter 10:Verifying accura-cyTesting overview .. 71 Accuracy test requirements .. 71 Verifying accuracy test .. 73 Energy pulsing considerations .. 75 Test points ..76 Typical sources of test errors .. 76 Chapter 11:Meter resetsFront panel meter reset screens .. 77 Global resets .. 77 Single resets .. 78 Chapter 12:Maintenance and UpgradesPower Meter Memory .. 81 Identifying the Firmware Version, Model, and Serial Number .. 81 Additional Meter Status Information .. 82 Downloading Firmware .. 82 Troubleshooting .. 83 Heartbeat/Comms LED .. 83 Getting Technical Support .. 84 Register List .. 84 Chapter 13:MID ComplianceMID overview ..85 MID compliance for the meter .. 85 Specifications relevant to MID .. 85 Safety precautions .. 86 Installation and wiring .. 86 Installing the terminal covers .. 87PM5111 default screen.
6 87 Meter firmware version .. 88 powerlogic PM5100 Series user guideTable of Contents 2015 Schneider Electric All Rights Reserved7 MID-protected setup parameters .. 88 Lock-protected setup parameters .. 88 Lock-protected functions .. 88 Setting up the PM5111 .. 89 Basic setup menu .. 89 Advanced setup menu .. 89 Clock setup menu .. 89 Passwords setup menu .. 89 Initializing the meter .. 89 Locking or unlocking the meter .. 89 Setting up lock password .. 90 GlossaryTerms .. 91 Abbreviations ..93 Table of ContentsPowerLogic PM5100 Series user guide 2015 Schneider Electric All Rights Reserved8 powerlogic PM5100 user guideChapter 1 Introduction 2015 Schneider Electric All Rights Reserved9 Chapter 1 IntroductionThis user guide explains how to operate and configure a powerlogic PM5100 Series Power and Energy and Energy Meter HardwareParts and AccessoriesBox Contents1. Power and Energy Meter (1)2.
7 Installation Guide (1)3. Calibration Certificate (1)4. Connectors 5. Retainer Clips (2)FirmwareThis user guide is written to be used with firmware version and higher. See Identifying the Firmware Version, Model, and Serial Number on page 81 for instructions on determining the firmware of the meter (rear view)AVoltage inputsBControl powerCCurrent inputsDDigital outputECommunications port - RS-485(optional)FGasketTable 1 1 Meter ModelsDescriptionModel NumbersPower and Energy meter with Integrated DisplayPowerLogicTM PM5100 , PM5110, and PM5111 Chapter 1 IntroductionPowerLogic PM5100 user guide 2015 Schneider Electric All Rights Reserved10 powerlogic PM5100 Series user guide Chapter 2 Safety Precautions 2015 Schneider Electric All Rights Reserved11 Chapter 2 Safety PrecautionsBefore You BeginInstallation, wiring, testing and service must be performed in accordance with all local and national electrical section contains important safety precautions that must be followed before attempting to install, service, or maintain electrical equipment.
8 Carefully read and follow the safety precautions outlined PART 15 NOTICEThis equipment has been tested and found to comply with the limits for a Class B digital device, pursuant to part 15 of the FCC Rules. These limits are designed to provide reasonable protection against harmful interference in a residential installation. This equipment generates, uses, and can radiate radio frequency Energy and, if not installed and used in accordance with the instructions, may cause harmful interference to radio communications. However, there is no guarantee that interference will not occur in a particular installation. If this equipment does cause harmful interference to radio or television reception, which can be determined by turning the equipment off and on, the user is encouraged to try to correct the interference by one or more of the following measures: Reorient or relocate the receiving OF ELECTRIC SHOCK, EXPLOSION, OR ARC FLASH Apply appropriate personal protective equipment (PPE) and follow safe electrical work practices.
9 In the USA, see NFPA 70E or CSAZ462. Only qualified electrical workers should install this equipment. Such work should be performed only after reading this entire set of instructions. If the equipment is not used in a manner specified by the manufacturer, the protection provided by the equipment may be impaired. NEVER work alone. Before performing visual inspections, tests, or maintenance on this equipment, disconnect all sources of electric Power . Assume that all circuits are live until they have been completely de-energized, tested, and tagged. Pay particular attention to the design of the Power system. Consider all sources of Power , including the possibility of back feeding. Turn off all Power supplying the meter and the equipment in which it is installed before working on it. Always use a properly rated voltage sensing device to confirm that all Power is off. Before closing all covers and doors, inspect the work area for tools and objects that may have been left inside the equipment.
10 When removing or installing panels, do not allow them to extend into the energized bus. The successful operation of this equipment depends upon proper handling, installation, and operation. Neglecting fundamental installation requirements may lead to personal injury as well as damage to electrical equipment or other property. Before performing Dielectric (Hi-Pot) or Megger testing on any equipment in which the Energy meter is installed, disconnect all input and output wires to the Energy meter. High voltage testing may damage electronic components contained in the meter. This equipment should be installed in a suitable electrical to follow these instructions will result in death or serious PM5100 Series user guide Chapter 2 Safety Precautions 2015 Schneider Electric All Rights Reserved12 Increase the separation between the equipment and receiver. Connect the equipment to an outlet on a circuit different from that to which the receiver is connected.
