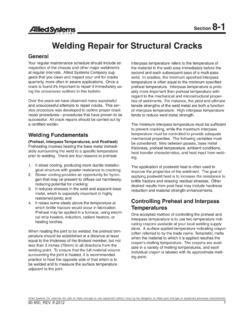
Transcription of Repairing Light Fixtures
1 278 THE COMPLETE GUIDE TO WIRINGR epairing Light FixturesIn a typical incandescent Light fi xture, a black hot wire is connected to a brass screw terminal on the socket. Power fl ows to a small tab at the bottom of the metal socket and through a metal fi lament inside the bulb. The power heats the fi lament and causes it to glow. The current then fl ows through the threaded portion of the socket and through the white neutral wire back to the main service fi xtures are attached permanently to ceilings or walls. They include wall-hung sconces, ceiling-hung globe fi xtures, recessed Light fi xtures, and chandeliers. Most Light fi xtures are easy to repair using basic tools and inexpensive a Light fixture fails, always make sure the Light bulb is screwed in tightly and is not burned out.
2 A faulty Light bulb is the most common cause of Light fixture failure. If the Light fixture is controlled by a wall switch, also check the switch as a possible source of Fixtures can fail because the sockets or built-in switches wear out. Some Fixtures have sockets and switches that can be removed for minor repairs. These parts are held to the base of the fixture with mounting screws or clips. Other Fixtures have sockets and switches that are joined permanently to the base. If this type of fixture fails, purchase and install a new Light to Light Fixtures often occurs because homeowners install Light bulbs with wattage ratings that are too high. Prevent overheating and Light fixture failures by using only Light bulbs that match the wattage ratings printed on the for Repairing fluorescent lights are different from those for incandescent lights.
3 Refer to pages 288 to 293 to repair or replace a fluorescent Light bracesElectrical boxHot wireGrounding wireNeutral wireMounting strapGrounding screwMounting screwsFixture baseTabBrass screw terminalSocket (cutaway)ShadeCircuit testerScrewdriverContinuity testerCombination toolReplacement parts, as neededTools & Materials TEXT BLACK(Provision) CG To Wiring - HI0559D508-15 / 2785/16/08 2:45:40 PM5/16/08 2:45:40 PM279 Repair ProjectsBefore 1959, incandescent Light fi xtures (shown cutaway) often were mounted directly to an electrical box or to plaster lath. Electrical codes now require that fi xtures be attached to mounting straps that are anchored to the electrical boxes. If you have a Light fi xture attached to plaster lath, install an approved electrical box with a mounting strap to support the fi or ceiling-mounted fixture flickers or does not Check for faulty Light Check wall switch and repair or replace, if Check for loose wire connections in electrical Test socket and replace, if needed (pages 280 to 281).
4 5. Replace Light switch on fixture does not Check for faulty Light Check for loose wire connections on Replace Replace Light flickers or does not Check for faulty Light Check wall switch and repair or replace, if Check for loose wire connections in electrical Test sockets and fixture wires, and replace, if fixture flickers or does not Check for faulty Light Check wall switch and repair or replace, if Check for loose wire connections in electrical Test fixture and replace, if wireNeutral wireMounting screwsScrew terminalsWood blockingElectrical boxTEXT BLACK(Provision) CG To Wiring - HI0559D508-15 / 2795/17/08 7:24:39 AM5/17/08 7:24:39 AM321456 280 THE COMPLETE GUIDE TO WIRINGTurn off the power to the Light fi xture at the main ser vice panel.
5 Remove the Light bulb and any shade or globe, then remove the mounting screws holding the fi xture base to the electrical box or mounting strap. Carefully pull the fi xture base away from the for power by touching one probe of a circuit tester to the green grounding screw, then inserting the other probe into each wire connector. Tester should not glow. If it does, there is still power entering the box. Return to the service panel and turn off power to the correct the Light fi xture base by loosening the screw terminals. If fi xture has wire leads instead of screw terminals, remove the Light fi xture base by unscrew ing the wire the metal tab at the bottom of the fi xture socket by prying it up slightly with a small screwdriver. This adjustment will improve the contact between the socket and the Light the socket (shown cutaway) by attaching the clip of a continuity tester to the hot screw terminal (or black wire lead) and touching probe of tester to metal tab in bottom of socket.
6 Tester should glow. If not, socket is faulty and must be tester clip to neutral screw terminal (or white wire lead), and touch probe to threaded portion of socket. Tester should glow. If not, socket is faulty and must be replaced. If socket is permanently attached, replace the fi screwMetal tabMetal tabHot screw terminalNeutral screw terminalThreaded portion of socket How to Remove a Light Fixture & Test a SocketTEXT BLACK(Provision) CG To Wiring - HI0559CD608-13 / 2806/6/08 10:31:28 PM6/6/08 10:31:28 PM212143 281 Repair ProjectsRemove the old Light fi xture. Remove the socket from the fi xture. The socket may be held by a screw, clip, or retaining ring. Disconnect wires attached to the an identical replacement socket. Connect the white wire to the silver screw terminal on the socket, and connect the black wire to the brass screw terminal.
7 Attach the socket to the fi xture base, and reinstall the fi the Light fi xture. Unscrew the retaining ring holding the the wires connected to the switch leads. Disconnect the switch leads and remove the the switch by attaching the clip of the continuity tester to one of the switch leads and holding the tester probe to the other lead. Operate the switch control. If the switch is good, the tester will glow when the switch is in one position, but not the switch is faulty, purchase and install an exact duplicate switch. Remount the Light fi xture, and turn on the power at the main service leadsRetaining ring How to Replace a SocketHow to Test & Replace a Built-in Light SwitchTEXT BLACK(Provision) CG To Wiring - HI0559D508-15 / 2815/17/08 7:26:57 AM5/17/08 7:26:57 AMCopyright of Complete Guide to Wiring is the property of Creative Publishing international, Inc.
8 D/b/a QuaysidePublishing Group and its content may not be copied or emailed to multiple sites or posted to a listserv withoutthe copyright holder's express written permission. However, users may print, download, or email articles forindividual use.