Transcription of REPLACEMENT WINDOW INSTALLATION INSTRUCTIONS
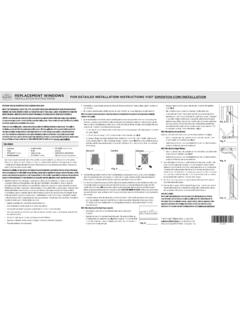
1 WEST. REPLACEMENT WINDOW . INSTALLATION INSTRUCTIONS . CAUTION: Some areas that are designated as high wind or windborne debris areas may require additional or special anchorage in order to TOOLS NEEDED: comply with local and state building codes. Please consult your local Tape Measure Cordless Screw Gun Code Official for certified INSTRUCTIONS regarding the INSTALLATION of this product . 4' Level 1/8" Drill Bit (4" in length). #2 Phillips Bit (4" in length) 3/32" Drill Bit Read all INSTRUCTIONS thoroughly before beginning the INSTALLATION (masonry bit when applicable). #3 Phillips Screwdriver of the WINDOW . These INSTRUCTIONS are intended as a basic guide for Small Rubber Mallet Caulk Gun & Color-matched installing REPLACEMENT windows . If you require more in-depth instruc- Silicone Caulk tions, that cover a specific WINDOW or door style or installing windows Pry Bar (structural sealant when applicable).
2 In a new construction application, please contact your Simonton Distributor or visit for current INSTALLATION INSTRUCTIONS . The weatherstripping may not seal properly, allowing air and water infiltration. 1. a. Before removing old unit inspect new unit for correct size, type, damage an correct INSTALLATION information for your application. If a The partial-ventilation latch on Slider windows may drag on the center problem exists with any of these areas contact your distributor leg of the sill or be inoperative. before installing. The locking system may not engage properly. b. Begin by measuring the WINDOW to be replaced. Measure at three locations: top, middle and bottom of the WINDOW on width, and right, 3. When installing in a slope sill application, place wood blocks along the center and left on height. Use the smallest of these measurements to existing windowsill. The blocks will help support the WINDOW and keep determine the width and height additional reductions may be the sill level.
3 Also, wrap the entire perimeter of the WINDOW with insula- required for the WINDOW to be installed plum and level. Do not tion. If gaps between the unit and the opening are less than 8 the unit remove the old WINDOW until the dimensions of the new WINDOW may not require insulation. When this occurs Simonton recommends have been verified to fit the opening properly and you have all the an exterior and interior perimeter seal to create a dead air space. accessories needed. Note: Use of spray foam is acceptable as long as it c. Check opening for square by measuring diagonally. If unit is out of meets AAMA 812 specifications. square additional cut backs on the WINDOW size may be required. Accessories are available from Simonton to ease the INSTALLATION and 4. Attach the sill extender (if necessary) to the bottom of the sill and trim finishing of the new WINDOW . For more information on accessories it to fit in the opening.
4 Be careful not to cut the sill extender too tight to and their applications, contact your Simonton Distributor. prevent deflection of sill. Sill extender should not be used as support. Accessories are available, but not required, from Simonton to ease the 5. Tilt the WINDOW up into the opening with the sash closed and locked. INSTALLATION and finishing of the new WINDOW . When using exterior accesso- Set it down on the wood blocks placed along the windowsill. ries such as a sill extender or snap on flange, sealant must be applied in the accessory groove of the frame or in the accessory piece itself prior to 6. If supplied, tighten the adjustment devices (alignment clips, jamb application in order to prevent leaks. It is the installer's responsibility to adjusters, etc.) and shim with wood blocks to hold the unit secure make sure that any attached accessory joint is weatherproof.
5 For more while checking it for plumb, level, and square. Be careful not to over information on accessories and their applications contact your Simonton tighten jamb adjusters or screws to avoid twisting or deflection of Distributor. jambs. If your windows do not have jamb adjusters then you will have to supply your own shims. 2. If local codes permit the removal of the existing WINDOW (including the frame), the proper INSTALLATION procedures according to AAMA stan- To check plumb: Place a level vertically on both the interior and face dards must be followed to prevent future leaking problems. Remove of the left and right jambs. If the bubble indicator is centered, the unit the old WINDOW and prepare the opening (leveling off the sill if neces- is plumb (Fig. A). sary). It is important to remember that the REPLACEMENT WINDOW must fit into the opening plumb, level and square, even though the opening To check level: Place a level along the sill.
6 If the bubble indicator is may not be any of these. If the WINDOW is not plumb, level and square centered, the unit is level (Fig. B). the following problems may occur: To check square: Measure from the top left corner of the frame to Double/Single Hung and Slider sash may be difficult or impossible the bottom right corner and from the top right to bottom left. If the to remove. measurements are equal, the WINDOW is square (Fig. C). You can also check the squareness by closing the sash to the point where it Casement sash may not operate properly due to excessive drag just meets the head or sill. If both sides of the sash meet the head or on the sill. sill at the same time, the WINDOW is square. The sash pivot bar on Double Hung windows could bind and cause the sash to become inoperative. The overlapping and interlocking meeting rail on Double/Single Hung and Slider windows may not perform properly - allowing air and water infiltration, even if the sash is locked.
7 7. Check the sash where they meet the frame to be certain the weather- 10. If installing a WINDOW with a stucco flange over an existing frame, stripping is sealing properly in all areas. Inspect all weatherstripping to follow the preceding INSTRUCTIONS . Before placing the WINDOW into the insure it has not pulled out of the receiver channel. To reinstall it, pull opening for the final time after making sure it will be plumb, level and the stripping completely out of the channel then reinsert it by sliding the square, place a heavy layer of caulking along the existing aluminum spline into the receiver channel. Check for an even reveal (gap) between frame so the new WINDOW will make contact to properly seal WINDOW . the sash and the frame. Leave two small gaps in the caulking at either end of the bottom edge of the stucco flange. Follow AAMA retrofit guidelines for jump 8. Once the WINDOW is plumb, level and square, install INSTALLATION screws into the prefabricated INSTALLATION holes in the jambs.
8 Shims should be 11. Finish off the exterior of the WINDOW . Seal the entire perimeter of the used to establish spacing at anchoring points and should be pene- WINDOW with the proper grade of sealant. Trim and cap off where nec- trated by the INSTALLATION screw. DO NOT OVER TIGHTEN THE essary. Do not cover weeps. Use of expanding foam is acceptable SCREWS, as this could cause the frame to bow. Recheck the sash for as long as it meets AAMA 812 specifications. proper operation once the screws have been installed. Caulk and cover the INSTALLATION holes when necessary. If the windows do not have 12. Make certain sash open, close and lock properly. Operable slider sash prefabricated holes, pre-drilling and countersinking the screws will be should lift out freely. Finish off the interior of the WINDOW . required. Cover the hole with the appropriate sized plug button. Buttons can be obtained from your dealer or supplier.
9 13. Remember: The homeowner is the final inspector. Clean the WINDOW well and remove all debris from the job site. Be sure the homeowner NOTE: When installing left or right hinge Casements: is familiar with the proper operation and all the features of the WINDOW . Make sure you have supplied the homeowner with the proper war- Place INSTALLATION screws in the two pre-drilled holes in the jamb on the ranty card, as this will explain proper cleaning and operating function hinge side of the WINDOW . of the WINDOW . Replace the last screw in the hinge track closest to the center of the WINDOW in both top and bottom hinge tracks with INSTALLATION screws (Fig D). Prior to replacing the screw in the sill, fill the hole with Fig. D. sealant before running the INSTALLATION screw into the hole. Seal the Fig. H. head of the screw to be sure it remains watertight Replace one screw in each tie bar guide on the lock side of the WINDOW with INSTALLATION screws (Fig.)
10 E). After the WINDOW is secured, recheck the sash operation and the Fig. E. weather seals. Left and right hinge Casements have an adjustment on the upper and Fig. F. lower hinge tracks which allows you to move the sash left and right. This adjustment can be used to help square the sash within the frame to correct uneven reveals between sash and frame or to address interference issues with the locking hardware. A slim line adjustment wrench is available from Simonton or a standard 3/8 or 7/16 open end wrench can be used but will require that the hinge arms be removed from the adjustment posts in order to access the adjustment Fig. G. cam. A 7/64 hex head wrench can also be used on certain hardware. ` (Fig. F). Note: When installing Awning windows : Replace one of the center screws in the operator assembly with an INSTALLATION screw (Fig. G). On both left and right hinge tracks, replace the second screw from the top and the closest screw to the bottom with INSTALLATION screws (Fig H).