Transcription of RES Manger Procedures - Infinity POS
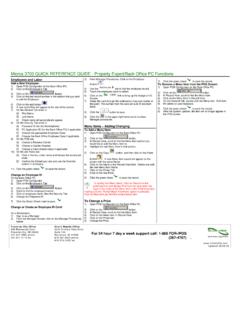
1 RES 3000 Manager Procedures Documentation Traverse City Office Grand Rapids Office 845 Robinwood Court 3033 Orchard Vista Drive Traverse City, MI 49686 Suite 104 phone Kentwood, MI 49546 fax phone fax For 24 hour 7 day a week support call: 1-866 FOR-IPOS 1 Revised October 1, 2008 Audience This manual is intended for beginning users, as well as intermediate and advanced users who might want to learn about new features. Description This guide introduces you to using RES 3000 Manager Procedures and instructs on how to perform the following tasks: Add and Modify Menu Items Modify Combo Groups Add and Modify Employee Records Add and Modify Schedule Records Add Cashier Numbers Assign Barcodes to Menu Items Define Currencies. Define and Modify Revenue Centers Edit Table Assignments, Inventory Counts, Set Kitchen Themes, and Edit Team Service Groups. Access and view Dashboard Totals.
2 2 Revised October 1, 2008 disclaimer Although the best efforts are made to ensure that the information in this manual is complete and correct, Infinity POS makes no warranty of any kind with regard to this material, including but not limited to the implied warranties of marketability and fitness for a particular purpose. Information in this manual is subject to change without notice. Infinity POS shall not be liable for errors contained herein or for incidental or consequential damages in connection with the furnishing, performance, or use of this manual. 3 Revised October 1, 2008 TABLE OF CONTENTS AUDIENCE .. 1 DESCRIPTION .. 1 disclaimer .. 2 MANAGER Procedures INTRODUCTION .. 5 MANAGER Procedures USAGE .. 5To Open Manager Procedures : .. 5 Navigation and Function Buttons: .. 6 Manager Procedures Wizards: .. 7 Menu Items: .. 7 Edit a Menu Item: .. 8 Add or Edit Prices: .. 8 Set Availability.
3 9 Combo Groups: .. 10To Edit Combo Menu Item Prices: .. 10To Add Combo Price Record: .. 10 Employees: .. 11 Add New Employee: .. 11 Delete Employee: .. 11 Edit Employee: .. 12 Edit ID: .. 12 Edit Training Status: .. 12 Increment Shift: .. 13 Edit Job Information: .. 13 Edit Time Card: .. 13 Schedule Records: .. 14 Add a New Schedule Record: .. 14 Edit Schedule Record: .. 14 Delete Schedule Record: .. 14 Cashiers: .. 15 Increment Shift: .. 15 Barcodes: .. 16 Add Barcode Record: .. 16 Edit Barcode Record: .. 16 Delete Barcode Record .. 16 Currencies: .. 17 Edit Currency Rate: .. 17 Revenue Centers: .. 17 Redirect Printer: .. 18 Disable Printer: .. 18 Set Current Business Date: .. 19 Edit Table Assignments: .. 19 Set Active Kitchen Theme .. 23 Set Active Kitchen Theme .. 23 Edit Team Service .. 23 Dashboard: .. 25 Using the Dashboard .. 26 Viewing Sales Information .. 26 4 Revised October 1, 2008 Viewing Kitchen/Speed of Service Information.
4 26 Viewing Labor Information .. 26 Viewing Employee Information .. 27 Defining Contests: .. 27 5 Revised October 1, 2008 Manager Procedures Introduction The Manager Procedure module is a software application that provides privileged employees with easy to use shortcuts that modify the system and database. Although Manager Procedures can perform tasks that can also be performed through POS Configurator, it offers the following advantages: Manger Procedures limits the actions that an employee may perform. An employee must be specifically privileged to perform a particular procedure. Only Procedures that an employee is privileged to perform appear on the workstation display. Manager Procedures is easy to use. An employee can easily perform tasks that would require more comprehensive training and system understanding to reliably perform in POS Configurator. Manager Procedures Usage To Open Manager Procedures : 1.
5 To open Manager Procedures , select Start Menu | Programs | MICROS Applications | POS | Manager Procedures from the desktop. The Manager Procedures login screen displays. Enter an access ID and select . The Welcome to Manager Procedures screen displays. NOTE: Procedures may also be accessed from a key in POS Operations, if a touch screen is programmed to include the Manager Procedure keys. 2. You will be prompted to sign in. Type your identification number and then press or hit enter on the keyboard. 6 Revised October 1, 2008 Navigation and Function Buttons: Alphanumeric Keypad: Use the alphanumeric keypad to enter the appropriate information. Back button: Returns to the previous screen. Cancel button: Returns to the previous screen and disregards any changes made. Clear button: Removes any information that has been entered for the selected field. Close Button: Use this button to exit the Manager Procedures application.
6 Drop Down Menu: When you select the button a menu of options for the associated field appears. Edit button: Opens the selected record to edit. Help Button: Use this button throughout Manager Procedures to access help information on the currently displayed screen. Logout Button: Use this button to log out of Manager Procedures and return to the login screen. Next button: Use this button to move to the next screen in the wizards. Number Pad: Use the numeric keypad to enter the appropriate information. OK button: Saves any changes made and returns to the previous screen. 7 Revised October 1, 2008 Manager Procedures Wizards: On the main screen of Manager Procedures are buttons that will guide the user through wizards to modify the database. Changes that you make to the 3700 using Manger Procedures are posted immediately to the database. These changes are implemented as if they had been made in POS Configurator.
7 Menu Items: Click on this button to add or modify menu items, set availability, edit or add prices, and edit effectively. Add New Menu Item: Opens the Add New Menu Item Record screen so information may be added for a new menu item. 1. Click on the Add New Menu Item button. 2. Click the button. 3. Enter in the name of the item by using the keyboard button. 4. Click the button. 5. Complete the necessary information for each page of the wizard and click . 6. Click on the last page of the wizard to save the new menu item. Menu Effectivity: Use this procedure to define when menu item prices are available. Definition of Fields: Price Number: Displays the number of the menu price change record. Number: Displays the number of the menu item. 1. Name: Displays the name of the menu item. 2. Effectivity Date: Displays the current effectivity date for the menu price change records.
8 3. Select from: Select the beginning date/time to filter menu price change records. 8 Revised October 1, 2008 4. Select to: Select the ending date/time to filter menu price change records. 5. New Prices: Select this option to display new menu items within the specified date range. 6. Discontinued: Select this option to display menu items that are no longer available within the specified date range. 7. Price Changes: Select this option to display menu items that have a price change within the specified date range. 8. Change Effectivity Dates: Click this button to change the effectivity date for the selected menu effectivity record. 9. Old Price/New Price: Displays the prices for before and after the price change. 10. Back: Closes Menu Effectivity and returns to the previous screen. Edit a Menu Item: Use this screen to select a menu item by highlighting the item from the table and selecting Edit.
9 Use and to page through the list of menu items. Definition of Fields: 1. Number: Displays the object number of the menu items that may be selected for edit. 2. Name: Displays the name of the menu items that may be selected for edit. 3. Class: Displays the menu item class for the items that may be selected for edit. 4. Locate by Name: To locate a specific menu item, enter a name in the Locate by Name field (or click the alpha-numeric keypad icon to enter a name using the keypad ) and select the button. 5. Show Blanks: Select this option to display items with no menu item name assigned. Clear this option to filter out items with no menu item name assigned. 6. Edit button: Opens the selected record. 7. Back button: Returns to the previous screen. Add or Edit Prices: 1. Select Edit Prices. 2. Select a menu item and click . 3. Select a price record and click to edit. 4. Select to exit price screen.
10 5. Select to save the changes. 9 Revised October 1, 2008 Definition of Fields: Set Price for Menu Item: Use this procedure to define prices for menu items. 1. Price 1-10: Enter the price(s) associated with this menu item. For open menu items (cost entered manually at the time of sale), enter 2. Surcharge: Enter the amount of the Florida Liquor Surcharge. Leave this field blank if your restaurant is outside the state of Florida or for non-alcoholic menu items. 3. Tare Weight: Enter the price of this item's container (tare) in either kilograms or pounds. The tare weight is subtracted from the total weight before calculating the price. Use the Price 1 field to enter the price per pound in either kilograms or pounds. 4. Effective From: Enter the first date on which this menu item is available at these prices. 5. Effective To: Enter the last date on which this menu item is available at these prices.