Transcription of Se InformatIz Ion - Sun-Tek
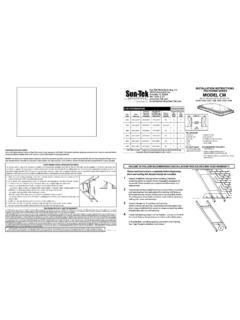
1 Installation Instructions Sun-Tek Manufacturing, Inc. 10303 General Drive INSULATED GLASS SERIES. Orlando, FL 32824. 407 / 859-2117. MODEL CMG 4949. Use on any type roof (curb required). Size Information Fastener Schedule Finished Opening Fits on Size Roof (Drywall Center Fastener Fastener Code Opening Dimension) Spacing Per Top Per Side 1414 11 x 11 10 x 10 16 3 3. 1422 11 x 19 10 x 18 16 3 3. 1430 11 x 27 10 x 26 16 3 3. CURB 1446 11 x 43 10 x 42 16 3 4. 1725 14 x 22 13 x 21 16 3 3. 1733 14 x 30 13 x 29 16 3 3 Finished Opening 1749 14 x 46 13 x 45 16 3 4. 2222 19 x 19 18 x 18 24 3 3 Roof 2230 19 x 27 18 x 26 24 3 3 Opening 2246 19 x 43 18 x 42 24 3 4 You will need: 2525 22 x 22 21 x 21 24 3 3 hammer sealant/mastic Cleaning Your Skylight: STS 1000 Caulk - Use only between decking and underside of skylight flange on Use a mild soap and water or glass cleaners only. Fresh paint splashes, glazing Glass Series. Not necessary on CMG2 2533 22 x 30 21 x 29 24 3 3 keyhole saw tape measure compound, etc.
2 May be removed by rubbing lightly with a soft cloth or cotton ball 2549 22 x 46 21 x 45 24 3 4 skill saw chalkline or straight edge soaked in mineral spirits. 3030 27 x 27 26 x 26 16 or 32 3 3 nails trowel or caulk gun Accessories: Step Flash Kit - Pre-formed, precut flashing eliminates need for flashing on self-built 3046 27 x 43 26 x 42 16 or 32 3 4 drill utility knife Skylight Shades - a variety of sizes are available and are easily installed. Contact your curb. Use with Curb Mount models. Note: Step flash kit designed for use with curbs building materials dealer or Sun-Tek Manufacturing for details. 3333 30 x 30 29 x 29 16 or 32 3 3 2 x 4's constructed of 2 x 6's only. 3349 30 x 46 29 x 45 16 or 32 3 4 For Light Tunnel: Recommended Sealants: 4646 43 x 43 42 x 42 16 or 24 or 48 4 4 8 or 10 penny nails 100% Silicone LIGHT TUNNEL INSTALLATION INSTRUCTIONS plywood or drywall STS 1000 ( Sun-Tek exclusive). 4949 46 x 46 45 x 45 16 or 24 or 48 4 4 Butyl rubber sealant/caulk For homes with an attic, it is necessary to build a tunnel between skylights and ceiling.
3 The tunnel walls may be straight, or flared for extra light and architectural appeal. It's very easy to increase the tunnel size along the length of the ceiling joists. As long as no roof-supporting members are cut, no special framing is needed. While it is possible to flare the tunnel in all directions, if support members are cut, special framing will be required for structural support. In this case you must consult a qualified building professional to insure proper and safe results. FAILURE TO FOLLOW RECOMMENDED INSTALLATION PROCEDURES MAY VOID WARRANTY. Check local building codes for glass requirements. Please read instructions completely before beginning. Deck and roofing 1 After roof and ceiling openings have been framed, measure distance (at each corner of roof opening) between rafter/truss and ceiling joist. felt should already by installed. Interior wood liner should be stained or painted before installation. 2 Using these four measurements, cut 2 x 4 lumber for vertical support members (two per corner).
4 3 In each corner, nail vertical support members into place at right angles to each other. 4 Measure, cut, and nail tunnel walls into place. Suggestions for lining tunnel: 1 To properly position skylight between trusses/rafters, locate the roof opening from the underside of the decking. (If this area is not accessible, locate the - use drywall, tape corners, and paint white using regular or texture paint. (Texture paint alone ceiling joists from inside the house, mark opening in ceiling (a-c), and cut will hide and fill untaped joints, but in time, cracks may appear in corners.). ceiling opening. Then follow steps below for roof opening.). - use prefinished paneling with molding in corners. - line the tunnel with cedar, pine, or a wood to coordinate with your decor. a) measure distance between trusses/rafters and mark center point. - for special effects, try painting the tunnel a striking accent color, or use mirrors or wallpaper on b) to center skylight, measure one-half of appropriate roof opening to each tunnel walls.
5 Side of center point and mark. 5 Caulk the slight gap between the tunnel walls and skylight base. c) using the side marks as a guide, mark corners by drilling holes or driving 6 Finish off tunnel at ceiling with molding, or blend edges into ceiling with texture paint. nails through roof. 7 Be sure to wrap the exterior of the tunnel with insulation for energy savings. 2 Remove shingles 6 - 8 out from roof opening. INSULATED GLASS SKYLIGHT LIMITED WARRANTY. Sun-Tek Manufacturing, Inc. ( Sun Tek ) 10303 General Drive, Orlando, Florida 32824, (407) 859-2117, warrants this Skylight on the following terms and conditions: A. Warranty Coverage: This warranty applies to both the original purchaser and first consumer-owner of a Skylight made by Sun-Tek . B. Warranty Duration: This warranty shall remain in effect for a period of twenty (20) years after the date the Skylight is purchased or the date the Skylight is delivered to the first 3 Cut roof opening (snap a chalkline from corner to corner, or draw line with a consumer-owner, whichever is later.
6 During the first ten (10) years of this warranty period, Sun-Tek Industries covers 100 percent of all material cost for the entire unit. After 10 years following the initiation of this warranty, Sun-Tek Industries straightedge.). will cover a pro-rated portion and issue a credit as follows: Years Coverage 11 to 13 14 to 16 17 to 20 75 percent 50 percent 25 percent 4 Frame roof opening: This 20-year limited warranty applies to glass series skylights only for skylights manufactured after January 1, 1998. For products manufactured before January 1, 1998, the warranty period is 10 years. a) cut two 2 x 4's to fit the actual distance between trusses/rafters and nail C. Warranty Application: This warranty applies only to the materials and fabrication of the Skylight and does not apply to any defect or damage caused by improper use, improper installation, improper care or accident. Glass breakage is not covered. D. Performance by Sun-Tek : During the warranty period, Sun-Tek will provide free of charge an equivalent new skylight (or component thereof) for one found to be defective in material or workmanship.
7 Shipping costs of such into place. NOTE: Size 2525, 2549, 3333, 3349, 4949 Skip step b proceed replacements are not the responsibility of Sun-Tek . Sun-Tek will not be responsible for any costs of removal or re-installation. Condensation or damaged caused by condensation is not covered under this warranty. E. Validation Procedure: To obtain performance under this warranty, the purchaser must: (1) On installed skylights, contact Sun-Tek for instructions before removing skylight. Removal of skylight from roof before inspection will void warranty. (2) Notify to c . Sun-Tek in writing of any claim within thirty (30) days after the defect is discovered; and (3) Sun-Tek or its authorized agents must examine high quality installed photographs of the subject skylight and determine to its satisfaction whether the defect is covered by this warranty, ; and (4) Present a copy of the receipt as proof of purchase. F. Implied Warranties: IMPLIED WARRANTIES, INCLUDING BUT NOT LIMITED TO IMPLIED WARRANTIES OF MERCHANTABILITY AND FITNESS.
8 B) cut two 2 x 4's to the exact length of the roof opening and nail to the FOR A PARTICULAR PURPOSE, SHALL NOT EXTEND BEYOND THE DURATION OF THE EXPRESS WARRANTIES PROVIDED HEREIN. Some states do not allow limitations on how long an implied warranty lasts, so the above limitation may not apply trusses/rafters. to you. G. Incidental or Consequential Damages. Sun-Tek SHALL NOT BE LIABLE FOR ANY INCIDENTAL OR CONSEQUENTIAL DAMAGES WHATSOEVER, INCLUDING BUT NOT LIMITED TO LOSS OF TIME OR REVENUE, GASOLINE, TELEPHONE, OR OTHER EXPENSES. Some states do not allow the exclusion or limitation of incidental or consequential damages, so the above limitation or exclusion may not apply to you. H. Exclusive Warranty: THIS WARRANTY IS EXCLUSIVE AND IN c) if applicable, cut ceiling opening and build tunnel framing. (See Light LIEU OF ALL OTHER WARRANTIES. This warranty gives you specific legal rights. You may have other rights which vary from state to state. Tunnel Installation Instructions.
9 All installation information is supplied in good faith, but without recommendation to its use. No guarantee of the results of any use of this information is to be implied, since conditions of use are beyond our control. Please consult local building codes for compliance before installing. - 2/14. 5 Build curb: a) Construct curb with 2 x 4's, 2 x 6's, etc. (depending on height desired or building code requirements). Curb should be minimum 3 high. Be sure inside measurement of curb is the same as roof opening measurement. b) Secure curb to roof. 6 Shingle roof up to bottom of curb. 7 Flash curb (sizes 2525, 2549, 3333, 3349, 4949 can be used with Sun-Tek 's preformed, pre-cut Step Flash Kit with one-piece head and sill). Use galvanized sheet metal, aluminum, or copper. Metal should extend a minimum of 4 over shingles (on bottom side), then up sides of curb. Flashing should be flush with curb top. 8 Shingle up sides and across the top. 9 Apply a wide bead of caulking on top of the curb around the entire perimeter.
10 Sealant applied too close to the opening may ooze into the opening. Position the skylight over the curb with the THIS EDGE DOWN label at the lowest side of the curb. Center the skylight over the curb, . As the fasteners, (see fastener schedule), are being attached to the curb, push down on the frame just above the fastener to insure a good seal. Use the 1 spiral ring shanked nails, provided. Continue attaching the remaining fasteners in the same manner. All fastener installation holes provided must be used.