Transcription of SENSIBLE, QUIET HEAT STARTS HERE
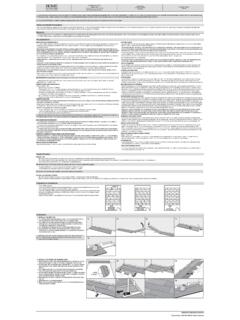
1 How-to videos or more information, please visit: BASEBOARDSENSIBLE, QUIET HEAT STARTS HEREESPA OL ver la gu a del propietario en S Vancouver, Washingtontested to UL standardsThank you for your purchase! Question or problem? Let us solve it with a single phone call, email or online chat! We ll save you a trip back to the store!Phone: ( )email: chat: (contact us)Cadet Customer ServiceSAVE THESE INSTRUCTIONSIMPORTANT INSTRUCTIONS2 KNOW YOUR VOLTAGE!TOOLS REQUIRED OR YOU MAY NEED1. Read all instructions before install-ing or using this A heater has hot and arcing or sparking parts inside. Do not use it in areas where gasoline, paint, or flammable liquids are used or This heater is hot when in use.
2 To avoid burns, do not let bare skin touch hot surfaces. Keep combus-tible materials, such as furniture, pil-lows, bedding, papers, clothes, and curtains away from To prevent a possible fire, do not block air intakes or exhaust in any manner. Do not use on soft surfaces, like a bed, where openings may become Do not insert or allow foreign objects to enter any ventilation or exhaust opening as this may cause an electric shock or fire, or damage the heater. 6. Use this heater only as described in this manual. Any other use not recommended by the manufacturer may cause fire, electric shock, or injury to persons. 7. This heater must be installed in a fixed, permanent location. 8. CAUTION High Temperature.
3 Keep electrical cords, drapes, and other furnishings away from heater. 9. Extreme caution is necessary when any heater is used by or near chil-dren or invalids and whenever the heater is left operating and unat-tended. When using electrical appliances, basic precautions should always be followed to reduce the risk of fire, electric shock, and injury to persons, including the following:120 voltsingle-pole breaker240 voltdouble-pole breakerWARNING: Connecting a heater to a voltage higher than what s listed on its rating label will destroy the heater and could start a fire. A heater will not heat properly when connected to a voltage lower than what s listed on its rating you are uncomfortable working with electricity, running electrical supply wire or in-stalling a circuit breaker, please consult a licensed electrician.
4 Make sure power to the heater is turned off at the main disconnect panel prior to doing any work on a heater. Serious injury or electrocution can result from electric shock. CHECK YOUR BREAKER! If you re replacing an existing heater, check the labels of the old heater and use the same MeasureStraight and Phillips Screwdrivers1 " Wood ScrewsWire StrippersWire Connectors " Cable Clamp ConnectorVolt MeterDrill and Drill BitsStud Finder (optional)A multi-purpose tool or something to cut your existing base trim or molding (optional) Hammer (optional) INSTALLATION INSTRUCTIONS3 STEP 1 Locate or route electrical supply wires1. All electrical work and materials must comply with the National Elec-tric Code (NEC), the Occupational Safety and Health Act (OSHA), and all state and local Use copper conductors Do not install below an electrical Do not install the heater against combustible low-density CAUTION High temperature.
5 Keep electrical cords, drapes, and other furnishings away from To reduce the risk of fire, do not store or use gasoline or other flammable vapors and liquids in the vicinity of the heater. 7. Maintain at least 12 inches minimum clearance from all objects above and in front of baseboard, and 6 inches minimum on both Turn off the electrical power supply. Locate wall studs and electrical supply wires. DON T CUT ANY FACTORY CONNECTIONS UNTIL YOU RE READY TO WIRE! 2. Remove only the wiring compartment cover. Wire connections can be made on either side of the baseboard Remove one of the slotted knockouts in the wiring Install a cable clamp connector (not in-cluded). Pull supply wires through the cable clamp connector leaving 6-inch wire leads.
6 For best results, install your baseboard heater under a window, along an outside wall, or as close as possible to an outside door. Install only in a horizontal position, not in a vertical position. Remove any floor base trim or molding so the heater will set flush against the wall. It can sit directly on any floor surface, including carpet. If you re wiring a WALL thermostat, route the electrical supply wire from the circuit breaker to the wall thermostat, and then to the heater. If you re wiring a BUILT-IN model BTF or Smart-Base ther-mostat, route the electrical supply wire from the circuit breaker directly to the clamp connector (view from back)DON T CUT YET!wall studselectrical supply wiretip: easiest to remove from back!NOTE: All baseboard heaters require a thermostat (sold separately).
7 A double-pole thermostat has an OFF setting; a single-pole thermostat does not. Electric heaters must be installed on a circuit dedicated to electric heaters , they cannot share a circuit with outlets, lights, or other OF YOUR HEATER elementhigh-temperature safety shutoffgrounding screwgrounding screwINSTALLATION INSTRUCTIONS46. Connect the grounding lead to the green grounding screw on the side you re Mount the heater securely to two or three wall screwFigure 8aFigure 7a KNOW YOUR VOLTAGE and CHECK YOUR BREAKER! All baseboard heaters require three supply wires. For 120 volt baseboard wiring you will have 1 hot, 1 neutral and 1 ground. For 240 and 208 volt baseboard wiring you will have 2 hots and 1 ground; no neutral 3 Baseboard wiringFigure 7bLEFT SIDE WIRINGRIGHT SIDE WIRING Cut ONLY ONE factory connection and ONLY on the side you will be wiring!
8 If your heater is a 120 volt model, cut ONLY the factory connection that has one black and one white wire!If you re wiring on the left side, CUT ONLY THE ONE FACTORY CONNECTION you re wiring on the right side, CUT ONLY THE FACTORY CONNECTION ON THIS Connect one supply wire to one of the heater wires with a wire connector (not included). For 240 and 208 volts, it doesn t matter which heater wire. Both supply wires (black and white) are hot. B. Connect remaining supply wire to remaining heater wire with a wire connector (not included). Figure 8bCUT ONLY THIS FACTORY CONNECTION! DO NOT CUT BOTH!CUT ONLY THIS FACTORY CONNECTION! DO NOT CUT!supply wiressupply wiresstar dimples are easy to punch through with either screws or nailsIf you re wiring a BUILT-IN model BTF or Smart-Base thermostat for your heater, go to those instruc-tions now and follow that installation.
9 When complete, proceed to OPERATING connectionnewnew connectionnew connectionIf you re wiring a WALL thermostat for your heater, follow the instructions and diagrams below or on page 5, for your voltage and the side you re wiring. Route your electrical supply wires from the circuit breaker to the wall thermostat, and then to the baseboard wiressupply wires If you re wiring a model 8F2025, go to page 5 NOT CUT!STEP 2 Mount heater to wall connection240 volt baseboard240 volt baseboard240 volt baseboard240 volt baseboardWrap supply (white) wire with black tape to identify it as hot. Proceed to STEP 4 Finish or 240 VOLT ONLYLEFT SIDE WIRINGRIGHT SIDE WIRINGBABAINSTALLATION INSTRUCTIONS5 Figure 10aFigure 9aDO NOT CUT!Left Side of Baseboard Shown 2000 Watt Configuration / Heater is wired on right sideLeft Side of Baseboard Shown 2000 Watt Configuration / Heater is wired on left sideCut the factory connection without the red wire.
10 A. Connect one supply wire to one heater Connect the remaining supply wire to the remaining heater wire. All model 8F2025 model baseboard heaters are factory set for 2500 watts. If you want to change to 2000 watts, follow the diagrams in Figure 9b or 10b, depending on which side you re wiring. If you do not want to change your baseboard heater s wattage, proceed to STEP 4 Finish installation. For 2000 watt applications: Cut red wire and cap both loose ends with wire connectors, or wrap loose ends with electrical tape. Proceed to STEP 4 Finish the factory connection. Do not cut any connections on the left Connect one supply wire to one heater Connect the remaining supply wire to the remaining heater you re wiring a BUILT-IN model BTF or Smart-Base thermostat for your heater, go to those instruc-tions now and follow that installation.