Transcription of SHARKBITE
1 SHARKBITE .. PEX INSTALLATION GUIDE. Table of Contents Features and Benefits of SHARKBITE tubing Features and Benefits of SHARKBITE Push-to-Connect Fittings Features and Benefits of Clamp/Barb Systems Types of Plumbing Trunk and Branch Systems Manifold Systems Combination Systems Home-Run Systems Making a SHARKBITE Connection with SHARKBITE PEX. Making a SHARKBITE Clamp/Barb Fitting Connection with Clamp System Calibration of Clamp Tool Removing a Clamp Connection with Crimp System Dos and Don'ts for SHARKBITE PEX Cross Linking Installation Proper Support Concrete Installation Technical SHARKBITE PEX tubing Marking Maximum Working Pressure Thermal Expansion tubing Dimensions, Bend Radius and Fluid Capacity Pressure Loss Data Policies and Combine SHARKBITE fittings, manifolds and valves with SHARKBITE PEX for the only Total Rough-In Solution Connection System.
2 2017. IC E BOOK and (using push-to-connect fittings) the fastest way to plumb any LIST PR residential or commerical project. Ask for the complete product line brochure or learn more at A Division of the Reliance Worldwide Corporation . 2. Introduction The purpose of this guide is to familiarize plumbing professionals with the SHARKBITE Connection System, and the recommended method of installing SHARKBITE PEX tubing . SHARKBITE PEX tubing can be used with SHARKBITE push-to-connect fittings, SHARKBITE barbed fittings, SHARKBITE manifolds, and SHARKBITE valves. SHARKBITE PEX is an excellent tubing product for plumbing, radiant and hydronic systems, offering many advantages over traditional rigid pipe.
3 The combination of SHARKBITE push-to-connect fittings, manifolds, valves and PEX tubing is the FASTEST way to plumb any residential or commercial project. If COST of MATERIAL takes priority, SHARKBITE barb fittings may be used with clamp or crimp rings. In addition, a variety of valves and manifolds with SHARKBITE barb connectors are included in the SHARKBITE Connection System line, making it the only Total Rough-In Solution. {Features and Benefits of SHARKBITE PEX tubing }. Flexible: Fewer fittings required: Easy to install and service. Reduces total installation cost. Quieter: Fewer joints: Minimizes noise caused by water hammer. Reduces the chances of call backs. Resists corrosion and scale buildup: Pressure test immediately: Improves the performance of the plumbing system.
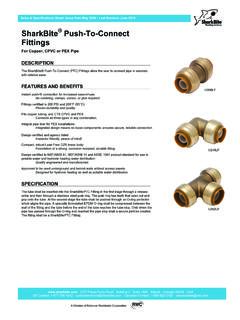
4 No waiting for glue to dry or joints to cool. {Features and Benefits of SHARKBITE Push-to-Connect Fittings }. Instant connection for increased ease-of-use: No soldering, clamps, unions or glue required. Fittings certified to 200 PSI and 200 F (93 C): Proven durability and quality. Fits copper tubing , CTS CPVC and PEX: Connects all three types in any combination. Integral tube liner for PEX installations: Integrated design means no loose components, ensures secure, reliable connection. Design certified and agency listed: Inspector friendly, peace of mind! Compact, robust DZR brass body: Foundation of a strong, corrosion resistant, durable fitting. Design certified to NSF/ANSI 61 and ASSE 1061. product standard for use in potable water and hydronic heating water distribution: Quality engineered and manufactured.
5 Approved to be used underground and behind walls without access panels. Designed for radiant and hydronic heating as well as potable water distribution. {Features and Benefits of SHARKBITE Barb Fittings } {Features and Benefits of Broad line of fittings and manifolds: SHARKBITE PEX Tools }. A typical barb system offers the lowest material cost. Clamp Ring Tool (one clamping tool for all size clamp rings): {Features and Benefits of Reduced equipment cost and saves installation time. One hand operation (leaves a hand free to SHARKBITE Valves } position the clamp ring). Crimp Ring System (Heavy-duty components with adjustment Line includes ball, regulator, and thermostatic mixing valves: tools and case): Push-to-connect (integral & union type) or barb Includes 5 interchangeable jaws and go/no-go gauge.
6 Connectors. 3. Plumbing Systems The SHARKBITE Connection System offers the only Total Rough-in Solution, including a full line of valves, push-to-connect fittings, PEX tubing and traditional PEX components and tools. The SHARKBITE system offers three options for a PEX tubing installation . Trunk & Branch, Manifold,or a Combination system as described in the diagrams below. The Home-Run system, using traditional PEX components Fixture Washing Machine (barbed fittings, clamp rings, etc.) offers the total lowest material cost. When you need Fixture special configuration fittings (such as Drop Ear Elbows), SHARKBITE push-fittings offer greater speed and efficiency SHARKBITE Angle Stop than traditional barbed fittings Fixture while costing about the same.
7 SHARKBITE . Angle Stop 1/2" SHARKBITE . PEX tubing 3/4" SHARKBITE PEX tubing SHARKBITE Barb Manifold with Shut-off Valves 3/4" Copper Pipe SHARKBITE . EB35 Regulator 4. Making a SHARKBITE Connection The combination of SHARKBITE push-to-connect fittings and PEX tubing offers the fastest, easiest installation from meter to fixture. Step 1. Use plastic tubing cutters to cut the tubing between the pointed ends of the repeating 1". SHARKBITE imprint pattern. The pattern provides a visual aid to determine if the tube has been inserted all the way into the fitting. Ensure the tube is cut square. A square cut end allows the tubing to be inserted all the way into the fitting. Ensure the tube has no rough edges, cuts or abrasions (rough edges, cuts or abrasions may damage the O-ring and cause the fitting to leak).
8 Step 2. SHARKBITE fittings come with integral tube support liners. Ensure that the support liner is in place. The liner reinforces the wall of the PEX tubing to help prevent collapse of the tubing wall. Step 3. Insert the tube into the fitting until the tube reaches the tube stop. Make sure the pointed end of the SHARKBITE pattern is even with the end of the release collar. Only when the tube reaches the tube stop has a secure joint been created. Note: Install SHARKBITE fittings at least 1" apart to enable disassembly of the joint. 5. Making a SHARKBITE Clamp/Barb Connection The use of traditional PEX components (manifolds, barbed fittings, clamp or crimp rings, etc.) offers the total lowest material cost.
9 Step 1. Use plastic tubing cutters to cut the tubing to length, making sure that you have a good square cut. A rough or uneven cut will result in a weakened joint. Step 2. Slide the correct size clamp ring over the tube and approximately 2" past the end of the tubing . Step 3. Push the tubing onto the barbed fitting until it touches the fitting shoulder. Position the clamp ring 1/8"-1/4" from the end of the tube. This distance ensures that the clamp ring is positioned directly over the barbs on the fitting. Step 4. Position the open jaws of the clamp tool over the raised tabs of the clamp ring and squeeze. One clamp tool fits all size clamp rings. It can be operated with one hand, leaving the other hand free to hold the clamp ring in position.
10 The tool cannot be removed until the clamp ring is fully compressed. A properly calibrated clamp tool eliminates the necessity to check each fitting ring with a go/no-go gauge. Step 5. Verify the connection is secure by visually checking the clamp tab. 6. Always check the Clamp Tool with the calibration gauge Check Calibration of Clamp Tool before the first and after the last crimp on each job site. 1. Close the Clamp 2. Gauge must stop at the Tool handles to the NO-GO line in order to stop point and insert make proper connections gauge into jaw gap If the gauge goes into the jaws beyond the GO portion, the Calibrating the Clamp Tool Clamp Tool should be recalibrated following these steps. 1. Place GO portion of gage into jaw gap 2.