Transcription of SHOT PUT BASICS FOR LITTLE ATHLETICS
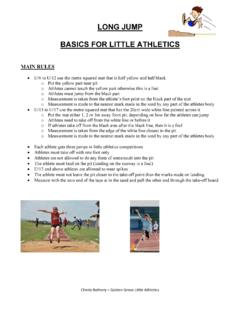
1 Cherie Rothery Golden Grove LITTLE ATHLETICS shot put BASICS FOR LITTLE ATHLETICS 1kg (blue) U/6 and U/7 boys & girls (same circumference as 2kg) (yellow) U/8 boys and girls (same circumference as 2kg) 2kg (orange) U/9 to U/11 boys and U/9 to U/12 girls 3kg (white) U/12 to U/14 boys and U/13 to U/17 girls 4kg (red) U/15 and U/16 boys 5kg (green) U/17 boys SAFETY tips All athletes must stand behind the circle The shot should be carried back to the circle (not thrown back) The shot should not be thrown until coach gives the okay BASIC RULES Figure 1 - Keep shot close to neck, under jaw or front of the ear The shot must touch or be close to the neck, under the jaw or front of the ear at beginning of the throw The shot cannot be dropped down or pulled back from the starting position it must be pushed forwards The shot cannot be taken behind the line of the shoulders The hand cannot be dropped below the neck/chin position during the throw A foul occurs when.
2 O Shot is held away from the neck at beginning of the throw o The hand is dropped or pulled back before the forward push o The hand is taken behind the line of the shoulder o If the shot lands outside of the sector (the point of impact of the shot must be completely within the inner edge of the sector lines o If the competitor walks out the front half of the circle o If the competitor walks out of the circle before the shot has landed Each athlete has three throws in LITTLE ATHLETICS The athlete can touch the inside of the front barrier (not the top of it) Athletes can enter the circle from any direction, but they must leave from the rear half of the circle Athletes cannot leave the circle until the shot has landed on the ground Measurement is from the circumference of the stop board to the nearest mark made by the shot (to the nearest cm below).)
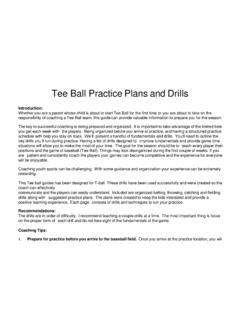
3 The tap must be pulled through the centre of the throwing circle Cherie Rothery Golden Grove LITTLE ATHLETICS COACHING CUES Encourage athletes to start with basic standing technique Hold shot at the base of fingers (not in the palm of hand) Thumb and LITTLE finger should be at each side of the shot Keep shot close to or touching neck think clean palm, dirty neck Keep elbow high Push the shot up (not towards the ground) look to where you want shot to travel Start with knees bent and side on Put weight on back leg with hand not holding the shot putting to where the shot will go Finish with chest and head up (not bowing head after the throw) Do not throw the shot push it Figure 2 - Put weight onto back leg with hand not holding shot pointing to where it will be gong As athletes progress, start stand with weight over the back foot and think chin/knee/toe so those three body parts are all in line.
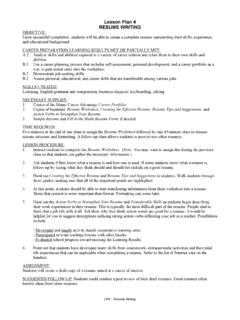
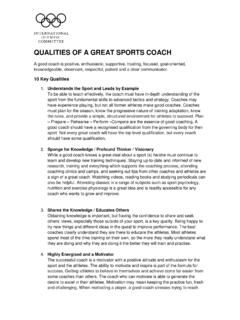
4 Bend knees at the start and push with the legs when throwing The non-throwing arm should be relaxed From this position, the movement is started by the back leg pushing the hip that is towards the back of the circle to the front Weight is transferred from the back leg to the front leg. The throwing arm comes forward and up The elbow must stay behind the shot Punch/push the shot up, keeping the elbow high The shoulder should not drop during any part of the movement Figure 3 - Release shot high with chest up Figure 4 - Drive the hip forward IDEAS FOR LITTLE ATHLETIC COACHES TO HELP DEVELOP SKILLS Use tennis balls or beanbags instead of shots Practice throwing from a cone Practice throwing up at a set point (tree, cloud) Throw facing towards arc (encourage elbow up and push out)