Transcription of Small Electric Line - VIBCO
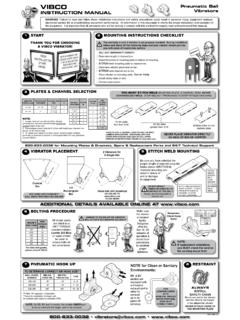
1 Small Electric LineHQ & Factory:75 Stilson RoadWyoming, RI 02898E-mail: 800 633-0032 (401) 539-2392 Fax: (401) 539-2584 Canada:2215 Dunwin DriveMississauga, ONT L5L 1X1E-mail: 800 465-9709 (905) 828-4191 Fax: (905) 828-5015 Mounting Instructions Operating InstructionsTroubleshooting Technical Data Parts List2 PHONE: 1-800-633-0032 FAX: you for choosing VIBCO , Inc. for your vibration needs. You are now the owner of the finest Small impact Electric vibrator available today, backed by complete manufacturer confidence in its quality and dependability. For reference, please complete the information below about your new VIBCO Number: _____ Serial Number: _____ Date of Purchase: _____Warning Labels and Serial Number Tags .. 3 Safety Instructions & Model Definitions .. 4 Mounting Instructions Checklist .. 5 Custom Mounting Instructions .. 5 Mounting Instructions.
2 6-9 Vibrator Installation .. 10-13 Alternative Mounting Suggestions .. 14-15 Changing Output Force .. 16-18 How to Fix a Crack in your Bin .. 19-20 Troubleshooting .. 21-22 Technical Data and Dimensions .. 23 Parts Lists & Breakdowns SPR-20, SPR-21, SPRT-21 .. 24 SPR-40, SPR-60, SPR-80, SPRT-60, SPRT-80 .. 25 SPWT-20, SPWT-60, SPWT-80 .. 26 SPR-60HD, SPR-80HD, SPRT-60HD, SPRT-80HD .. 27 Warranty & General Information .. 28 TABLE OF CONTENTSWARNING: Failure to read and follow these installation instructions and safety precautions could result in personal injury, equipment damage, shortened service life or unsatisfactory equipment performance. All information in this document is vital to the proper installation and operation of the equipment. It is important that all personnel who will be coming in contact with this product thoroughly read and understand this you forchoosing VIBCO Vibrators3 PHONE: 1-800-633-0032 FAX: LABELS AND SERIAL NUMBER TAGSWARNING!
3 Do not operate with the cover removed. Whenever the cover is removed make sure that the power is turned off and cannot be turned on Location: On body of !Make sure ground connections are completed. Before working on unit disconnect Electric Location: Wrapped around end of cordPlease have the information on this tag ready when ordering parts or contacting the technical service department at Location: On body of : Always make sure that the vibrator does not run above the specified amper-age for which the vibrator is : SCR-200 VOLTS: 115 AMP: .8 RPM: 0 - 4000 PHASE: 1 RHODE ISLAND, USA -- ONTARIO, NO: A5300000S/N: : 50/60 DUTY: SPECIALCOUNTERWEIGHT WARNING LABELGROUND CONNECTIONWARNING LABELSERIAL NO. & SPECS TAGIMPORTANTWARNINGDo not operate withcounterweight Opere Con ElContrapest DeProtecci n RemovidoNe pas faire fonctionnersi les dispositifs deprotection de contrepoidssont enlev sure groundconnections are Electric supplybefore working on Que La ConexionA Tierra Esta Hecha.
4 AntesDe Abrur La UnidadDesconecte La EnergiaEl ctricaS assurer se les mises lamasse sont bien effectu `esAvant de travailler surl`appareil, d brancher lasource d`alimentation4 PHONE: 1-800-633-0032 FAX: s model SPR line of Electric vibrators utilize a shaded pole motor. To ensure a long operating life, they are constructed with ball bearings, not sintered bronze bearings, and have a low amperage draw. HD models have oversized bearings and shafts for use in severe duty DEFINITIONSSPR-20 & -21: Open, Fan Cooled MotorFor Clean, Dry, Non-Dusty EnvironmentsSPWT: Watertight, Totally Enclosed, Non-Ventilated MotorNEMA Code 4, for Wash Down or Wet EnvironmentsSPR-20 & 21 SPRT-40, -60 & -80 SPRT-60 HD & -80 HDSPRT-21 SPR-40, -60 & -80 SPR-60 HD & -80 HDSPWT-21 ,-60 & -80HD: Heavy Duty MotorsNEMA Codes TEFC OR TENV, for 24/7 Continuous OperationSPRT: Totally Enclosed, Non-Ventilated MotorNEMA Code TENV, for Dusty EnvironmentsSAFETY INSTRUCTIONSWARNING: Failure to read and follow these installation instructions and safety precautions could result in personal injury, equipment damage, shortened service life or unsatisfactory equipment performance.
5 All information in this document is vital to the proper installation and operation of the equipment. It is important that all personnel who will be coming in contact with this product thoroughly read and understand this & -80: Totally Enclosed Fan-Cooled MotorNEMA Code TEFC, for Clean, Dry, Non-Dusty EnvironmentsHD: Heavy Duty MotorsNEMA Codes TEFC OR TENV, for 24/7 Continuous OperationSPRT: Totally Enclosed, Non-Ventilated MotorNEMA Code TENV, for Dusty Environments5 PHONE: 1-800-633-0032 FAX: INSTRUCTIONS CHECKLISTF actory warranty is VOID if vibrator is not installed per these instructions. o Determine vibrator placement on bin. (See Vibrator Placement on Page 6)o Determine length of channel iron and position on side of bin. (Figure 1 on Page 7)o Determine style of mounting plate. (Figure 3 on Page 8)o Select method of STITCH welding mounting plate to channel iron.
6 (Figure 4 on Page 8).o STITCH weld channel iron to bin. (See Welding Instructions on Page 9)o Attach vibrator to mounting plate. Check the mounting plate for warping. Secure firmly. DO NOT OVER TIGHTEN THE BOLTS. (See Vibrator Installation on Page 10) o Install safety chain or cable. (See Safety Chain Installation on Page 11)o Plug vibrator in using the NEC Standards. (See Figure 5 on Page 11)o Take a voltage reading at vibrator while running. VOLT _____o Take an amp reading while vibrator is running. AMPS _____ o Compare readings to standard values. Is the force the vibrator produces sufficient? Do you need more or less? See service instructions. o FILL OUT WARRANTY CARD AND MAIL TO VIBCO !!!!If the these steps are followed, your vibrator will be installed properly and should give you years of trouble free service. DO NOT MOUNT VIBRATOR DIRECTLY TO SURFACE OF BIN!!
7 !(IT WILL DAMAGE THE BIN)CUSTOM MOUNTING INSTRUCTIONSVIBCO s application specialists are providing general instructions and guidelines for the installation of our vibrators on customer equipment. These instructions and guidelines are based on the industries best practices and years of experience in applying vibrators. VIBCO specialists are available to review a customer s individual application to verify installation and make recommendations. These recommendations should not be considered as the Welding Procedure Specifications for the Welding Procedure Specifications are required, they should be provided by a professional engineer who is familiar with the structure the vibrator is being mounted to, as well as all of the specifications of the materials being used, and any of the environmental details present at the : 1-800-633-0032 FAX: INSTRUCTIONSC onical BinRectangular Bin1/2 Rectangular BinTwo Vibrators On A Single Bin(Normally used to clean out bin or for larger bins)1/4 TO 1/3 LL1/3 TO 1/4 LL1/2 L1/4 TO 1/3 LL1/4 TO 1/3 LLVibrator PlacementFor coarse materials the vibrator should be mounted approximately 1/3 of the distance from the discharge opening to the top of the sloped portion of the bin.
8 For fine materials place the vibrator 1/4 of the distance from the discharge to the top of the sloped portion of the PLACEMENT OF VIBRATOR IS ALWAYS LOCATED ON THE SLOPED PORTION OF THE BIN!DO NOT MOUNT VIBRATOR DIRECTLY TO SURFACE OF BIN!!!(IT WILL DAMAGE THE BIN)7 PHONE: 1-800-633-0032 FAX: 1 The thickness of your bin walls determines the minimum length of channel iron needed in order to successfully mount your vibrator. To find out what length of channel iron is needed for your application, refer to the chart t have the time or the resources to manufacture your own mounting plates? VIBCO supplies mounting plates for all SPR Electric Vibrators. Choose the plate you need from the table below. Mounting bolts are included free of 2 Determining Length of Channel IronAll of VIBCO S SPR Electric Vibrators are designed to use standard 2 Channel , 3 Channel Iron is also INSTRUCTIONS continuedSee Figure 1 for DimensionsNote: Longer channel iron will not affect the vibrator performance, but total channel iron length should not exceed the length of the bin PLATES AVAILABLE FROM VIBCOM ounting Plates can be purchased with thru-holes standard (see Page 8.)
9 For studded Mounting Plates add -ST to the part number when Wall ThicknessMinimum Channel Length (L)Less Than 1/8 (thin)12 to 24 on both sides of vibratorGreater Than 1/8 6 to 8 on both sides of vibratorModelSPR-20 SPR-21 SPR-80 & 80 HDSPR-60 & 60 HDSPRT-21 SPWT-21 SPWT-60 SPWT-80 Mounting Plate Part #SPM-1 SPM-1 SPM-2 SPM-1 SPWM SPWM SPWM2 1 1/8 8 PHONE: 1-800-633-0032 FAX: start and stop welds 1 from ends to prevent heat concentration. In accordance with the appropriate picture below, weld 2 to 3 inches, skip 1 to 2 inches and repeat until securely mounted. NOTE: length and spacing of stitch welds described here is different than that for mounting the channel iron to the Plates for all SPR Vibrators can be purchased directly from (800) 633-0032(See previous page for proper sizing & Part No. s)Different Suggestions for Styles of Channel Iron1a & b) Mounting plate welded to legs of channel iron (a-SPR, SPRT; b-SPWT).
10 2) Channel iron with holes drilled thru & nuts welded on back, or just holes drilled thru (SPR, SPRT).3a & b) Mounting plate on face of channel iron & holes drilled or tapped thru (a-SPR, SPRT; b-SPWT).4) Notch the channel for access to mounting bolts (SPR, SPRT).5) Weld studs to back of channel (SPR, SPRT).6a & b) Mounting plate welded to two angle iron stiffeners instead of channel iron (a-SPR, SPRT; b-SPWT).2 Stitch Welding Mounting Plate to Channel IronFigure 3 Figure 4 MOUNTING INSTRUCTIONS continuedDetermining Style of Mounting Plate1a1b3a3b6a6bThru HoleStuddedorFor all SPR Vibrators, use 1/4 in. thick mounting : 1-800-633-0032 FAX: SURE YOU HAVEENOUGH CHANNELON EITHER SIDE OFTHE VIBRATOR TOPROPERLY MOVEYOUR MATERIAL(see figure 1 on page 7)L = LENGTH OF SLOPED PORTIONALWAYS START AND STOPYOUR STITCH WELDSAT LEAST 1 ( cm)FROM THE ENDOF THE CHANNEL TOPREVENT FROM HEAT CONCENTRATIONALWAYS LEAVEAT LEAST 3 ( cm)BETWEEN STITCH WELDSEITHER 1/4 L(for fine material)or 1/3 L(coarse material)FROM THE DISCHARGEMOUNTING INSTRUCTIONS continued Stitch Welding Channel Iron to BinDO NOT MOUNT VIBRATOR DIRECTLY TO SURFACE OF BIN !