Transcription of SPHERICAL ROLLER BEARING Installation Instructions SERIES ...
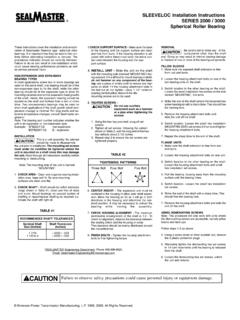
1 SPHERICAL ROLLER BEARINGI nstallation InstructionsSERIES 1000 / 1100 / 1101 These Instructions cover the set screw and eccentric locking SPHERICAL rollerbearings with the Multi-Trap labyrinth or contact seals. It is important thatthey be read in their entirety before attempting Installation or removal. Theprocedures indicated should be carefully followed. Failure to do so can resultin mis- Installation which could cause BEARING performance problems as wellas serious personal AND EXPANSIONBEARING TYPESIn most applications where two or more bearings are used on the same shaft,one BEARING should be of the non-expansion type to fix the shaft, while theother BEARING should be of the expansion type to allow for mounting variablesand normal expansion (heat growth) of the shaft.
2 Ideally, the expansion bear-ing should be located on the shaft end furthest from a belt or chain drive. Twonon-expansion bearings may be used on short shaft applications if the shaftgrowth (shaft temperature change) is minimal. For long shafts and extensivetemperature changes, consult Browning engineers*.Note:The BEARING part number indicates whether the unit is an expansionor non-expansion :SPB1000NE x 2 7/16 NE- non-expansionSPB1000E x 2 7/16 E- expansionBEARING INSTALLATION1. CHECK AREA - Clean and organize BEARING Installation area, keep well sure mounting surfaces are clean and CHECK SHAFT - Shaft should be within tolerance range shown in Table#1, clean, and free of nicks and burrs.
3 Mount BEARING on unused section ofshafting or repair/replace shafting as required. Emerson Power Transmission Manufacturing, 1999. All Rights INSTALL UNIT - Slide the BEARING unit and locking collar on shaft. (If theprojecting side of the BEARING is to be mounted toward the machine, put thelocking collar on first.) If it is difficult to mount the BEARING on shaft, use apiece of emery cloth to reduce any high spots on shaft. Do not hammer onany component of the FASTEN UNIT IN PLACE - Install housing attachment bolts, check andalign BEARING and tighten attachment bolts. Rotate shaft slowly to SCREW INSERTSa. Set screws in a multiple BEARING setup should be Torque first set screw to one half recommended torque inTable #2.
4 Torque second set screw to full torque. Torque first setscrew to full Check shaft again for freedom of rotation and then lock secondbearing unit to ECCENTRIC LOCK INSERTSa. Rotate locking collar in the direction of rotation until hand tightly with a drift pin and hammer or spanner wrench andhammer. Tighten set screws to torque specified in Table # Check shaft again for freedom of rotation and then lock secondbearing unit to INSERT - The expansion unit must be centered in the housingto allow axial shaft expansion. Move the BEARING as far as it will go inboth directions in the housing and determine the centered position.
5 Itmay be necessary to unload the BEARING while moving the HOUSING ALIGNMENT - The maximum permissible misalign-ment of the shaft is . To check the for alignment, observe theclearance between the sealing shield and the housing or collar. Theclearance should be evenly distributed around the 2nd UNIT - Repeat Steps 4 through 6 for each additionalbearing used on the shaft.*Browning Engineering Department: Phone SHAFT TOLERANCESN ominal ShaftSize (inches)Shaft Tolerances(inches)1 1/8 to 1 15/162 to 3 15/164 to 4 15/16+.0000 / +.0000 / +.0000 / SCREW LOCKBoreSizeScrewSizeTorque(in-lbs.)(ft- lbs.)(N-m)1 1/8 to 2 3/ 162 7/16 to 3 1/23 7/16 to 4 15/163/81/25/825053510602045902906551310 ECCENTRIC LOCKBoreSizeScrewSizeTorque(in-lbs.)
6 (ft-lbs.)(N-m)1 1/8 to 2 3/162 7/16 to 3 1/23 7/16 to 4 15/163/167/321/4250360535203045290435655 TABLE #2 TABLE #3 TABLE #1P/N 784102 REV. 0PS-740-00223/22/99 Printed in Emerson Power Transmission Manufacturing, 1999. All Rights Power TransmissionAurora, IL 60507 Phone: 630-898-9620 RELUBRICATION INSTRUCTIONSBROWNING SPHERICAL ROLLER BEARING Units are factory lubricated with a highquality lithium soap grease with an EP additive. The BEARING is ready for usewith no (initial) additional lubrication required. However, for slow speed appli-cations less than 100 RPM, operating in dirty or wet environment, sufficientadditional grease should be applied at start-up to completely fill the void inthe BEARING .
7 Relubrication intervals depend upon the type of application, speedand other external conditions. For general use, suggested intervals are shownin Table #4 and grease charge in Table #5. Experience will determine thebest interval for each specific lubricating bearings, add grease slowly while the shaft is grease begins to come out of the seals, the BEARING will contain thecorrect amount of grease. Re-lubricate with a lithium soap grease with EPadditive, which conforms to NLGI 2 consistency and is suitable for anoperating range of -20 F to +250 F. Compatibility of grease is critical, there-fore consult with Browning Engineering Department* and your grease sup-plier for current grease specifications to ensure greases are applications operating below -20 F, above 250 F, and all unusual appli-cations.
8 Contact Browning Engineering Department*RELUBRICAT ION SCHEDULEA Q UALI TY LITHI UM SOAP GREASE WI TH AN EP ADDITI VE SHOULD BE USEDS peed RPMT emperatureCleanlinessGreasing Interval1005001000-20 F to 125 F-20 F to 150 F-20 F to 210 FCleanCleanClean1-4 Months1 Week to 1 Month1-2 Weeks1500 to MaximumCatalog Rat ingUp to 150 FOver 150 FUp to 250 FUp to 250 FDirtyDirtyVery Dirty *Ext reme Condit ions *Daily t o 1 weekDaily t o 1 weekDaily t o 1 weekDaily t o 1 weekRECOMMENDED SHAFT TOLERANCESN ominal ShaftSize (inches)Shaft Tolerances(inches)1 1/8 to 1 1/ 41 3/8 to 1 7/ 161 1/2 to 1 11/ 161 3/4 to 22 to 2 3/162 1/4 to 2 1/ 22 11/16 to 33 3/16 to 44 7/16 to 4 1/24 15/16 to ROLLER BEARINGI nstallation InstructionsSERIES 1000 / 1100 / 1101 TABLE #4 TABLE #5*Browning Engineering Department: Phone Installation InstructionsSERIES 2000 / 3000 These Instructions cover the Installation and re-lubrication of Sealmaster Sleevloc type sphericalroller bearings.
9 It is important that they be read inthere entirety before attempting Installation or re-moval. The procedures indicated should be care-fully followed. Failure to do so can result in mis- Installation which could cause BEARING perfor-mance problems as well as serious personal AND EXPANSIONBEARING TYPESIn most applications where two or more bearingsare used on the same shaft, one BEARING should beof the non-expansion type to fix the shaft, while theother BEARING should be of the expansion type toallow for mounting variables and normal expansion(heat growth) of the shaft.
10 Ideally, the expansionbearing should be located on the shaft end furthestfrom a belt or chain drive. Two non-expansion bear-ings may be used on short shaft applications if theshaft growth (shaft temperature change) is mini-mal. For long shafts and extensive temperaturechanges, consult Sealmaster engineers*.Note: The BEARING part number indicates whetherthe unit is an expansion or non-expansion : SPB2207-C2non-expansionESPB2207-C2E - expansionINSTALLATIONThis is a unit assembly. No attemptshould be made to disassemblethe unit prior to Installation . The mounting setscrews must under no condition be tightened un-less the unit is mounted on a shaft since this maydamage the unit.