Transcription of STOP MOTION - Teach Animation
1 STOP MOTIONStop MOTION is a powerful Animation technique that makes staticobjects appear to be moving. Creating stop MOTION draws attention toplacement, framing, direction and speed of movement. There aremany types of stop MOTION techniques, in both 2-D and 3-D media,such as: hand drawing, cel, cut-paper, sand, and best projects result from strong ideas. To generate stronger ideasit is worthwhile to engage students in critical viewings of Animation , and encouragebrainstorming and synthesis of ideas. Feeling ownership of the concept will help keepstudents interested and dedicated throughout the Animation students brainstorm ideas they need to write down their thoughts to determinewhat interaction and action will take place. Most people prefer to start with scripts, astoryboard that is completely textual. Writing descriptions of the action helps todetermine how and in what order every shot will become animated later in is a major component to any Animation project because it ensures thatideas are well developed before production, and saves time by anticipating purpose of the storyboard is to visually plan out the entire Animation .
2 Here iswhere students begin to think about the camera work by showing every shot orimportant transition in the Animation . Storyboards should be required for all stopmotion MOTION requires a camera or video device to expose single or multiple frames ofimages that, when run at normal speed, appear to represent continuous can set up by connecting a computer to video camcorder, digital still camera, ora webcam. When using a video recording device to compose shots, keep the camerasteady by using a tripod or Animation stand. Your computer needs current softwarethat supports single frame : FrameThief is a premiere software package forcreating Animation on Macintosh platforms. Stop MOTION Pro is an easy to use, powerful toolfor creating animated films on Windows MOTION Tips: The quality of the art in storyboards isn t very important, but a well-executedstoryboard is the best of all planning devices.
3 Use arrows to indicate MOTION of thecamera or MOTION of the characters within the storyboard drawings. Anything that detracts the viewer s attention from what is being animated worksagainst the movie. For this reason, backgrounds should be simple and steady. Using a copy stand for Animation requires one to work upside down because of thecamera mount. This can be inconvenient or confusing for students. Improvise - don t give up when your story calls for something to happen that seemsimpossible to achieve with the techniques. Remind students that since stop MOTION filming is very time consuming, studentsneed to take turns in responsibilities and use of PLANO bjectivesStudents will use a stop MOTION technique to create a simpletwo-dimensional and/or three-dimensional Animation thatcommunicates an idea. They will also be able to define theconcepts of: placement, framing, direction, and different examples of stop MOTION Animation .
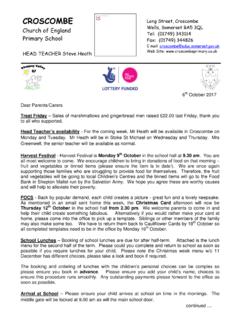
4 Some DVDs of Animation include Making Of documentaries that can also be a great way to begin discussing thetechniques and strategies used in stop :Monty Python s Flying Circus (Work of Terry Gilliam)available on videoThe Legend of The Sky KingdomMark Osborne s MoreNick Park s wonderful Wallace and Gromit series of shortsTim Burton s The Nightmare Before ChristmasStudents choosing objects to animateHow Can Students Create an Animated Stop MOTION Narrative?BrainstormingHave students spend up to an hour discussing, brainstorming, and writingeverything down. Challenge students in suggesting new ideas and adding toexisting ideas. Even weak ideas can be developed into something good!Tips: Remind students that great ideas can come from simple, every dayexperiences. Have students take notes and write down their thoughts on the plot,the scenes, the characters, and any extra details that come to mindwhile they are writing.
5 Use the linked handout to get them started! KEEP IT SIMPLE! The shortest and simplest concepts are the easiestto animate. Limit them to one or two characters, so that they canconcentrate on the details. The approach students take (2-D, 3-D or combined) should supporttheir overall script is the written description of the actions that will takeplace. Ask students questions such as: What is your theme or idea? What sort of personality would you like to create? How long do you plan for this to be? How many framesand fps is that? (Make them do the math!) Who in your group will do which production jobs? What materials or objects will you need to collect? What kind of background will you need? Will 2D or 3D technique work better for this particular story? Why? What different shots do you need? What close-ups? Attach your storyboard!
6 Have you varied the scale, pace, angle orwhatever of the shots? What else do you want to say about your idea?StoryboardingThe story then is ready to be visually depicted as a storyboardoutlining the plot, characters, and backgrounds. Remind studentsthat storyboarding and planning on paper saves time and energybecause they will figure out all the details before committing tothe Animation . Storyboarding will also ensure that each groupselects the one approach best suited to the basic concept they veidentified. Using poster board, preferably large, and a packet ofPost-it-notes, sort out the ideas and images to be used. Divide up the page, discussthe sequence of shots, and draw in key transitions or moments, making notes asnecessary. Label each section of the storyboard with sequence, camera angle,timing, and other directorial information as you groups have decided on the story they will be telling and have created theirstoryboards, they need to begin gathering their props, characters, and back dropsto be ready to film their for stop MOTION Animation can be created from just about anymaterials you have on hand: Art materials such as: crayons, markers, construction paper, colored paper,watercolors, cardboard boxes, whiteboard, blackboards, tempera paint, clay,etc.
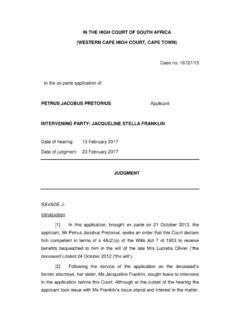
7 Real objects: a rock for a boulder, a branch for a tree, etc. Animated background: one that changes during the course of youranimation. Remember, arranging a 3D space with objects in the foreground can giveyour Animation a nice sense of depth. Make sure that your background is thesame scale as your characters, and that it will fill the frame for whatevercamera you will use to capture the images. Cut paper background Student working on Animation StandCameraYou can use almost any camera to capture the individual frames of youranimation. The advantage of using a digital camcorder is that it can save eachpicture directly onto the computer's hard drive as you take StandIn 2D stop MOTION Animation , the camera is positioned directly above thebackground upon which the cutout characters lay camera is mounted on a tripod because you don't want the camera to moveat all during the picture-taking do I Record Stop MOTION ?
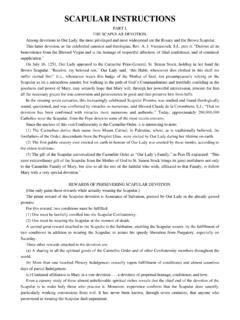
8 Connect the camcorder to the computer using the FireWire or theUSB port. On the computer, open the software for the camera you are s Project Chooser window shows up and choose NewAnimation to begin a new Animation project or Open Previous if youwill continue a previously saved Animation project. The FrameThief software now allows you to select where you'd likeyour frames to be stored. Create a folder in your desktop to save allof your images and project. If Video Source pop up window shows up it means that FrameThiefwas unable to connect to a video source. Please make sure that yourvideo device is connected and working properly. Make surecamcorder is turned on and that FireWire cable is connected from thecamcorder to the computer. Click Check Again to try the connectionagain or Continue to proceed without connecting.
9 Place the background so that it completely fills the frame for thepictures you'll take. Position the characters where you'll want them, and then press the"Capture" button to take your first frame. Stop MOTION Animation looks good at a frame rate as low as tenframes per second. However, because video rate is 30 frames persecond, it is recommended to capture each frame three times. Byclicking the number 3 on your keyboard, you will be capturing 3frames at once. After you take each picture, slightly move your characters intoposition for the next shot. Each picture you take will become a framein your movie. Click play to replay captured frames in real-time. After you've taken all the pictures, it is time to turn your stills into aQuickTime movie. File Menu > Export > Animation to QuickTime Movie. In the Export Animation settings box that appears, you can changethe size, Starting and Ending Frames and Compression.
10 The standardVideo resolution is 720 x 480 pixels. By clicking on the Edit buttonnext to the Compression box. You may choose to change the qualityand Frame rate. It is recommended to keep the Frame rate from 10to 15 fps. Click OK > Enter the name of the QuickTime Movie to create anddetermine where you would like the Movie to be saved > Click Save. To finalize Animation students can add sound and credits in videoediting programs such as iMovie or Final Cut Pro archive theirprojects in DV tape, CD or may evaluate this project using the general rubric or add criteria depending upon the needs or levels of your students,and/or other curricular concerns. This lesson introduces new terminologytherefore instructors should give a quiz. In addition to that formal finalassessment I encourage teachers to conduct informal, in-progressassessment thinking about questions like these: How well are the groups working together?