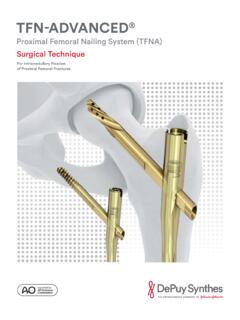
Transcription of Surgical Technique - Smith & Nephew
1 Surgical Technique1 Nota BeneThe Technique description herein is made available to the healthcare professional to illustrate the author s suggested treatment for the uncomplicated procedure. In the final analysis, the preferred treatment is that which addresses the needs of the specific of contentsIndications ..2 TRIGEN INTERTAN case examples ..3 Design features ..4 Implant specifications ..5 Surgical Technique ..6 Implant selection ..6 Patient positioning ..6 Opening the proximal femur ..8 Incision and entry point ..8 Entry portal acquisition ..9 Intramedullary reaming ..12 Fracture reduction ..12 Implant measurement (long nails) ..13 Preparing the canal ..13 Nail insertion ..15 Nail assembly ..15 Insertion ..16 Nail anteversion ..16 Insertion depth ..17 Proximal locking overview ..18 Proximal locking ..20 Lag Screw Drill Sleeve insertion ..20 Lag Screw Guide Pin insertion ..20 Lag Screw measurement ..21 Subtrochanteric Lag Screw insertion.
2 23No compression ..23 With compression ..24 Cannulated Set Screw ..25 Integrated Interlocking Screw insertion ..27No compression ..29 With compression ..30 Cannulated Set Screw ..31 Distal locking ..33 Short nail ..33 Long nail ..33 Nail Cap insertion: optional ..34 Closure ..34 Implant information ..39 TRIGEN INTERTAN intertrochanteric Antegrade NailSurgical Technique2 IndicationsThe TRIGEN INTERTAN nail is indicated for fractures of the femur including simple shaft fractures, comminuted shaft fractures, spiral shaft fractures, long oblique shaft fractures and segmental shaft fractures; subtrochanteric fractures; intertrochanteric fractures; ipsilateral femoral shaft/neck fractures; intracapsular fractures; nonunions and malunions; polytrauma and multiple fractures; prophylactic nailing of impending pathologic fractures; reconstruction, following tumor resection and grafting; bone lengthening and INTERTAN system case examplesPreoperative APPostoperative APPostoperative LateralCase 1 Preoperative APPostoperative APPostoperative LateralCase 24 Design featuresClothespin distal tip reduces nail stiffness and the potential for periprosthetic fracture distal to the nailSmall proximal diameter ( X ) preserves the gluteus medius tendon and the lateral wall of the greater trochanterPreloaded Cannulated Set Screw allows for creation of a fixed angle device or facilitates postoperative slidingTrapezoidal nail profile provides enhanced stability in the proximal femur for early weight bearingDistal locking slot allows static or dynamic locking using standard TRIGEN Internal Hex Captured Locking Screws12 of built-in femoral neck anteversion (long nail)
3 For optimal screw position in the femoral neck and headIntegrated Interlocking Lag and Compression Screws in figure eight formation for superior stability and linear compression4 lateral offset for minimally invasive trochanteric entry10mm, and 13mm distal diameters5 Implant specificationsNote These views are not to scale and should be used as a pictorial representation INTERTAN nail (long)TRIGEN INTERTAN nail (short) , , AP Bow15mm20mm11mm32mmMinor diameter tapers from Lag Screw 5mm40mm/18cm60 , 20cmTRIGEN INTERTAN subtrochanteric lag screwTRIGEN INTERTAN lag and compression screws11 mm32mmMinor diameter tapers from Interlocking Screws (sold together) , , 13mm6 Surgical techniqueImplant selectionThe TRIGEN INTERTAN Nail Preoperative Template Set (7167-4200) may be used to assist with preoperative implant selection. Nail size, screw length and femoral neck angle may be As template magnification levels are set at 117%, all measurements are estimates of true size.
4 All measurements must be verified INTERTAN Nail Preoperative Template SetSet No. 7167-4200 Patient positioningPlace the patient in the supine or lateral decubitus position on a fracture table according to surgeon preference and/or fracture pattern. The foot of the affected limb is placed in a foot holder or a skeletal traction pin is inserted through the calcaneus to achieve traction. The unaffected limb is extended down and away from the affected limb or is placed up in a leg holder. The torso may be abducted 10 15 to allow for clear access to the intramedullary canal. Check the affected limb for length and rotation by comparison to the unaffected limb. Rotate the C-Arm to ensure optimal AP and lateral visualization of the proximal If using a radiolucent table, a distraction device may be helpful in reducing the for opening the proximal x 343mm Brad Point Tip Threaded Guide PinCat. No. Entry ReamerCat.
5 No. 7163-1116 HoneycombCat. No. 7167-4075 Entry Portal TubeCat. No. 7167-406016mm Channel Reamer* Cat. No. 7167-4062 Entry Portal HandleCat. No. 7167-4092 Mini ConnectorCat. No. 7163-1186* Also available: 17mm Channel Reamer (7167-4063)8 Opening the proximal femurIncision and entry point Assemble the Honeycomb (7167-4075), Entry Portal Handle (7167-4092) and Entry Portal Tube (7167-4060). The pieces will lock in place securely at either 0 or 180 .A longitudinal incision is made proximal to the greater trochanter. Carry the incision through to the fascia and palpate the tip of the greater optimal entry point is located on the medial face of the greater trochanter, 4 from the anatomical axis in the AP and in-line with the intramedullary canal in the portal acquisition Insert the Entry Portal Instrumentation through the incision down to bone. Attach a x 343mm Brad Point Tip Threaded Guide Pin (7167-4130) to power via the Mini Connector (7163-1186) and insert 2-3cm into the trochanteric region.
6 Avoid over-insertion of the guide pin as this can establish a false trajectory and lead to fracture malalignment. Confirm guide pin placement in the AP and lateral In the instance of suboptimal guide pin placement, rotate the Honeycomb within the Entry Portal Tube to the desired location and insert another guide pin. Following guide pin placement, remove the Honeycomb from the Entry Portal Tube along with any additionally inserted guide pins. Insert the Entry Reamer (7163-1116) into the 16mm Channel Reamer (7167-4062)* and attach to power. Advance the assembly through the Entry Portal Instrumentation 1-2cm into the trochanteric region. * Also available: 17mm Channel Reamer (7167-4063)10 Adjust the angle of the reamer assembly to the desired trajectory and advance to the positive stop on the Entry Portal Tube. The channel reamer will be at the level of the lesser trochanter. If the Entry Portal Instrumentation is not used, the channel reamer must be inserted to the level of the lesser trochanter.
7 Confirm the reamer assembly s final position and fracture reduction in both the AP and lateral planes. Remove the reamer assembly and guide pin. Note If inserting a long INTERTAN nail, leave the channel reamer in In the instance of hard bone, it may be necessary to use the 17mm Channel for fracture reduction and intramedullary reaming (long nail)Entry Portal TubeCat. No. 7167-4060 GripperCat. No. 7167-408016mm Channel Reamer* Cat. No. 7167-4062 Entry Portal HandleCat. No. 7167-4092 Ruler Cat. No. 7167-4079T-HandleCat. No. 7167-4076 Reamer ShaftCat. No. 7111-8200 ReducerCat. No. x 1000mm Ball Tip Guide RodCat. No. 7163-1626 Reamer Heads Cat. No. 7111-8231 to 7111-8256**Also available: 17mm Channel Reamer (7167-4063)12 Intramedullary reamingFracture reduction Insert the back end of the Ball Tip Guide Rod (7163-1626) into the front end of the Gripper (7167-4080) and gently close the trigger-grip. Connect the Reducer and Reducer Connector (7167-4077) so that the words Slot Orientation are in line with the opening at the tip.
8 Complete the Reducer assembly by connecting it to the T-Handle (7167-4076).Introduce the Reducer into the intramedullary canal through the channel reamer and Entry Portal Instrumentation. Care should be taken to maintain fracture reduction. Pass the ball tip guide rod through the back of the T-Handle and insert to the desired depth using the Reducer s curved tip to avoid any areas of comminution. The guide rod should be center-center in the AP and lateral the guide rod is in position, detach the Gripper and remove the Reducer from the intramedullary canal. Slide the Obturator (7167-4078) into the back of the T-Handle during extraction in order to maintain guide rod position within the measurement (long nails)After Reducer removal, re-confirm guide rod position in the distal femur. Advance the Ruler (7167-4079) over the guide rod through the channel reamer and Entry Portal Instrumentation. The metal tip of the Ruler should be at the level of the greater trochanter.
9 Confirm guide rod position in the window at the proximal end of the Ruler as shown in order to ensure accurate implant measurement. Push down on the top of the Ruler until contact is made with the guide rod. Implant length is read from the exposed calibrations near the thumbwheel on the Resistance on the Ruler may be adjusted by tightening or loosening the reaming (optional)Preparing the canal Beginning with the End Cutting Reamer Head (7111-8231) and Flexible Reamer Shaft (7111-8200), ream the intramedullary canal sequentially in half millimeter increments to a size* larger than the selected nail guide rod position during reaming by inserting the Obturator into the back of the Reamer unit during retraction. Continue to confirm guide rod position throughout reaming. Periodically move the Reamer back and forth in the canal to clear debris from the cutting flutes. Note The channel reamers will not accommodate Reamer Heads larger than *The largest Reamer Head that the TRIGEN Base Instrument Tray can hold is Larger sizes are available in the SculptOR Reamer Set (7111-8330)14 Instruments for nail assembly and insertionAlignment ArmCat.
10 No. 7167-4066 Lag Screw DrillCat. No. 7167-4040 Guide Bolt Wrench Cat. No. 7163-1140 Guide Bolt Cat. No. 7167-4071 Alignment TowerCat. No. 7167-4018 Drill Guide HandleCat. No. 7167-4001T-HandleCat. No. 7167-4076 Drill Guide Drop 125 and 130 Cat. No. 7167-4002 and 4003 Slotted Hammer Cat. No. 7167-4082 Cannulated Impactor - Medium Cat. No. 7167-5081 Lag Screw Drill SleeveCat. No. 7167-402315 Nail insertionNail assembly Attach the Drill Guide Handle (7167-4001) to the nail with the Guide Bolt (7167-4071) and tighten with the Guide Bolt Wrench (7163-1140) and T-Handle. The nail can only be attached to the Drill Guide Handle in one the desired Drill Guide Drop (7167-4002, 7167-4003) to the Drill Guide Handle and insert the Lag Screw Drill Sleeve (7167-4023) into the drop until it locks. Verify targeting accuracy by passing the Lag Screw Drill (7167-4040) through the assembly. An incorrectly attached nail will not target.