Transcription of TECHNICAL DATA SHEET - Loctite Products
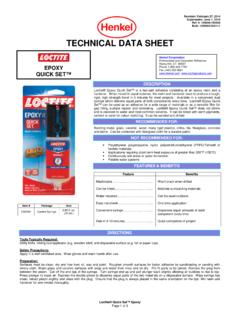
1 Revision: October 7, 2013. Supersedes: July 15, 2013. Ref. #: 440388. TECHNICAL data SHEET . Henkel Corporation Professional and Consumer Adhesives Rocky Hills, CT 06067. PL S30TM POLYURETHANE Phone 1-800-624-7767. Roof & Flashing Sealant Fax (440) 250-9661. DESCRIPTION. TM. Loctite PL S30 Polyurethane Roof & Flashing Sealant is a premium quality, commercial grade sealant developed especially for forming permanent, water and weatherproof seals in all exterior gaps and joints. This sealant is elastic and remains flexible to expand and contract with construction material movement to protect and retain the original seal.
2 It provides properties of non-sag, permanent flexibility and corrosion resistance. It exhibits outstanding durability and tear resistance. It usually requires no primer and resists deterioration from weather, stress or movement. It is UV and ozone resistant and does not soften in the sun. RECOMMENDED FOR: Seals roof flashing around chimneys and roof edging. Also suitable for shingle tabbing and for covering roofing nails. Bonds asphalt, aluminum, fiberglass, metal, brick, wood, concrete, stucco and many more substrates. NOT RECOMMENDED FOR: Underwater applications or permanent water immersion Applications requiring temperature resistance greater than 200 F (93 C).
3 Joint depths greater than without the use of a backer rod Use with fillers impregnated with oil, asphalt, tar or any migratory saturant Contact with oil-based caulking compounds, butyl caulking compounds and silicone sealants (uncured and cured). FEATURES & BENEFITS: Feature Benefits Flexible .. Use on expansion joints; 35% movement Weatherproof .. Withstand harsh environments Does not deteriorate.. One-time application Paintable . Blends with surroundings Colour Item # Package Size Low-VOC formula Complies to stringent Federal & State Regulatory Requirements Paper Black 1618181 10 fl oz Cartridge Paper COVERAGE.
4 Black 1618148 10 fl oz Cartridge Paper For a 10 fl. oz. cartridge: Black 1675273 10 fl oz Cartridge A (6 mm) bead extrudes approximately ft ( m). A 3/8 ( mm) bead extrudes approximately ft. ( m). DIRECTIONS. Tools Typically Required: Utility knife, caulking gun and tool to puncture cartridge seal. Safety Precautions: Gloves. Sealant may temporarily stain skin. TM. Loctite PL S30 Polyurethane Roof & Flashing Sealant Page 1 of 4. Revision: October 7, 2013. Supersedes: July 15, 2013. Ref. #: 440388. Surface Preparation: Surfaces must be structurally sound, dry, clean, free of dirt, moisture, loose particles, oil, grease, asphalt, tar, paint, wax, rust, waterproofing, curing and painting and compound.
5 Joint Preparation: The number of joints and the joint width should be designed for a maximum of 35% joint movement from the initial joint width. The depth of the sealant joint should be the width of the joint. The maximum depth is inch (13 mm) and the minimum is (6 mm). The maximum recommended joint width is inches (38 mm). In deep joints, the sealant depth must be controlled by Closed-Cell Backer-Rod or Soft Backer-Rod. Where the joint depth does not permit the use of backer-rod, a bond breaker (polyethylene strip) must be used to prevent three-sided adhesion. To maintain the recommended sealant depth, install backer-rod by compressing and rolling it into the joint channel without stretching it lengthwise.
6 Closed-Cell Backer-Rod should be approximately 1/8 (3 mm) larger in diameter than the width of the joint to allow for compression. Soft Backer-Rod should be approximately 25% larger in diameter than the joint width. Backer-rod becomes an integral part of the joint. The sealant does not adhere to it, and no separate bond breaker is required. Do not prime or puncture the backer-rod. Masonry: Concrete, stone, stucco and other masonry must be cleaned where necessary by grinding or wire brushing to expose a sound surface free of contamination. Concrete must be fully cured. Wood and painted wood: Cut back weathered and treated surfaces and dry rot until clean, sound wood is reached.
7 Loctite PL Polyurethane Roof & Flashing Sealant will adhere to most new and old dry, oil-free wood. Scrape away paint to bare wood. Metal: Scale, rust and coatings must be removed to expose bright metal. Protective coatings should be removed with a solvent as well as any chemical residue or film. General Preparation: Use above 40 F (4 C). In cool or cold weather, store container where temperature is about 75 F (25 C) for at least 24 hours before using. Cut nozzle at a 45 angle to desired bead size and puncture inner seal. Priming: While Loctite PL Polyurethane Roof & Flashing Sealant is generally considered a non-priming sealant, special circumstances or substrates (Copper, galvanized and stainless steel) may require a primer.
8 It is the user's responsibility to check the adhesion of the cured sealant on a test joint before applying to the entire project. Where incidental water immersion may occur, priming is required. Apply primer full strength with a brush or clean cloth. A light, uniform coating is sufficient for most surfaces. Porous surfaces, may require more primer, but do not over apply. Allow primer to dry prior to sealant application. Depending on temperature and humidity, the primer will be tack free in 15 to 120 minutes and ready for sealant. Priming and sealing must be done on the same working day. Application: Henkel Loctite PL S30 comes ready to use.
9 Apply by professional caulking gun. Do not open product container until preparatory work has been completed. Protect open containers from heat and /or direct sunlight. Fill joints from the deepest point to the surface by holding a properly sized nozzle against the back of the joint. Do not use in joints deeper than (13 mm) without the use of a backer rod. For roof tile applications, apply a bead of Henkel Loctite PL S30 sufficient to make a bond between two tiles on the upper surface of the down slope tile. Install the upslope tile and press into the sealant bead to ensure good contact between the sealant and both tiles.
10 Dry tooling is recommended within 5 minutes of extrusion. DO NOT use soapy water when tooling as this may cause the surface to discolor. If tooling with solvent is necessary, use clean mineral spirits. Tooling results in the correct bead shape, a neat joint, and maximum adhesion. Sealant skins within 24 hours, is functional within 3 days and reaches full cure in about 1 week. Clean-up: Clean tools and any uncured sealant residue immediately with mineral spirits. Cured sealant may be carefully cut away with a sharp-edged tool. STORAGE AND DISPOSAL. NOT DAMAGED BY FREEZING. Store in original, tightly closed container away from heat and direct sunshine.