Transcription of TECHNICAL SERVICE GUIDE - ApplianceAssistant.com
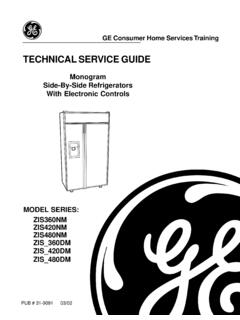
1 G GE Consumer Home services Training TECHNICAL SERVICE GUIDE . Monogram Side-By-Side Refrigerators With Electronic Controls GEA01265. MODEL SERIES: ZIS360NM. ZIS420NM. ZIS480NM. ZIS_360DM. ZIS_420DM. ZIS_480DM. PUB # 31-9091 03/02. ! IMPORTANT SAFETY NOTICE. The information in this SERVICE GUIDE is intended for use by individuals possessing adequate backgrounds of electrical, electronic, and mechanical experience. Any attempt to repair a major appliance may result in personal injury and property damage. The manufacturer or seller cannot be responsible for the interpretation of this information, nor can it assume any liability in connection with its use.
2 WARNING. To avoid personal injury, disconnect power before servicing this product. If electrical power is required for diagnosis or test purposes, disconnect the power immediately after performing the necessary checks. RECONNECT ALL GROUNDING DEVICES. If grounding wires, screws, straps, clips, nuts, or washers used to complete a path to ground are removed for SERVICE , they must be returned to their original position and properly fastened. GE Consumer Home services Training TECHNICAL SERVICE GUIDE Copyright 2002. All rights reserved. This SERVICE GUIDE may not be reproduced in whole or in part in any form without written permission from the General Electric Company.
3 Table of Contents TECHNICAL Data .. 3. Model Nomenclature .. 4. Rating Plate .. 4. Mini-Manual .. 4. Serial Number .. 5. Component Locator Views .. 6. Cabinet .. 9. Machine Compartment .. 9. Door Closure 10. Doors and Hinges .. 10. Door Gaskets .. 11. Rollers and Leveling .. 11. Ice and Water Dispenser .. 12. Controls .. 12. Water Valve and Water Tank .. 13. Airflow .. 14. Damper .. 14. Evaporator Fan .. 15. Condenser Fan .. 19. Defrost System .. 20. Adaptive Defrost .. 20. Normal Operating Characteristics .. 21. Abnormal Operating Characteristics .. 21. Liner Protection Mode .. 21. Defrost Heater .. 22. Evaporator Thermistor .. 23.
4 Defrost Overtemperature Thermodisk .. 23. Control System .. 24. Touch Panel and Temperature Control Board .. 24. Main Control Board .. 25. Main Control Board Locator Tables .. 26. Thermistors .. 31. Climate Control Drawer .. 32. Strip Circuit .. 32. Component Locator View .. 33. Operation .. 34. Temperature Table .. 35. Climate Control Drawer Top Panel (Mullion) .. 36. Control Board and Display .. 36. Fan and Fan Housing .. 38. Dampers .. 39. Heater .. 40. Thermistor .. 40. Airflow .. 42. 1 . Table of Contents (cont.). Compartment Lights .. 44. FF/FZ Compartment Lights Diagnostic .. 44. Door Switches .. 45. Master Light Switch (Sabbath Switch).
5 45. Temperature Overload Device (TOD) .. 45. Circuit Breakers .. 46. Transformers .. 46. Light Bulb Replacement .. 46. Schematic .. 49. Refrigeration System .. 50. Compressor .. 50. Condenser .. 50. Condenser Loop .. 50. Dryer .. 51. Evaporator .. 51. Refrigerant Charge .. 51. Diagnostic Mode .. 52. Diagnostic Flowcharts .. 53. Fresh Food Warm - Freezer Normal .. 53. Fresh Food Too Cold - Freezer Normal .. 54. Fresh Food Warm - Freezer Warm .. 55. Freezer Warm - Fresh Food Normal .. 56. Compressor Not Running .. 57. Refrigerator Dead - No Sound, No Cooling .. 58. Damper Door Does Not 59. Heavy Frost on Evaporator .. 60. Evaporator Fan Not Running.
6 61. Condenser Fan Not Running .. 62. Warranty .. 63. 2 . TECHNICAL Data WARNING: Disconnect power cord before Important Safety Notice: servicing. This information is intended for use by individuals Note: Reconnect all grounding devices. possessing adequate backgrounds of electrical, electronic, and mechanical experience. Any attempt All parts of this appliance capable of conducting to repair a major appliance may result in personal electrical current are grounded. If grounding wires, injury and property damage. The manufacturer or screws, straps, clips, nuts, or washers used to seller cannot be responsible for the interpretation complete a path to ground are removed for of this information, nor can it assume any liability in SERVICE , they must be returned to their original connection with its use.
7 Positions and properly fastened. REFRIGERATION SYSTEM. Caution: To avoid personal injury when servicing the condensing unit, stand on a ladder which will Compressor ..983 Btu/hr give enough support to allow removal of the top Minimum Compressor Capacity panel and safely allow access to SERVICE the unit. Vacuum .. 26 inches Minimum Equalized Pressure ELECTRICAL SPECIFICATIONS @ 70 72 PSIG. @ 90 PSIG. Max Defrost Control Refrigerant Charge (R134a) .. oz W/No Door Openings ..60 hrs @ 35 min Evap Overtemperature Thermodisc ..60 F-45 F. Heat Exchanger Light Thermostat ..140 F-90 F Evaporator Condenser Suction Electrical Rating: 115 VAC 60 amp Tube Maximum Current mA.
8 Maximum Ground Path Resistance .. ohms Energy Consumption (HUMID) .. * Dryer NO LOAD PERFORMANCE. High Pressure CONTROL POSITION 37-0 F and (Do NOT use). AMBIENT TEMPERATURE OF 70 F 90 F. Fresh Food, F .. 36 46 .. 37 48 Process Frozen Food, F .. (-6) 6 .. (-4) 3 Tube Compressor Percent Running 41 46 .. 53 55. Condenser REFRIGERATION DIAGNOSIS Loop To access the low-pressure side of the system, install a WR86X0097 valve only on the process REPLACEMENT PARTS. tube extending from the compressor case. HMI Temperature **. To Cabinet To Cabinet Relay ..WR07X10031. Wiring Wiring Overload .. WR08X10015. White White Run Capacitor (15 uF).
9 WR62X0080. Overtemperature Thermodisc Light .. WR50X10035. Overtemperature Thermodisc Evaporator .. WR50X10036. Orange Orange Overload Overload Defrost Heater .. WR51X10065. Drain Trough ASM .. WR17X11194. Condenser Fan Motor .. WR60X10083. Black Black Condenser Fan Blade .. WR60X10049. Evaporator Fan Motor .. WR60X10043. Evaporator Fan Blade .. WR60X10050. Run Green Green Main Board .. WR55X10167. Run Capacitor Capacitor (Ground). (Ground) Thermistors (2-FF, 1-FZ, 1-EV) .. WR55X10025. Damper Assembly Fresh Food .. WR60X10085. *For Models ZIS 36 & ZIS 36D: kWh/mo. Models ZIS 42 & ZIS 42D: Evaporator .. WR84X10038. kWh/mo. Model ZIS 48: kWh/mo.
10 Model ZIS 48D: kWh/mo. Compressor .. WR87X10042. **For model ZIS 36: WR55X10166. Model ZIS 36D: WR55X10165. Model ZIS 42: WR84X10037. WR55X10164. Model ZIS 42D: WR55X10163. Model ZIS 48: WR55X10162. Model ZIS 48D: WR55X10158. Filter Dryer .. WR86X0096. 3 . Model Nomenclature Z I S S 480 N M A LH. Brand/Product Door Type Z - Monogram F - Flat R - Right L - Left Door Swing Style I - Built-In Engineering A - Initial Design Configuration B - 1st Revision S - Side by Side C - 2nd Revision D - 3rd Revision Etc. Color S - Stainless B - Black W - White Blank - Trim Model Model Year L - 2002 Pre-Energy M - 2002 Energy Size 480 - 48 Inches Wide Icemaker/Exterior N - Nondispenser Mini-Manual and Rating Plate Rating Plate The rating plate, located behind the grille panel at the top of the refrigerator on the right side of the evaporator box, contains the model and serial numbers.


