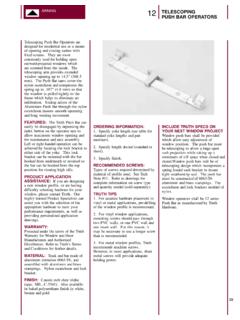
Transcription of telescoping RHS - Austubemills
1 telescoping RHS. Female (outer) Nominal Male (inner) Female (outer) Nominal Male (inner) Female (outer) Nominal Male (inner). Clearance Clearance Clearance d b t top side d b d b t top side d b d b t top side d b mm mm mm mm mm mm mm mm mm mm mm mm mm mm mm mm mm mm mm mm mm 89 89 75 75 75 50 65 35. Square Hollow Sections 89 89 75 75 75 50 65 35. 13 13 No Section 89 89 75 75 75 50 65 35. 15 15 Available 90 90 75 75 75 50 65 35. 20 20 15 15 90 90 75 75 75 50 65 35. 25 25 20 20 100 100 90 90 75 50 65 35. 25 25 20 20 100 100 90 90 75 50 50 25. 25 25 20 20 100 100 90 90 100 50 75 25. 30 30 25 25 100 100 90 90 100 50 75 25. 30 30 25 25 100 100 90 90 100 50 75 25. 35 35 30 30 100 100 75 75 100 50 75 25. 35 35 30 30 100 100 75 75 100 50 75 25. 35 35 30 30 125 125 100 100 100 50 75 25. 35 35 25 25 125 125 100 100 100 50 75 25. 40 40 35 35 125 125 100 100 100 50 75 25. 40 40 35 35 125 125 100 100 100 50 65 35. 40 40 35 35 150 150 125 125 100 50 65 35.
2 40 40 30 30 150 150 125 125 100 50 65 35. 40 40 30 30 150 150 125 125 100 50 65 35. 50 50 40 40 200 200 150 150 100 50 65 35. 50 50 40 40 200 200 150 150 100 50 65 35. 50 50 40 40 200 200 150 150 100 50 65 35. 50 50 40 40 250 250 200 200 100 50 65 35. 50 50 40 40 250 250 200 200 125 75 100 50. 50 50 40 40 125 75 100 50. Rectangular Hollow Sections 65 65 50 50 125 75 100 50. 50 20 65 65 50 50 125 75 100 50. 50 20 No Section 65 65 50 50 125 75 100 50. 50 20 Available 65 65 50 50 125 75 100 50. 50 20 65 65 50 50 150 100 125 75. 50 25 65 65 50 50 150 100 125 75. 50 25 No Section 65 65 50 50 150 100 125 75. 50 25 Available 75 75 65 65 150 100 125 75. 50 25 75 75 65 65 200 100 150 50. 65 35 50 25. 75 75 65 65 200 100 150 50. 65 35 50 25. 75 75 65 65 200 100 150 50. 65 35 50 25. 75 75 65 65 200 100 150 50. 65 35 50 25. 75 75 65 65 250 150 200 100. 75 25 50 20. 75 75 50 50 250 150 200 100. 75 25 50 20. 250 150 200 100.
3 75 25 50 20. NOTE. CLEARANCE TOP CLEARANCE TOP CLEARANCE. RHS is not a precision tube and all dimensions shown in the 3. Having selected the most suitable clearance for your application, FEMALE FEMALE. chart, although in accordance with the specifications, may vary take the appropriate size of the male (inner) section from the right marginally within the tolerance bands permitted. hand column, eg: Sizes shown in bold print are sizes that provide a clearance of MALE. BORE. less than The internal weld bead and variation in corner Female Section Clearance Male Section FEMALE. radii between sections will need to be considered when closer (outer) d0 mm (inner) SIDE SIDE. fits are indicated. Where telescoping over some length is desired, 75 x 75 x 65 x 65 MALE. CLEARANCE CLEARANCE. MALE. additional allowance may be needed for straightness. For tight fits it is recommended that some form of testing be carried out prior Note that clearance is total available difference between member to committing material.
4 Dimensions, not the gap on both sides. How To use this chart 4. Where two telescoping sections are being used, thickness Note: should be similar and will be determined by normal structural Sizes where clearance is shown as will generally require 1. Select the appropriate table for the type of hollow section requirements. If a third section is to be used, consideration of press fit. required. Select the size of female (or outside) member closest to both clearance and thickness within the size list available may be your requirements for the left hand column. required. 2. Depending on the application select the clearance required 5. RHS has the obvious advantage that its shape prevents rotation between the two members. Members may need to slide freely of the sections. When pipe is used it may need to be fixed against inside each other, or be locked with a pin, spot welded or fixed twisting by welding or bolting.
5 With wedges. This means, in some cases, a sloppy' fit may be suitable, while for others the tightest fit possible may be more 6. Press Fit. For short pieces with no need for separation or sliding appropriate. an interference fit can be achieved using the available ductility of the steel. telescoping CHS. Female (outer) Male (inner) Female (outer) Male (inner). Size Size Minimum Size Size Minimum Clearance Clearance DN Quality d0 t DN d0 DN Quality d0 t DN d0 mm mm 15 Light x - - - 65 Extra Light x 50 Medium - - - Galtube 50 Heavy - - - Light 50 20 Extra Light x 15 Medium 50 25 Extra Light x 20 Heavy 50 Light 20 Extra Heavy 50 Medium 15 80 Light x 65 Heavy 15 Medium 65 32 Extra Light x 25 Heavy 65 Light 25 Extra Heavy 50 Medium 25 90 Extra Light x 80 Heavy 20 Light 80 40 Extra Light x 32 Medium 80 Light 25 Heavy 80 Medium 25 100 Extra Light x 90 Heavy 25 Light 90 Extra Heavy 25 Medium 90 50 Extra Light x 40 Heavy 80 Light 40 125 Extra Light x 100 Medium 40 Light 100 Heavy 40 Medium 100 Extra Heavy 40 Heavy 100 150 Light x 125 Medium 125 Heavy 125 NOTE.
6 Clearance = (AS1163 Min d0 - 2t) - (AS1163 Max d0) Members may need to slide freely inside each other, CLEARANCE. or be locked with a pin, spot welded or fixed with CHS is not a precision tube and all dimensions wedges. This means, in some cases, a sloppy' fit may shown in the chart, although in accordance with be suitable, while for others the tightest fit possible the specifications, may vary marginally within the may be more appropriate. (See Note 6 Press Fit). tolerance bands permitted. BORE. MALE. 3. Having selected the most suitable clearance for Sizes shown in bold print are sizes that provide FEMALE. your application, take the appropriate size of the male a clearance of less than The internal weld d0. (inner) section from the centre column, eg: bead will need to be considered when closer fits are indicated. Where telescoping over some length Female Section Male Section Clearance is desired, additional allowance may be needed (outer) (inner) mm for straightness.
7 For tight fits it is recommended that some form of testing be carried out prior to 5. Pipe may need to be fixed against twisting by committing material. Note that clearance is total available difference between member dimensions, not the gap on both welding or bolting. sides. 6. Press Fit. For short pieces with no need for How To use this chart 4. Where two telescoping sections are being used, separation or sliding an interference fit can be 1. Select the size of female (or outer) member closest achieved using the available ductility of the steel. thickness should be similar and will be determined by to your requirements from the left hand column. normal structural requirements. If a third sections is the 2. Depending on the application select the clearance be used, consideration of both clearance and thickness required between the two members. within the size list available may be required. This publication has been prepared by Australian Tube Mills, (Trading Limited ACN 123 666 679).
8 Please note that the specifications and technical data are subject to change without notice and to ensure accuracy users of this publication are requested to check the information to satisfy themselves and not to rely on the information without first doing so. Unless required by law, the company cannot accept any responsibility for any loss, damage or consequence resulting from the use of this publication. Issue 3 August 2013. SJ0510. This brochure is not an offer to trade and shall not form any part of the trading terms in any transaction. Copyright 2013. Australian Tube Mills ABN 21 123 666 679 - registered Trademarks: DuraGal.

