Transcription of The Bose Wave Radio
1 The bose Wave RadioOwner s GuideTM2 Safety InformationWARNING: To reduce the risk of fire or electric shock, do not expose the Wave Radio to rainor with any electronic product, use care not to spillliquids into any part of the Radio . Liquids can cause afailure and/or a fire OF ELECTRICAL SHOCKRISQUE DE CHOC LECTRIQUEDO NOT OPENNE PAS OUVRIRCAUTION: TO REDUCE THE RISK OF ELECTRIC SHOCK,AFIN DE PR VENIR UN CHOC LECTRIQUE NE PAS ENLEVERDO NOT REMOVE COVER (OR BACK). LE COUVERCLE ARRI RE. IL NE SE TROUVE L INT RIEURNO USER-SERVICEABLE PARTS INSIDE. AUCUNE PI CE POUVANT TRE R PAR E PARREFER SERVICING TO QUALIFIED USAGER. S ADRESSER UN R PARATEUR COMP CAUTION marks are located on the bottom of your Wave Radio :The lightning flash with arrowhead symbol, within an equilateral triangle, is intended to alertthe user to the presence of uninsulated dangerous voltage within the system enclosure thatmay be of sufficient magnitude to constitute a risk of electric exclamation point within an equilateral triangle, as marked on the system, is intended toalert the user to the presence of important operating and maintenance instructions in thisowner s : To prevent electric shock, match wide blade of plug to wide slot, insert : Pour viter les chocs lectriques, introduire la lame la plus large de la fichedans la borne correspondante de la prise et pousser jusqu au dispose of used batteries properly, following any local regulations.
2 Do not read this owner s guidePlease take the time to follow this owner s guide carefully. It will help you set up and operateyour Radio properly, and enjoy all of its advanced features. Save your owner s guide for to UpBefore you begin .. 4 Unpacking the carton .. 5 Selecting a location for your Radio .. 5 Installing the battery .. 6 Connecting the power cord .. 7 Connecting to a cable Radio signal .. 7 Setting up the remote control .. 8 Connecting other components .. 10 Operating Your Wave RadioOperating the remote control .. 12 Operating the Radio control panel .. 12 Listening to the Radio .. 13 Setting the time .. 13 Reading the clock display .. 14 Reading the Radio display .. 14 Customizing the display .. 15 Setting Alarm 1 .. 16 Setting Alarm 2 .. 17 Using the alarms .. 18 Maintaining Your Wave RadioTaking care of your Wave Radio .. 19 Technical information.
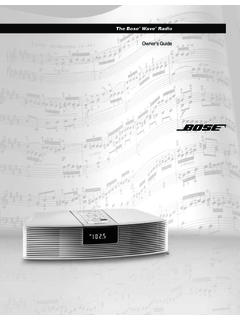
3 19 Warranty period .. 19 Troubleshooting .. 20 Customer service .. 20 Index .. 21 bose Corporation .. inside back coverFor your recordsThe serial number is located on the bottom of your Radio serial number: _____Purchase date: _____We suggest you keep your sales receipt and warranty card together with this owner s UpBefore you beginThank you for purchasing the bose Wave years of research by bose Corporation bring you the benefits of patented acousticwaveguide speaker technology, which was named Invention of the Year by the IntellectualProperty Owners this technology, a tube efficiently transfers energy from a small loudspeaker to theoutside air over a whole range of bass notes. And there is a 34-inch long waveguide foldedinside the Wave Radio , enabling this tabletop Radio to produce room-filling sound with full, Wave Radio also includes: Integrated system design for acoustic quality without inconvenient adjustments A high performance stereo tuner offers up to 6 AM and 6 FM station presets Two independent alarms, with battery backup power to remember settings A credit card-size infrared remote control with mounting strip provided Inputs for an additional sound source, such as a CD or tape playerPlease take the time to follow this owner s guide carefully.
4 It helps you set up and operateyour Radio and enjoy all of its features and high-fidelity STATIONSTUNINGWAVE RADIOALARMSETALARM MODECLOCKSET321654AM/FMAUXSLEEP/SNOOZES etting UpUnpacking the cartonCarefully unpack your system. Save all packing materials for possible future use. The originalpacking materials provide the safest way to transport your Wave Radio . If any part of theproduct appears damaged, do not attempt to use it. Notify bose Customer Service immedi-ately (see phone numbers on the inside back cover).Check to be sure your Wave Radio contains the parts identified in Figure : Find the serial number on the bottom of your Radio . Write it on your warranty card andin the space provided on page 1 What comes with yourWave radioWAVE Radio REMOTE CONTROL124563 STATIONSVOLUMEMUTEAUXAMFMR emote controlLithiumbattery9 VbatteryPower cordSelecting a location for your radioPlease keep these guidelines in mind when selecting a location for your Radio : Place the Radio on a table or other flat surface.
5 Do not use the Radio in a damp location. It is important to prevent moisture from gettinginto the unit. Do not place it on a metal surface or table that could interfere with AM reception. Since all electrical equipment generates some heat, do not place it on a heat-sensitivesurface. If you use the Radio with your television or VCR, do not place it directly on top of thetelevision. It may interfere with the picture quality. A location within two feet of a wall is recommended for best bass performance. You get the maximum sound from your Radio if you are able to place the Radio across theroom from where you will be adjust the location to get the sound you radioMounting strip6 Setting UpInstalling the batteryThe Wave Radio s 9 volt battery maintains the memory and backup alarm system for up tothree days during a power failure, or while the Radio is unplugged.
6 Operating without thisbattery leaves the memory unprotected, but will not harm the Radio . Use a standard 9 Vbattery (IEC 6F22 in Europe), available at most retail : The battery does not power the Radio or light the Carefully turn your Radio upside down (avoid scratching the top).2. Locate the battery compartment on the bottom (Figure 2).3. Press the arrow on the cover to slide the compartment Place the battery inside, matching the large ( ) and small (+) terminals with the oppositesize terminals on the clip inside the Press the terminals together Slide the cover back and turn the Radio right side 2 Installing the battery7 Connecting the power cord1. Plug the small end of the power cord into the power jack on the back of your Radio (Figure 3). The connector is shaped to fit in only one direction. Line up the flat edge of theplug with the flat edge on the side of the The FM antenna is built into the power cord.
7 To improve FM reception, unwind the powercord Plug the other end of the power cord into an electric The display panel lights and the time display begins Press the clock SET button once to stop the 3 Connecting the power cordFlat edgeof connectorConnecting to a cable Radio signalTo connect your Radio to the FM signal available from some cable TV companies, contactyour cable provider for assistance. The connection is made to the FM 75 EXTERNAL antenna connector on the back of the : Be certain that the installation includes a signal splitter so that only the FM band,not the cable TV band, is transmitted to the Radio . It is necessary to use a splitter that filtersthe signal to prevent any re-emissions of the TV spectrum through the Up8 Setting UpSetting up the remote controlWARNING: Keep the remote control battery away from children. It may cause a fire orchemical burn if mishandled.
8 Do not recharge, disassemble, heat above 100 C (212 F), orincinerate. Dispose of used battery promptly. Replace only with a battery of the correct typeand model remote control may be one of two types (Figure 4A or 4B). Each is identified by the waythe battery compartment unlocks to install or replace the Place the remote control face down on a flat If your remote has a slot on the back (Figure 4A), follow step A. Otherwise, follow step Band refer to Figure 4B:A. Insert the tip of a ballpoint pen into the slot. Push to the side as shown and hold. Slidethe battery compartment open with your Using your finger, push the tab lock to the side as shown and hold. Slide the batterycompartment 4 Locating the safety lockSee operatinginstructions for types ofbattery to be usedSee operatinginstructions for types ofbattery to be usedSee operatinginstructions for types ofbattery to be usedSee operatinginstructions for types ofbattery to be usedABSlot+ SymbolTa b+ Symbol9 Setting UpSee operatinginstructions for types ofbattery to be usedNote: Use only a Duracell, Eveready, Maxell, or Toshiba CR2032 or DL2032 lithium battery(available at electronics stores).
9 If you have difficulty finding a replacement battery, contactBose Product Support (see phone numbers on the inside back cover).3. Keeping the remote control face down, insert the new battery into the compartment withthe + symbol facing Gently slide the battery compartment closed. It locks Use the supplied mounting strip if you want to attach the remote to a surface in yourlistening room. Peel off the protective backing to stick one piece to the back of the remoteand the other to the selected surface (Figure 5).Figure 5 Installing the mounting strip forthe remote control10 Setting UpConnecting other componentsUse your Wave Radio to improve the sound of a CD player, tape player, or TV. You can also useyour Radio as extension speakers for a bose Lifestyle music system. Connect one of thesecomponents to the right and left AUX IN play your Radio through external speakers, connect powered bose speakers to the Radio sright and left VARIABLE OUT jacks.
10 Audio cables for these connections are available at electron-ics stores, or by calling audio cables are color coded. Match the red plugs to the right (red) jack and the blackor white plugs to the left (white) jack (Figure 6).Note: Connecting components or speakers to the VARIABLE OUT jacks shuts off the 6 Connecting another componentRAUX INLVARIABLE OUTRAUX INLU sing other componentsSelect your CD player, tape player, or other auxiliary source by pressing the AUX the listening volume with the VOLUME buttons. Control all other functions, includingon/off, at the source, referring to its owner s manual, if your auxiliary powered speakers from the Wave Radio . If these speakers have avolume control, you may use : Recording from your Wave Radio is not recommended. Connecting a tape recorder tothe VARIABLE OUT jacks shuts off the Radio speakers, preventing you from monitoring therecording player, tape deck,or VCRA udio output jacksIf there are two sets ofoutputs (fixed andvariable), use fixed sothat the volume canbe controlled from IN jacksTelevisionAudio output jacksIf there are two sets ofoutputs (fixed andvariable), use fixed sothat the volume canbe controlled from IN jacksStereo cable withmale-to-male IN jacksBose Lifestyle music systemPowered BosespeakersSpeaker system input(as described in thespeaker owner smanual)