Transcription of This is a tutorial to submit pick up requests on CTE’s ...
1 CTE Web tutorial (323) 357-1720 Version 8/2/17 1. This is a tutorial to submit pick up requests on CTE's website. The system provides features such as: Edit functions to change email and contact information Cut and paste function for purchase order information Correcting DC/carton/weight (lbs)/cubic feet information prior to submitting This tutorial provides step-by-step instructions with screen shots of each step. Vendors are expected to process multiple department stores/DC destinations in one web request. Please do not route using Google's Chrome browser. CTE recommends Firefox, Internet Explorer, Mozilla, for example. If you are a 3PL and you are shipping different accounts/vendors to CTE, each one gets a separate pick up request. (For instance, if you are shipping Nike and Puma, each has their own pick up request.). If you have any questions after reading the tutorial , please call CTE at: (800) 540-0244 or (323) 357-1720.
2 Pick ups are submitted only 1 business day in advance and all requests must be submitted before 3:30 pm. (For a Monday pick up, please submit Friday before 3:30 pm.) Pick ups submitted after 3:30 pm are not guaranteed a next day pick up. If you realize after finishing that you made a mistake, please do not submit another request. Please wait until you receive an email confirmation from CTE with a PDF. attachment. Open your attachment and look at the dispatch number, then call or fax CTE your correction and refer to your dispatch number. No emails please. If you do not get a confirmation within 30 minutes, please call CTE before 3:30 pm that same day. No emails please. You are expected to review your PDF attachment to ensure your pick up has no problems like: underweight shipments, bad po numbers, wrong cubic feet, etc. If you submit just before 3:30 pm, please give CTE time to process it, but call CTE.
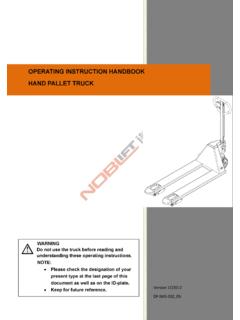
3 That day before 4 pm if you don't receive an email confirmation. Please read the instructions on CTE's routing portal for Hautelook pos destined for DC 569. CTE Web tutorial (323) 357-1720 Version 8/2/17 2. To start, go to Click the Pick-Up Request link. (Highlighted in yellow for emphasis). You will see the log in screen as below. Enter your ID and password as one continuous stream no spaces. Click submit (or press Enter) to log in. Links to routing instructions for Nordstrom Canada and Domestic (which includes Hautelook) are beneath the login area. Instructions are also linked at the FAQ link on CTE's home page. Go to How can I schedule a pick up or delivery? Click the question and a box appears: CTE Web tutorial (323) 357-1720 Version 8/2/17 3. Once you have logged in, the landing page shows your company's information (company name, address, phone number, contact and email addresses).
4 If the address or phone number is wrong, call CTE immediately! Do not continue! Note: If you need to change a contact name or revise/add an email, go to page 13. and read Change Your Company Profile. If the information is correct, Click Pick up Request button to start. CTE Web tutorial (323) 357-1720 Version 8/2/17 4. The next screen is the PICK UP REQUEST INFORMATION page. Click the Consignee box and a list of DC's will appear. Select your first destination. The B/L # (Bill of Lading #) is optional. If you don't have it, you can skip it. The Reference/SRR # is required for Boscov's. If don't have it at the time of pick up, please make sure it's on the bill of lading. Northern California shippers: please select NORDSTROM SF for DC's 399. and 499. For Hautelook purchase order numbers, please enter the alphanumeric po only as one continuous stream or it will be rejected.
5 Do not type PO - then the po number in the po column. No spaces between the letters and numbers. Hautelook po numbers should look like this: HL258151 or N1521321. Please read the instructions there for Hautelook pos and DC 569! CTE Web tutorial (323) 357-1720 Version 8/2/17 5. NORDSTROM CANADA is DC 868. Please read CTE's Canada instructions if you have not shipped to Canada before. Please list all weights in lbs. After selecting the Consignee, there are two ways to enter information. 1. Type it in each box. 2. Copy and Paste from Excel Typing: Type each item in each box provided. Each purchase order number (PO) must have the cartons, weight (lbs) and cubic feet for every Consignee. If you do not provide that, you cannot get a pick up. All numbers must be whole numbers. No decimal points! To calculate the cubic feet: Multiply Length x Width x Height x Total boxes 1728.
6 CTE Web tutorial (323) 357-1720 Version 8/2/17 6. Example: If you had 41 boxes and the dimensions are 12x12x12, the cubic feet would be: 12 x 12 x 12 x 41 1728 = 41 cubic feet. If you have multiple Consignees, enter the information for the first Consignee, then click the button [Continue/Next Bill ]. All boxes will clear (refresh). Select the next Consignee. Enter the PO, Cartons same thing as above. If you are shipping the same po number to multiple DC's, here's what you do. After you have completed the first DC. Select the DC for the next shipment. Enter the bol # if you have it. Click Copy Previous PO. The po number from previous shipment will appear. Enter the cartons, weight and cubic feet. Repeat the process for each DC. If you enter multiple Consignees, they all appear on the summary page later in the process. Once you have finished the last Consignee, click Done/Finish.
7 Skip to Page 8 Date/Time Information. CTE Web tutorial (323) 357-1720 Version 8/2/17 7. 2. Copy and Paste From Excel: After you select the Consignee, click the button [Copy From Excel]. The screen looks like this: After you choose the consignee, there are two other fields. Enter the bill of lading number (B/L #), if you know it. The SRR # is only for Boscov's. When copying from Excel, copy the numbers only, in this order:. Purchase order number, total cartons To calculate the cubic feet: per po number, total weight per po Multiply Length x Width x Height x Total number, total cubic feet per po number. boxes 1728. If you are shipping 3 po numbers to a Example: If you had 41 boxes and the dimensions are 12x12x12, the cubic feet Distribution Center, please prepare the would be: information this way (po number, 12 x 12 x 12 x 41 1728 = 41 cubic feet. cartons, weight, cubic feet): 14113672 23 442 115.
8 14155444 2 41 10. 14107561 16 87 80. CTE Web tutorial (323) 357-1720 Version 8/2/17 8. Paste all the information for a Distribution Center at the same time. You cannot paste the po numbers, then the cartons, then the weight, etc. Once you have copied the data from Excel, put the cursor inside the box. Press the <CTRL> key and <V> key to paste ( CTRL + V ). After you paste, it should look like this: Click the button [Click Here To Save] near the bottom of the screen. The screen should now look like this: If you have more Consignees to submit , click Continue/Next Bill.. (If you have 3 Consignees, you will do this process 3 times.). CTE Web tutorial (323) 357-1720 Version 8/2/17 9. If you enter multiple Consignees, they will show on the summary page later in the process. After the last Consignee is entered, click the [Done/Finish] button. The screen will change to the Date/Time information page: Click the box next to Ready Time and select the ready time to the nearest 30.
9 Minutes. Click the box next to Ready Date, and a calendar appears. Select the ready date. Please remember that CTE accepts pick ups only 24 hours in advance. A pick up on Monday must be submitted Friday. For Ready Time please use military time for the afternoon. So 1 pm = 1300. hours (12+1). 2 pm=1400 (12+2). 3 pm=1500. 4 pm=1600. There are ready times for each area. If you don't know your ready time, call CTE. CTE requires a 4 hour window for pick up. Lunch and breaks are not included. Note: The screen shows lunch times in 30 minute intervals 12:00, 12:30 pm, etc. CTE Web tutorial (323) 357-1720 Version 8/2/17 10. If your lunch is at a different time, like 12:15 12:45, please enter the actual time in the REMARKS box. If you don't give all the information, the system will not accept your pick up. Use the REMARKS box for information like: vendor name (Nike, Puma, Guess), dimensions of your largest box (in inches), dock doors, number of pallets, etc.
10 If you are shipping multiple vendor/accounts (Puma and Nike), each account must have a separate request. Click the button [Done/Finish] once you have completed the necessary steps. The screen will go to the summary page as shown below: Please look at this screen carefully. It will show everything scheduled for pick up. CTE Web tutorial (323) 357-1720 Version 8/2/17 11. If you need to change the Ready Date, Ready Time, Close Time, Lunch Time, or Remarks, click the [Edit] button next to each item. Make the change and click [Save]. If you entered the wrong DC, you can change the DC information. Click the Edit button next to the DC you want to revise and it. The DC information line changes to Make the change and click the [Save] button to save. If you need to change a po number on a DC, or any of the information with the po number: Click the Edit button next to the PO number and this box appears.