Transcription of TILE REDI - SHOWER PAN INSTALLATION GUIDE
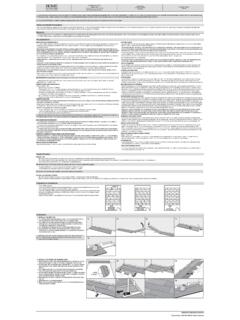
1 Copyright 2020. Tile Redi Sales, LLC. All Rights Reserved Rev. 20200804 TILE REDI - SHOWER PAN INSTALLATION GUIDE SHOWER Pans To help GUIDE you through the SHOWER pan INSTALLATION process, we have provided the following INSTALLATION GUIDE , whic h is intended to provide an easy to follow step by step process for the INSTALLATION of your Tile Redi SHOWER pan, whether you are a professional or a first-time novice. In connection with your SHOWER base and SHOWER pro ject, please comply with the recommendations and standards established for such projects from time to time by the Tile Council of North America, Inc. INSTALLATION INSTRUCTION FOR SHOWER PAN WITH PVC DRAIN 1. Frame out SHOWER stall are a to SHOWER pan dimensions. 2. Sweep out any debris from sub floor. 3. Test fit SHOWER pan dra in housing into subfloor bore hole.
2 DO NOT NAIL OR SCREW ANYTHING INTO THE PAN. DO NOT SAND, CUT, OR MAKE ANY CHANGES/MODIFICATIONS TO THE SURFACE OF THE SHOWER PAN WHATSOEVER. 4. Make sure the SHOWER pan is aligned properly and fits snuggly against the SHOWER frame studs on all sides. 5. This step depends on whether there is access to the drain connection from below the subfloor: a. If there is access from the subfloor below, then cut a section of drain pipe (PVC, as applicable to the type of drain) whic h is long enough to extend below the subfloor and easily make a connection to the waste water pipe. b. If there is no access from the subfloor below, then make sure the drain pipe stubbed up from the subfloor is adjusted to a height sufficient to fit properly into the SHOWER pan drain connection. 6. Turn the SHOWER pan over and note that there are ribs under the SHOWER pan floor.
3 Calculate the amount of mortar needed by measuring the height from the rib bottoms that rest on the substrate to the underside of the pan floor at the deepest point in between the ribs. Once you have that value, calculate the thickness (depth) of your mortar base (Type N or S Mortar) using the formulas listed below based on the type of SHOWER pan you purchased: a. Redi Trench / WonderFall Trench / Redi Free Trench Pans: Subtract 1/2 from deepest rib measured in Step 6. b. Redi Base & Redi Free (Non-Trench) / Wonder Drain Pans: (Left or Right Drain ONLY) Subtract 1/4 from deepest rib measured in Step 6 c. Redi Base & Redi Free (Non-Trench) / Wonder Drain Pans: (Center Drain ONLY) Subtract 1/8 from deepest rib measured in step 6, PROVIDED the mortar base should always be at least 1/2 . Please note, do not place the mortar directly on a wood or Gyp-crete substrate.
4 First, waterproof the wood substrate with a fluid applied waterproofing membrane or NO. 15 or No. 30 roofing paper so the wood does not absorb the water from the mortar. 7. Spread your mortar base (should be a milk shake consistency), EVENLY ACROSS THE SUBFLOOR AT THE THICKNESS CALCULATED FROM STEP 6a, 6b, or 6c, and offset 1 from each outside edge of the pan with exception of the curb side. Mortar will protrude out from under the curb, run the finished side of trowel along curb face to backfill any excess mortar. a. If there is access from the subfloor below and you followed step above, then brush PVC adhesive on the outside of the cut drain pipe and quickly insert into drain connection, and then be sure the drain pipe extends far enough below the subfloor so it can be conveniently connected to the waste water pipe following the INSTALLATION .
5 B. If there is no access from the subfloor below and you followed step above then brush PVC adhesive on the drain pipe stubbed up from the subfloor, then quickly insert the stubbed-up drain pipe properly into the SHOWER pan drain. 8. Place the pan in the mud base and firmly but gently shimmy the pan (applying pressure in drain location first) into the mud so that (i) the drain is fully supported by mud at the bore hole in the substrate, and (ii) the ribs are completely filled with the mud alternately applying hand pressure to the right and left sides of the pan floor until the pan ribs come within 1/8 clearance of the subfloor. Level all pan sides and the let the mortar dry overnight. Important: DO NOT STEP INTO THE SHOWER PAN ONCE THE SHOWER PAN HAS BEEN SET AND LEVELED UNTIL THE MORTAR HAS CURED COMPLETELY 9. Install the SHOWER backer board and water proofing in accordance with the standards established by the Tile Council of North America, Inc.
6 10. Seal and waterproof joint between backer board and the SHOWER pan splash walls using Redi Flash or 100% silicone, and then cover the joint with a fluid applied waterproofing membrane on the SHOWER walls over the joint. Allow the mortar bed to dry in accordance with the instructions of the mortar bed manufacturer. 11. Adjust the height of the drain as necessary to accommodate the flooring covering. 12. Set your tile using a white modified thin-set and a notched trowel as specified by your thin-set manufacturer based on your tile size. Tile Redi recommends the modified thin-set products found in Appendix A. 13. Tile the rest of the SHOWER Copyright 2020. Tile Redi Sales, LLC. All Rights Reserved Rev. 20200804 APPENDIX A Tile Redi approved modified thin-sets mapei Ultraflex LHT White mapei Large Format Floor and Wall White CBP Prolite White mapei Ultraflex 1 White mapei Porcelain Tile White CBP Flexbond White mapei Large Tile and Stone White mapei Ultraflex LFT White