Transcription of Trouble Shooting Guide – AMP Research Power …
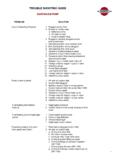
1 TECH SUPPORT 1-888-983-2206 Monday Friday 8:00 AM 5:00 PM PST | Page 1 of 7 Trouble Shooting Guide AMP Research Power StepTable Of Contents:1) Trouble Shooting Quick Guide2) Frequently Asked Questions3) System Operation Information4) Knowledge Base5) Trouble Shooting Flow Chart6) Flow Chart NotesTECH SUPPORT 1-888-983-2206 Monday Friday 8:00 AM 5:00 PM PST | Page 2 of 7 ConcernPossible root-causesFactory door ajar switch in-op?Fuse burnedDiodes connected in reverse polarity or faulty diodeConnections not secureSteps inoperativeConnected to incorrect wire in vehicle electrical systemConnections not secureFaulty diode or connectionIntermittent operationBad groundDiodes connected in reverse polarity or faulty diodeOne or more doors deploy the step.
2 Othersdo notConnections not secureBad groundSteps shake and/or shutter during operationConnections not secureDelay in step operation or steps deploy afterdoors have been closedDiodes connected in reverse polarity or faulty diodeTighten wedge make a creaking noise duringoperationLoosen lower mount bolts and remove step extrusionfrom lower mount. Re-install step extrusion to lowermount and make a ticking noise when fullydeployed or fully retracted and motorcontinues to ring / clutch assembly failed / failing. Replaceclutch connected in reverse polarity or faulty diodeConnections not secureSteps operate randomlyConnected to incorrect wire in vehicle electrical systemStep stays down all the time and motor canbe heard runningTolerance ring / clutch assembly faulty.
3 Replace go up when opening door and downwhen closing doorMotor polarity reversed. Exchange location of wires goinginto motor plug. (Swap orange and white wires in motorplug.)TECH SUPPORT 1-888-983-2206 Monday Friday 8:00 AM 5:00 PM PST | Page 3 of 7 Trouble Shooting Guide Frequently Asked QuestionsQ: The wire colors on my vehicle do not match the colors in your diagram. Whatdo I do?A: Unfortunately vehicle manufactures frequently change the color of the wires in their wiringharnesses. The wire that we need locate is the factory door-ajar signal located inside eachdoor. You can find this circuit by removing the door panel and physically tracing the wiresleading to the door latch / switch.
4 Once you have located the bundle of wires that go to theswitch you will need to isolate the door-ajar circuit. This circuit will be a negative switching circuit. Negative switching indicates that the circuit will be in a ground state where the circuitis connected to the minus or negative side of the battery with the door open (Except 02 03 Ford Super Duty and 08 Ford Super Duty where the circuit is closed to ground with the doorshut). With the door closed the circuit will sometimes show a very small amount of current ornothing at best and safest way to isolate this wire is to use a computer safe circuit tester like theCTS24 Circuit Tester by Blue Point available from Snap On Tools.
5 There are othermanufacturers of similar testers. The important thing about this kind of tester is that it isspecifically designed to be computer and air bag safe . This means the tester will not damagesensitive electrical multimeter or continuity tester can also be used by setting the tester to the Ohms setting andconnecting one probe to the negative battery terminal and probing the previously located the door open, operate the door latch with the door handle to open the latch. Manuallyclose the latch with a screwdriver or other tool by actuating the latch and simulating the strikepin located on the doorjamb.
6 The correct wire will change readings on the tester from nocontinuity to 100% continuity when opening and closing the latch (Except 02 03 Ford SuperDuty and 08 Ford Super Duty where the circuit is closed to ground with the door shut). Orwhen using a tester like the CTS24 the reading will change from green (indicating ground orminus) to nothing (in some cases red). Complete the balance of the wiring per our : The step only goes up (down) halfway and stops. How can I fix it?A: The body of certain vehicles is often not straight and can put the steps in a bind. Open thedoor and put the step in the down position.
7 On the underside of the step you will find two 3/16 socket head bolts (Allen bolts) that hold the step to the linkage. Remove these two bolts anddislodge the step from the linkage by tapping on the bottom of the step with a soft face malletas if you were going to remove step. It is important that the step is totally separated from thelinkage. Failure to do so will not allow the linkages to properly align. You only need to removethe Allen bolts from the front or the rear linkage. Both are not necessary. Next put the step inthe up position and reinstall the step on the linkage and reinstall the 3/16 Allen bolts andtighten.
8 This will align the linkages and eliminate the binding that is causing the step to stophalf way SUPPORT 1-888-983-2206 Monday Friday 8:00 AM 5:00 PM PST | Page 4 of 7 Power Step System OperationControl ModuleThe operation of the steps is driven by our controller that is mounted under the hood. Thecontroller is completely potted in epoxy and is therefore totally sealed. There are noserviceable parts inside the controller. The controller is the brain of the system andcontains hardware and software that not only actuates the steps, but also controls thecrucial anti pinch function.
9 Controllers very rarely fail and are almost never WiresThe trigger wires that tap into the vehicle door ajar switches are ground actuated. That is:these wires look for a ground signal. In general, closing the circuit to ground with one ofthese wires lowers the step and an open circuit (no ground signal) retracts the step. Thiscan be a useful test to isolate concerns and to diagnose applications use diodes in the wiring circuit. Diodes are the electrical equivalent of aone-way valve. Diodes isolate against unwanted actuation or delay of the steps, isolatepassenger and driver side door-ajar signals and insure proper operation of the factorydoor-ajar warning light in the instrument panel.
10 The orientation of the diode is of extremeimportance. An improperly installed diode or poorly secured diode connection can cause anumber of & Drive SystemThere is one motor per side of the vehicle that drives the steps up and down. This isaccomplished by alternating polarity between poles of the motor. Reversing polaritycauses the motor to reverse direction. Testing for voltage to the motor can be a useful testin diagnosing concerns. If the motor is getting a 12 volt positive and a negative (ground)signal and does not respond, in most instances the motor will need to be replaced. Themotor contains a gear drive system and employs rubber cushions that dampen start upand shut down.