Transcription of Tutorial on using HEC-GeoRAS with ArcGIS 10.x and HEC- RAS ...
1 1 Tutorial on using HEC-GeoRAS with ArcGIS and HEC-RAS modeling Prepared by Venkatesh Merwade School of Civil Engineering, Purdue University May 2016 Objective The objective of this exercise is to explore and learn basic functions in HEC-GeoRAS for pre- and/or post-processing of GIS data and HEC-RAS results for flood inundation mapping using ArcGIS It is expected that you are familiar with HEC-RAS and ArcGIS . If you want to get into details of HEC-GeoRAS that are not covered in this Tutorial please refer to the HEC-GeoRAS users manual. Computer Requirements You must have a computer with windows operating system, and the following programs installed: 1. ArcGIS 2. HEC-GeoRAS 3. HEC-RAS You can download HEC-RAS and HEC-GeoRAS (appropriate for your ArcGIS version) for free from the US Army Corps of Engineers Hydrologic Engineering Center website Data Requirement The only essential dataset required for HEC-GeoRAS is the terrain data (TIN or DEM). Additional datasets that may be useful are aerial photograph (s) and land use information.
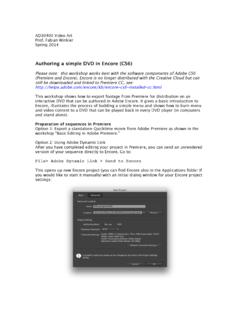
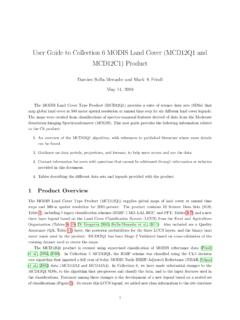
2 The dataset supplied with this Tutorial includes a small portion of the fictional Baxter River available with HEC-GeoRAS users manual. The data ( MB) required for this Tutorial are available at the following link: Download the zip file on your local drive, and unzip its contents. The GeoRASData folder contains one sub-folder, one TIN dataset, and one aerial image (as raster grid ) as shown below (ArcCatalog view): 2 The LandUse folder contains a shapefile with land use data, aerial is the aerial image of the study area, and baxter_tin is the TIN dataset for the study area. Getting Started Start ArcMap by clicking Start Programs ArcGIS ArcMap. Save the ArcMap document (by clicking File Save ) as in your working folder. Since HEC-GeoRAS uses functions associated with ArcGIS Spatial Analyst and 3D Analyst extensions, make sure these extensions are available, and are enabled. You can check this by clicking on Customize , and checking the boxes (if they are unchecked) next to 3D Analyst and Spatial Analyst as shown below: Close the Extensions window.
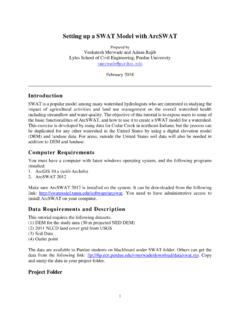
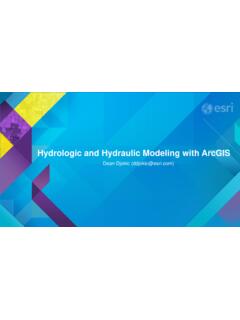
3 Now load the HEC-GeoRAS toolbar into ArcGIS by clicking on Customize Toolbars HEC-GeoRAS to see the toolbar as shown below: You can either leave the HEC-GeoRAS toolbar on the map or dock it with other toolbars as desired. The HEC-GeoRAS toolbar has four menus (RAS Geometry, RAS Mapping, ApUtilities, Help) and seven tools/buttons (Assign RiverCode/ReachCode, Assign FromStation/ToStation, Assign LineType, Construct XS Cutlines, Plot Cross Section, and Assign Levee Elevation) as shown in circles and boxes, respectively in the figure below. 3 The RAS Geometry menu contains functions for pre-processing of GIS data for input to HEC-RAS. The RAS Mapping menu contains functions for post-processing of HEC-RAS results to produce flood inundation map. The ApUtilites menu contains functions mainly for data management. The Help menu is self-explanatory. You will learn more about the functions associated with these menus and buttons in the following sections. Setting up Analysis Environment for HEC-GeoRAS using GIS for hydrologic/hydraulic modeling usually involves three steps: 1) pre-processing of data, 2) model execution, and 3) post-processing/visualization of results.
4 To create a geometry file, you need terrain (elevation) data. Click on Add button in ArcMap, and browse to baxter_tin to add the TIN to the map document. You must have the same coordinate system for all the data and data frames used for this Tutorial (or any GeoRAS project). Because baxter_tin already has a projected coordinate system, it is applied to the data frame. You can check this by right-clicking on the data frame and looking at its properties. Next, click on RAS Geometry Layer Setup. Select baxter_tin as the single TIN in the Required Surface tab, and click OK. Creating RAS Layers The geometry file for HEC-RAS contains information on cross-sections, hydraulic structures, river banks and other physical attributes of river channels. The pre-processing using HEC-GeoRAS involves creating these attributes in GIS, and then exporting them to the HEC-RAS geometry file. In HEC-GeoRAS , each attribute is stored in a separate feature class called as RAS Layer.
5 So before creating river attributes in GIS, let us first create empty GIS layers using the RAS Geometry menu on the HEC-GeoRAS toolbar. Click on RAS Geometry Create RAS Layers. You will see a list of all the possible attributes that you can have in the HEC-RAS geometry file. If you wish, you can click on 4 individual attribute to create a single layer at a time, or you can click on All to create all layers. For this Tutorial , click on ALL to create all layers. In the Create All Layers window, accept the default names, and click OK. HEC-GeoRAS creates a geodatabase in the same folder where the map document is saved, gives the name of the map document to the geodatabase ( , in this case), and stores all the feature classes/RAS layers in this geodatabase. 5 After creating RAS layers, these are added to the map document with a pre-assigned symbology. Since these layers are empty, our task is to populate some or all of these layers depending on our project needs, and then create a HEC-RAS geometry file.
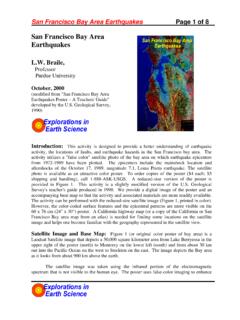
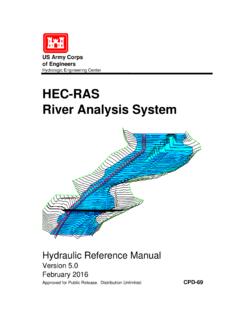
6 Creating River Centerline Let us first start with river centerline. The river centerline is used to establish the river reach network for HEC-RAS. The baxter_tin dataset has the Baxter River flowing from east to west with Tule Creek as a tributary. So there are three reaches: upper Baxter River, lower Baxter River and Tule Creek Tributary as shown below: We will create/digitize one feature for each reach approximately following the center of the river, and aligned in the direction of flow. Zoom-in to the most upstream part of the upper Baxter reach to see the main channel (black outline shown in the above figure). To create the river centerline (in River feature class), start editing. In the create features window, select River for features and Line for construction tools as shown in the figure below. (Note: While digitizing the centerline, make sure that you leave some space between the boundary of the dataset and the beginning/ending of your centerline.)
7 6 using the straight segment tool on the Editor, start digitizing the river centerline from the upstream end of the upper Baxter River reach towards the downstream until you reach the intersection with the Tule Creek tributary. When you reach the intersection, double click to complete the centerline for the upper reach. If you need to pan, click the pan tool, pan through the map and then continue by clicking the sketch tool (do not double-click until you reach the junction). After finishing digitizing the upper Baxter Reach, save the edits. Before you start digitizing the Tule Creek tributary, modify some editing options. Click on Editor Snapping Snapping Toolbar, and select the check the End Snapping option as shown below. (Note: Setting the snapping options is not needed in ArcGIS versions and higher because the editing digitizing tool will snap automatically to the end of an existing line) 7 We are selecting this snapping option because when we digitize the Tule tributary we want its downstream end coincide with the downstream end of the upper Baxter Reach.
8 Now start digitizing the Tule Tributary from its upstream end (leave some space from the edge!) towards the junction with the Baxter River. When you come close to the junction, zoom-in, and you will notice that the tool will automatically try to snap (or hug!) to the downstream end of the upper Baxter Reach. Double click at this point to finish digitizing the Tule Tributary. Save edits. Finally, digitize the lower Baxter reach from junction with the Tule Tributary to the most downstream end of the Baxter River (again leave some space from the edge!). Again make sure you snap the starting point with the common end points of Upper Baxter Reach and Tule Tributary. Save edits, and stop editing. Snapping of all the reaches at the junction is necessary for connectivity and creating a junction that HEC-RAS will use to define the intersection of these lines. After the reaches are digitized, the next task is to name them. Each river in HEC-RAS must have a unique river name, and each reach within a river must have a unique reach name.
9 We can treat the main stem of the Baxter River as one river and the Tributary as the second river. To assign names to reaches, click on Assign RiverCode/ReachCode button to activate it as shown below: With the button active, click on the upper Baxter River reach. You will see the reach will get selected, invoking the following window: Assign the River and Reach name as Baxter River and Upper Reach, respectively, and click OK. Click on the tributary reach, and use Tule Creek and Tributary for River and Reach name, respectively. For lower Baxter River, use Baxter River and Lower Reach for River and Reach name, respectively. 8 Now open the attribute table of the River feature class, and you will see that the information you just provided on river and reach names is entered as feature attributes as shown below. Also note that there are still some unpopulated attributes in the River feature class (FromNode, ToNode, etc.). Before we move forward let us make sure that the reaches we just created are connected, and populate the remaining attributes of the River feature class.
10 Click on RAS Geometry Stream Centerline Attributes All Confirm River for Stream Centerline and baxter_tin for Terrian TIN, River3D for Stream Profiles, and click OK. This function will populate the FromNode and ToNode attribute of the River feature class. This will populate all attributes in River, and will also create 3D version (new feature class) of River centerline called River3D. Now open the attribute table for River, and understand the meaning of each attribute. 9 HydroID is a unique number for a given feature in a geodatabase. The River and Reach attributes contain unique names for rivers and reaches, respectively. The FromNode and ToNode attributes define the connectivity between reaches. ArcLength is the actual length of the reach in map units, and is equal to Shape_Length. In HEC-RAS, distances are represented using station numbers measured from downstream to upstream. For example, each river has a station number of zero at the downstream end, and is equal to the length of the river at the upstream end.